Define and Edit Variants
In this article, you will learn how to define and edit a variant. This is the first step to start conditionalizing the content in your document, so you can deliver tailored content to different audiences.
We recommend defining your variants before you start versioning your document. If your document already includes versions other than the Working Version, you should make sure that your variant definition applies to all versions that require the variants.
Navigate to the Variants Manager
Navigate to the Document Library of the space where you have created your Scroll Documents.
Click on the document card to navigate to the Document Manager.
Click Manage.
Select Variants.
Define a New Variant
To start creating a new variant definition, click on New Variant in the top-right corner of the screen. In the New Variant dialog follow these steps:
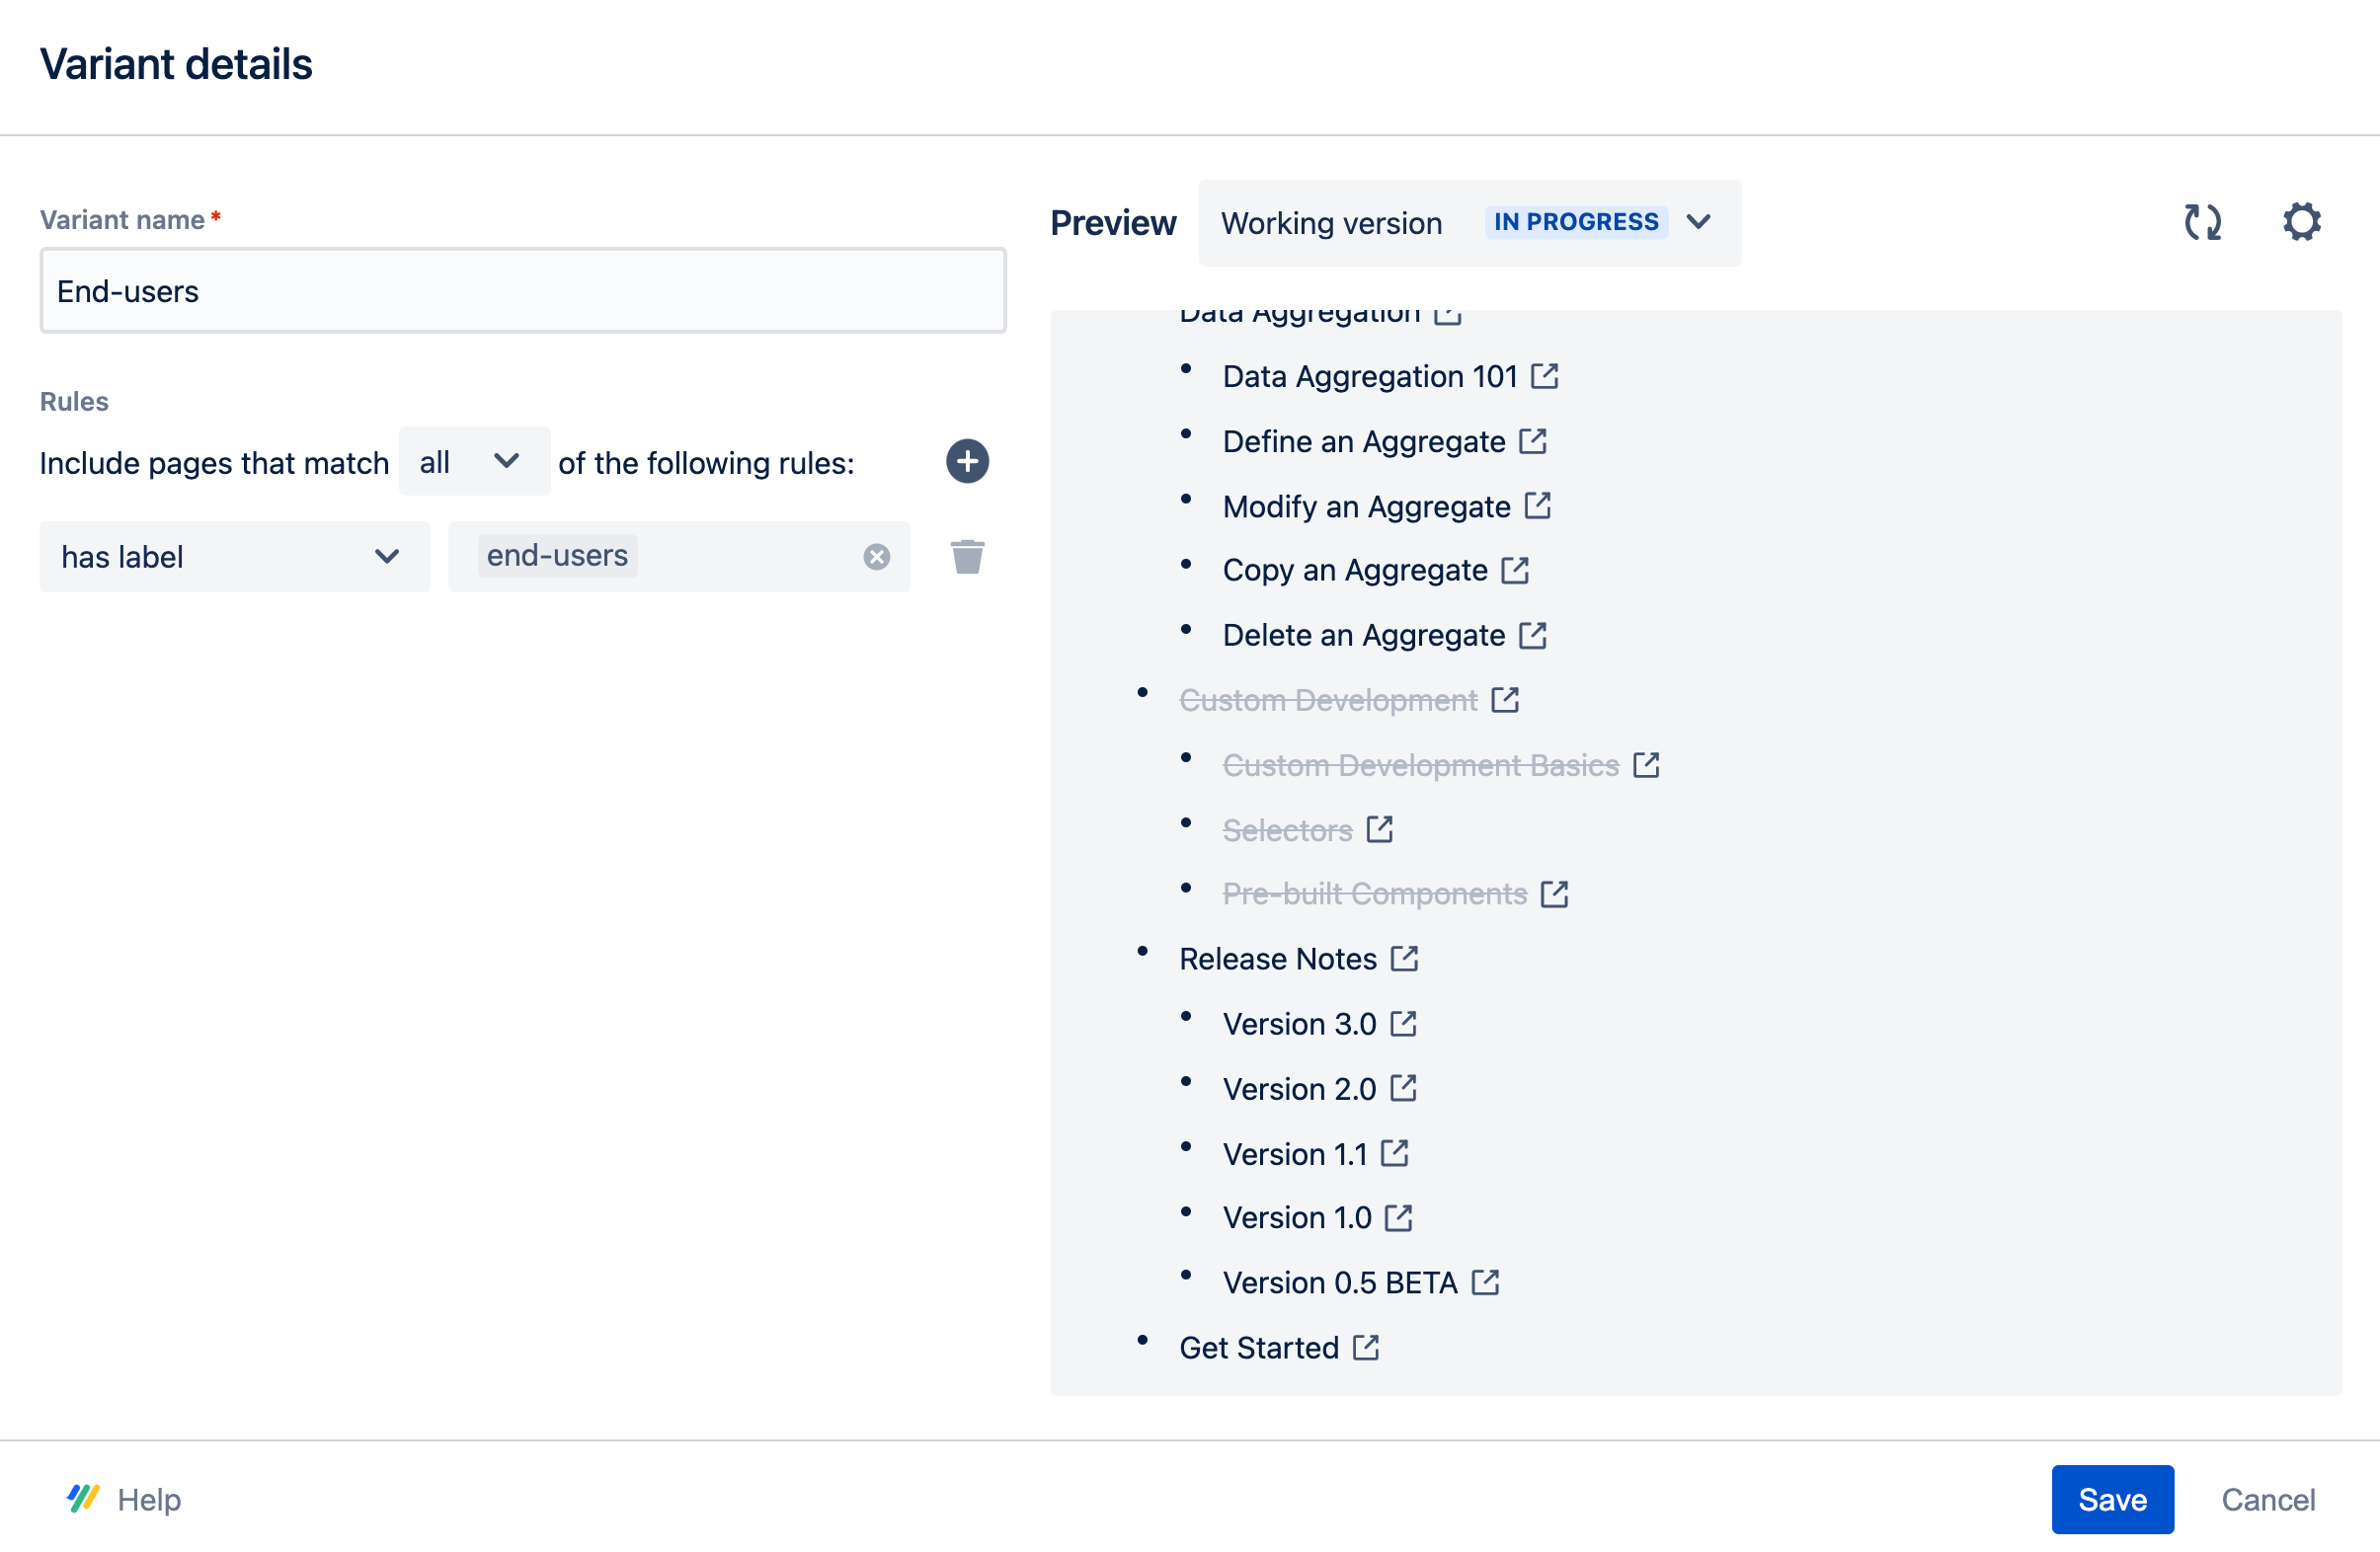
In the field “Variant name” enter a descriptive name for your variant.
Under “Rules”, add one or more rules to define which pages of your document get included and excluded from the variant.
Rules are based on whether a page has (has label) or doesn’t have (does not have label) a specific label.

When multiple rules are in place for a variant, use the dropdown to select if the variant should include only pages matching all of the rules (similar to the AND operator in Boolean search) or if it should include pages matching any of the rules (similar to the OR operator).
(Optional) Add rules under a rule. Hold the Alt/Option key while clicking on the
 (Add rule) button.
 Please note: Nested rules are only available if you have extended Scroll Documents with Variants for Scroll Documents.
For each level of nested rules, there is also a dropdown menu to select whether any or all of the rules must be true.
In general, it’s best to keep variant rules as simple as possible to achieve your desired results, however sometimesTo learn more about using nested rules, see our tutorial: Tutorial: Define and Edit Multiple Variant Rules

Use the dynamic page tree preview on the right of the dialog to check which pages in your document will be part of the variant based on the rules that you define. Pages whose titles appear greyed with a strike-through are not included in the variant.
Use the version switcher above the preview field to view the page trees of all your versions.
4. Click Create.
Your variant is now defined. From here on, any content added to your document that matches the rules of the variant will automatically be considered part of the variant.
Learn how to create content that matches your variant rules in Define Conditional Content.
Edit and Delete a Variant
The Manage Variants action in the Document manager always indicates the number of variants you have currently set up for your document.
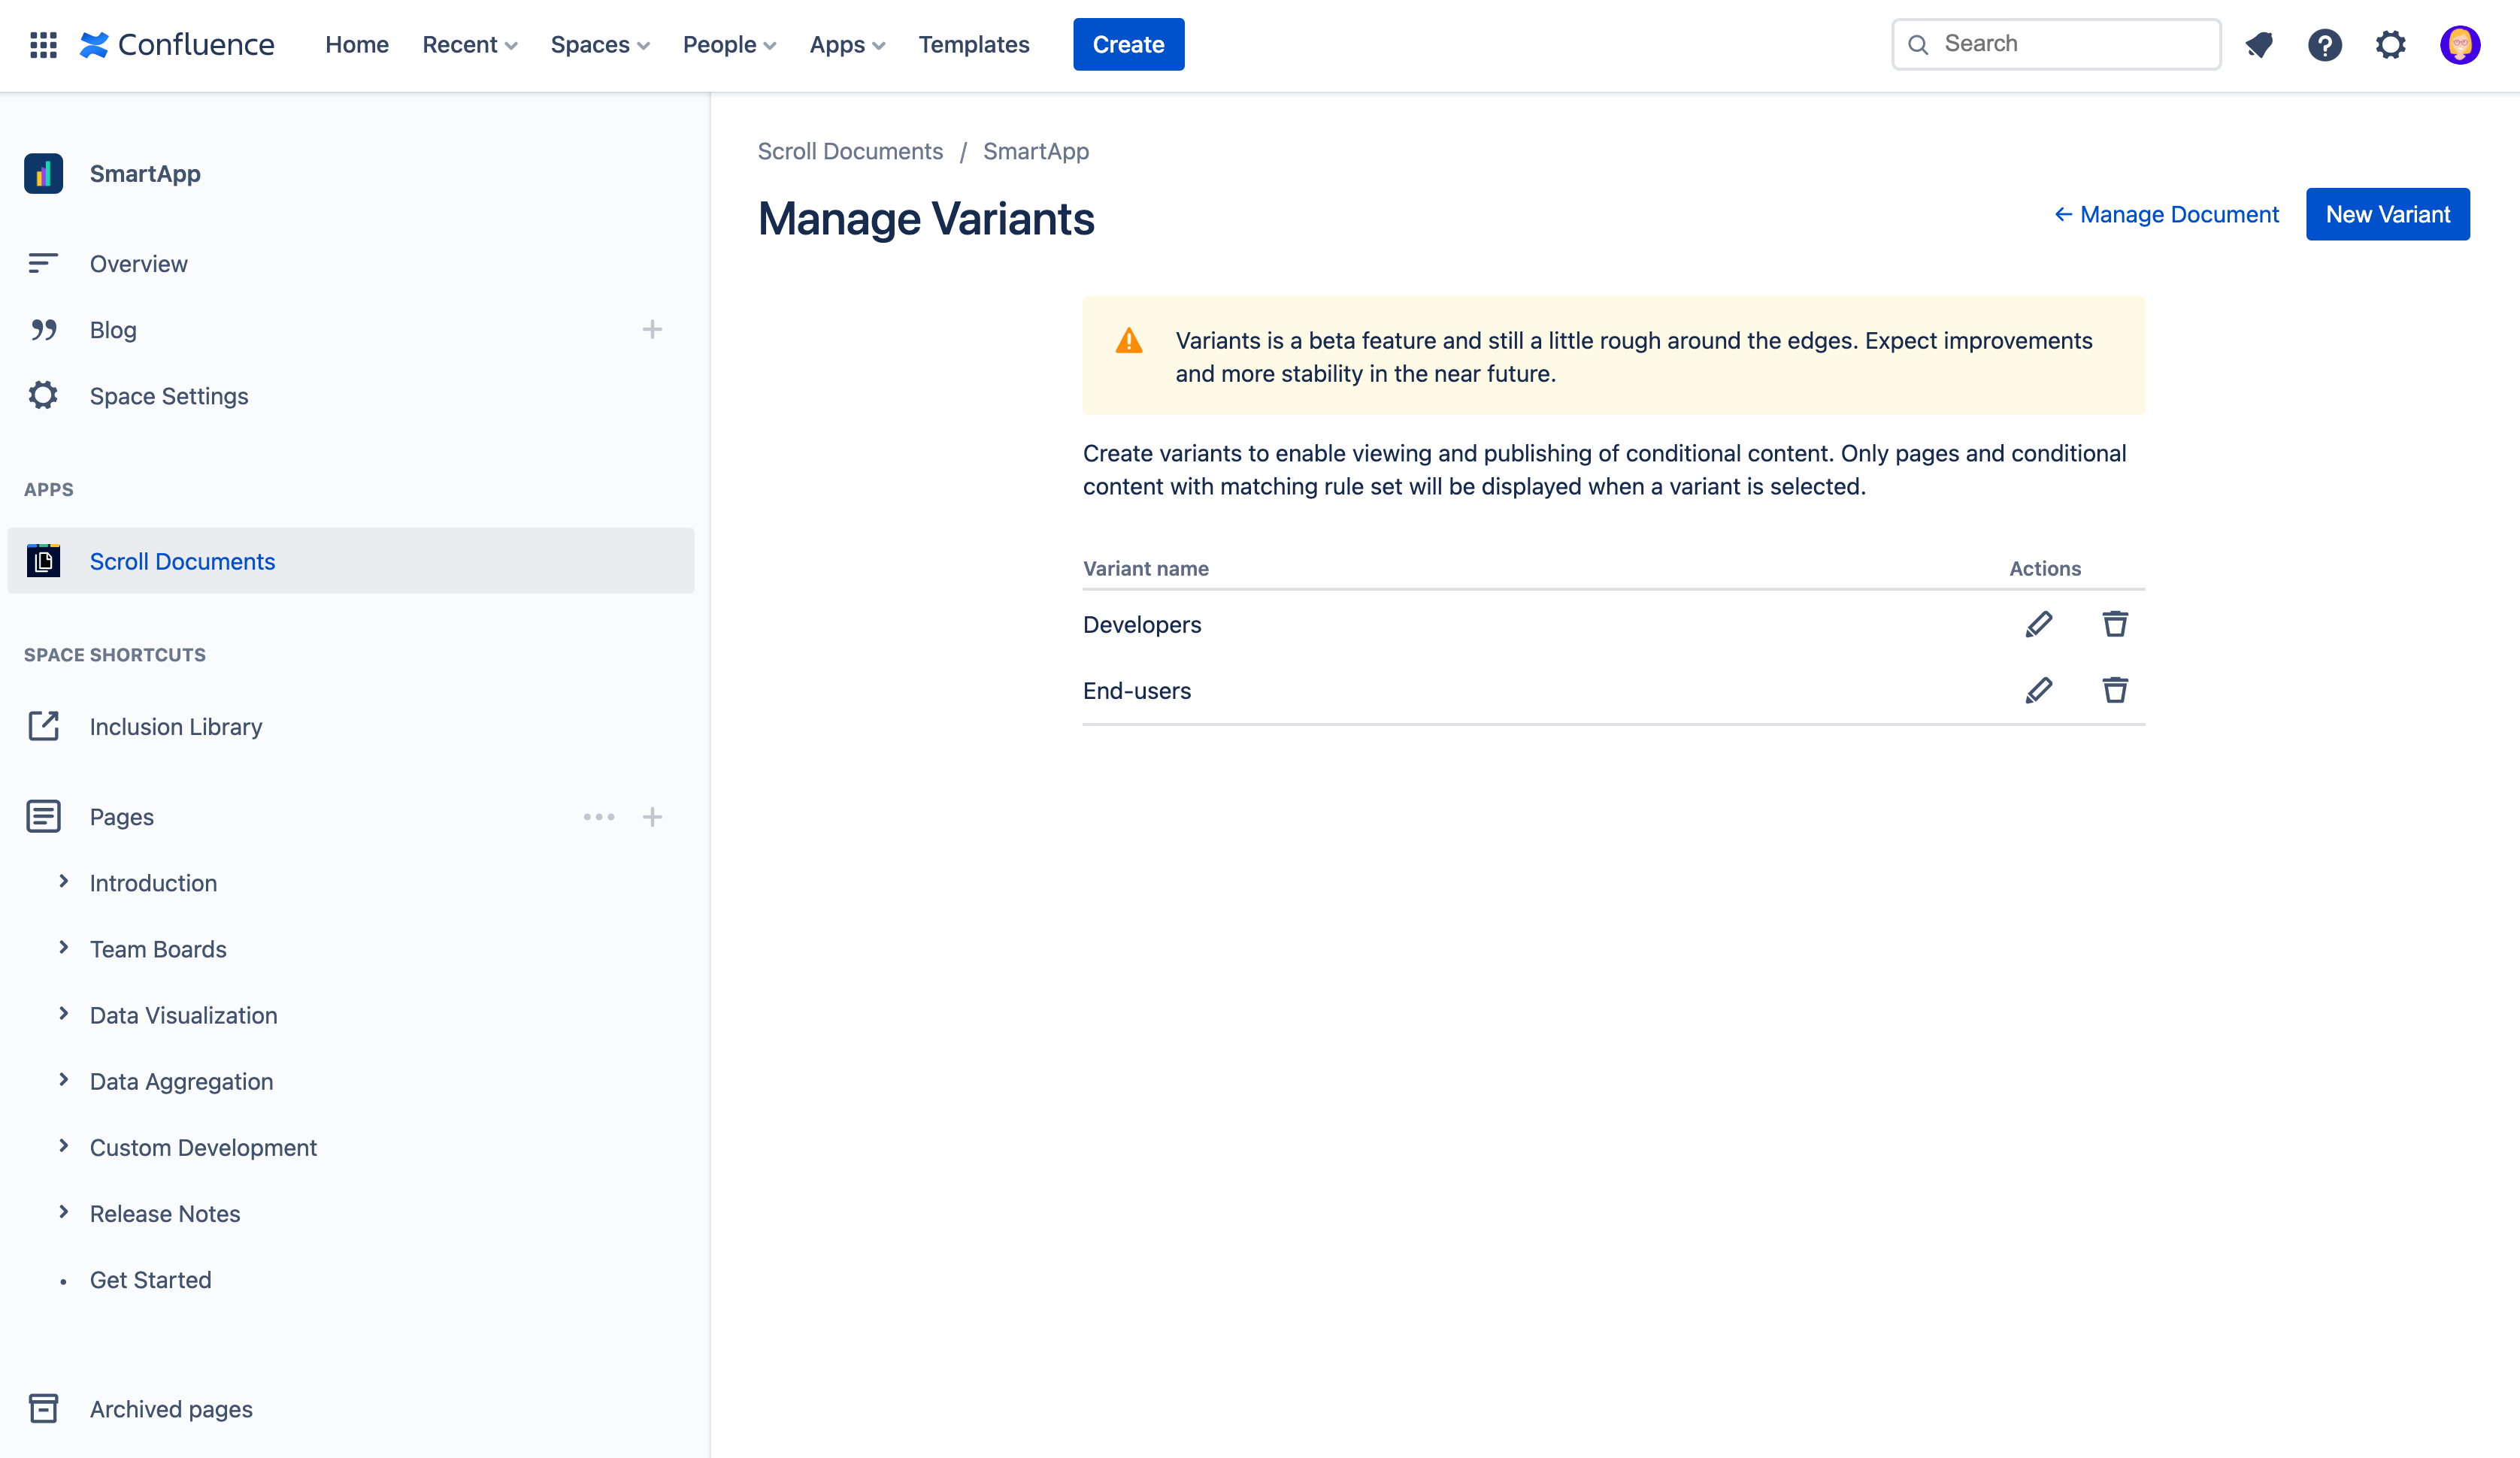
After creating a variant, you can always go back to the Variants Manager for an overview of all created variants.

From the variants list you can:
Click the pen icon to edit the name and/or rules of a variant
Click the trash icon to delete a variant
