Synchronizations overview
The main entry point of the Backbone UI is the synchronization overview which shows you a list of all existing synchronizations. You can find it either on a project level or a global level. Both screens offer the same set of actions you can do with your synchronizations.
Project synchronizations overview
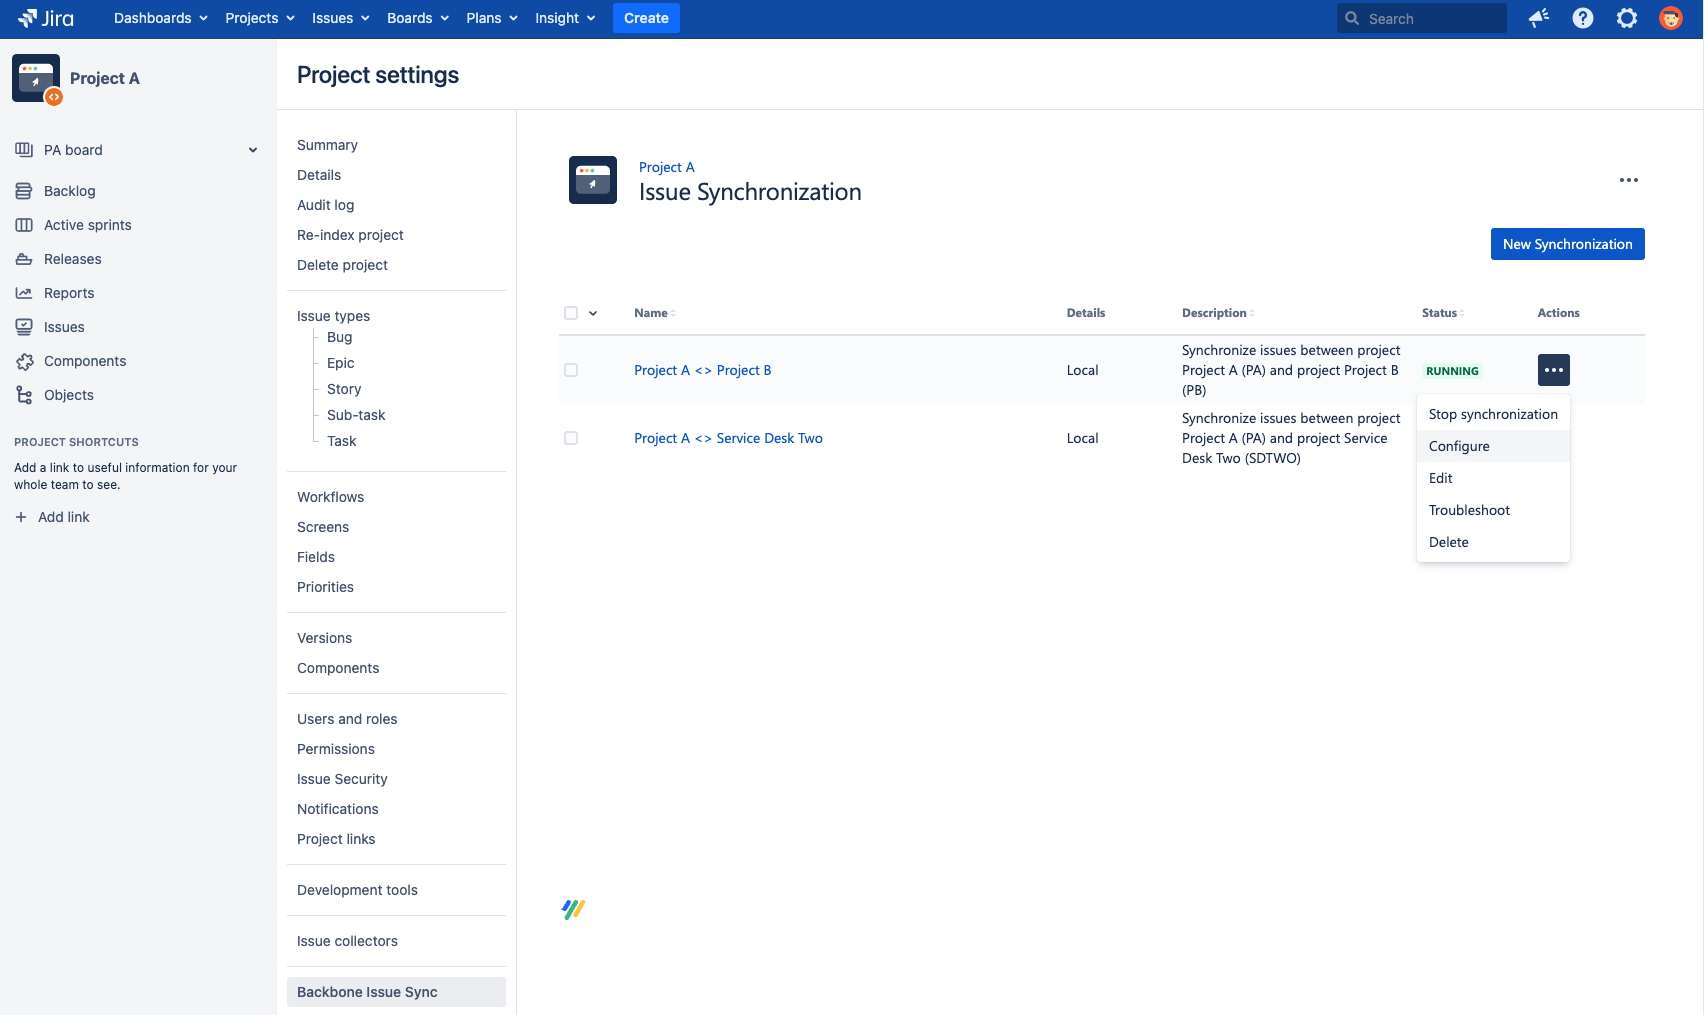
Select Project settings > Issue Synchronization > ••• to manage your synchronizations for a single project:

Jira instance synchronizations overview
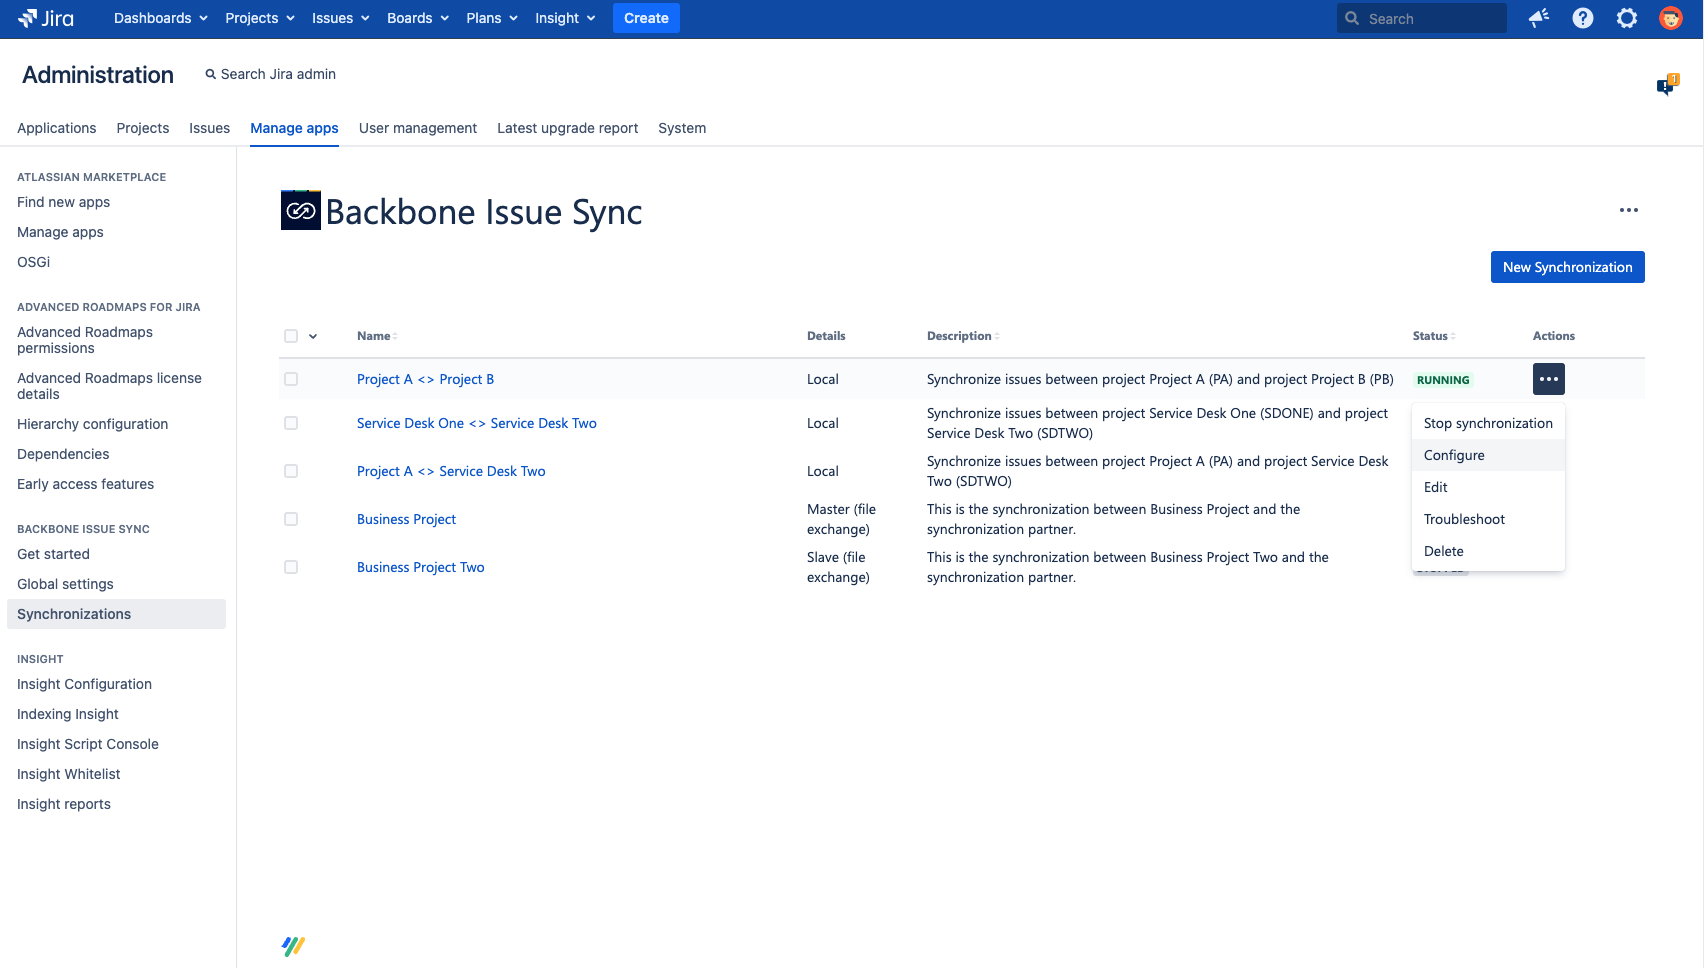
If you have Jira admin permissions, select Jira administration > Add-ons > Backbone Issue Sync > Synchronizations > ••• to manage all your synchronizations for the whole Jira instance:

Status
Synchronizations in Backbone can have the following status:
RUNNING | The synchronization is up and running. Issue updates are synchronized according to the configuration. |
|---|---|
STOPPED | The synchronization is stopped. No issue updates are synchronized. |
REQUEST SENT | The synchronization request has been sent to the synchronization partner and is waiting for their approval. |
INCOMING REQUEST | This synchronization has been requested by your partner and is waiting for your approval. |
DECLINED | This synchronization request has been declined. Please delete it. |
Actions
Backbone has a range of functionality for managing synchronizations:
Start/stop: enable or disable Backbone from syncing issues and issue data
Edit: allows you to edit the name and description of a synchronization
Configure: allows you to define what issue data gets synchronized between instances
Troubleshoot: allows you to Analyze & Fix Errors
Delete: allows you to permanently delete your synchronization. If the synchronization is not stopped, it will automatically be stopped.
If you're here for the first time, you should start with creating a new synchronization.
Bulk start/stop synchronizations
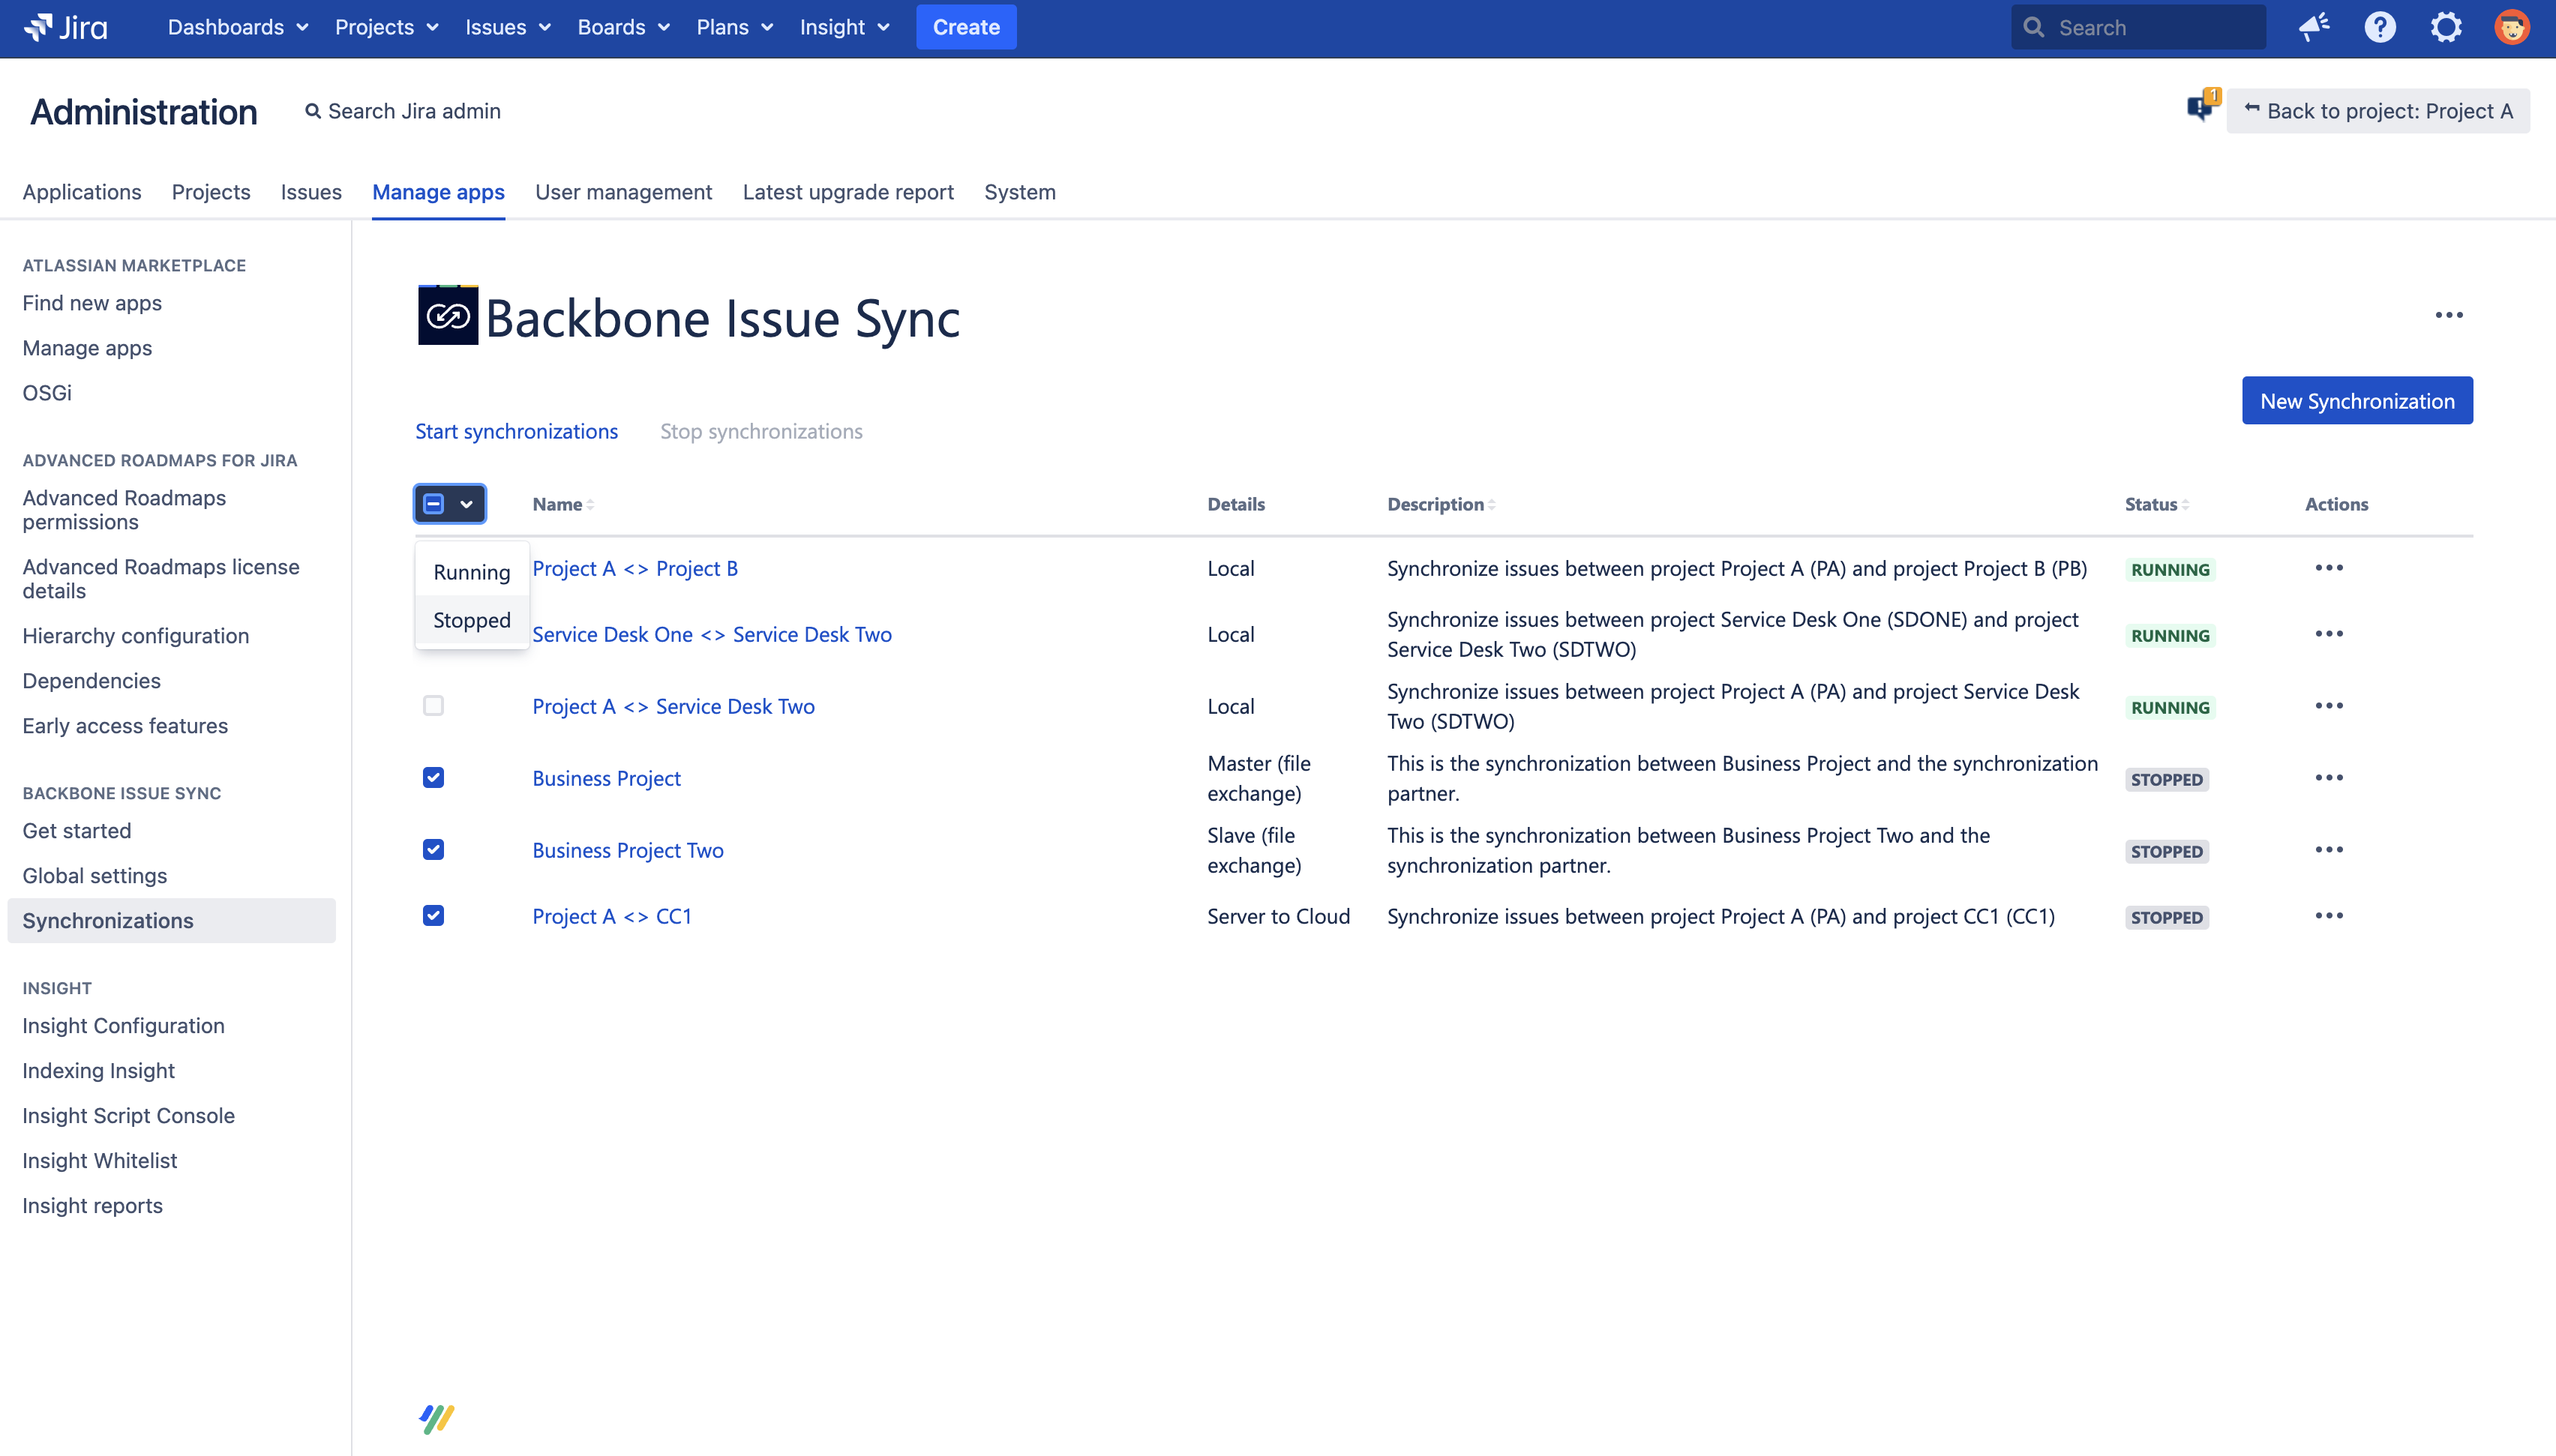
You can start or stop multiple synchronizations at once. You can select which synchronizations to start/stop in two ways:
Select specific synchronization you want to start/stop by clicking the checkbox in front of the synchronization name.
Select all synchronizations in a certain state by choosing a status from the dropdown next to the checkbox.
Once you’ve selected synchronizations that are in the same state, the start or stop action will be visible above the table. By clicking on the action, the synchronizations will be started/stopped.
If you select synchronizations in different statuses (e.g., one started and one stopped synchronization), there is no common action. Therefore the actions will be greyed out and you are not able to bulk start/stop synchronizations.

