Define and Delete Languages
In this article, you will learn how to define languages, this is the first step to start translating the content in your document. You'll also learn how to delete the languages you just added.
Prerequisites
Before you can activate, define, or delete languages you need to fulfill the following prerequisites:
There should exist at least one existing document in the space.
You should have Edit Version Details permissions in the space.
How to Define Languages
Step 1: Navigate to the Language Manager
To find the Language Manager follow these steps:
Click on the document card in the Document Library of the space where you have created your Scroll Document. Alternatively, click the cog icon in the Document toolbox which you can find on your Confluence pages.
Click Manage menu in the top-right corner of the Document Manager
Select Translations. You are now in the Manage Languages section of your document.
Step 2: Activate and add languages
Before you can start creating translations of your content, the authoring language needs to be defined. If your document already has existing content in any of its versions, this content will be considered to be in the authoring language. So, if your content so far was authored in English, select English as your authoring language.
If you have not yet added an authoring language, let's continue from where we left in the Manage Languages section:
Click Activate to open the Activate Languages dialog:
In the dialog select which language that you want to use as the authoring language, let's say we chose English in this example.
Click Activate, this will add English as the authoring base language of your document which your translations will be based on.
Once the authoring language is defined, additional languages can be added to the document.
The document can only be translated into languages that were previously added in the Language Manager.
To add more languages follow the steps below:
Click New language to open the Add Language dialog.
Select a language you want to translate your content into, like German for example.
Click Add, German will now be added as a language to your document enabling you to translate content into German.
Choosing the Authoring Language
The authoring language is defined first in a translated Scroll Document and is treated differently than other languages, mainly due to its content always being considered up-to-date.
Some points to keep in mind:
The status label TRANSLATED indicates that a translated page reflects the corresponding authoring language page accurately. If the original page gets edited, its translation is going to be considered outdated.
When synchronizing pages of a translation, the translation page tree is aligned with the authoring language page tree.
An instance of the authoring language must be present in every version of the Scroll Document.
It is recommended to keep the Working version in the authoring language only and only create translations of saved versions.
How to Add Custom Languages for Localization
Need to localize your translations with custom language keys? Scroll Documents allows for this within its advanced language options, but proceed with caution!
Modifying existing language keys can cause unexpected issues. It's best to use this feature only for adding new, custom languages.
Here's how to add a localized language:
Start with creating a XML backup of the space in case something would go wrong in this process.
Click the document card in the Document Library, or click the cog icon in the Document toolbox on a Confluence page to access the Document Manager of your Scroll Document.
Click Manage > select Translations.
Click New Language.
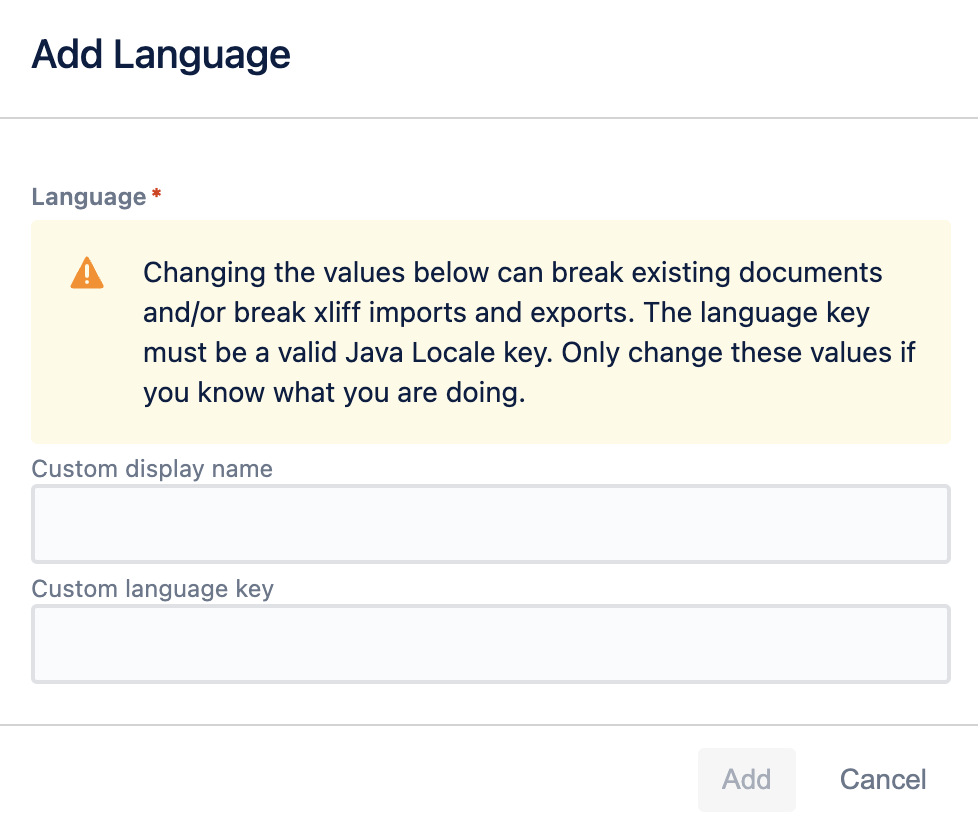
To access the advanced language options, place your mouse cursor anywhere in the Add language dialog. Then, press and hold Alt/Option while left-clicking for at least 5 second This will expand the dialog with two more options: Custom display name and Custom language key.
ℹ️ Info: Use the Alt key for Windows/Linux, and the Option key for Mac.

Enter the Custom display name that will appear in Scroll Viewport language picker.
Add a Custom language key.
⚠️ Important: Enter a valid Java Locale key (e.g., "en-US" for US English).Click Add to add the custom language.
Now you can translate your content into this custom localized language within your Scroll Document.
How to Delete Languages
The manage Languages action in the Document manager always indicates the number of languages you have currently set up for your document.
After defining languages, you can always go back to the Language Manager to overview all created languages in a list. For example, if you followed the steps provided above you should now have a language list with English as the authoring, and German as an additional language.
If you want to delete a language, follow the steps below:
Click Scroll Documents in your left space sidebar to get back to the Document Library.
Click on the document card belonging to your document.
Now, click Manage > select Languages.
In the Manage Languages section click More actions (•••) for a language.
Select Delete to delete the language.
A language with existing translations cannot be deleted. Please first delete all translations for that language.
