Define Conditional Content
Define content that only appears under certain conditions when publishing with Scroll apps.
Applying Confluence page labels and the Scroll Conditional Content macro lets you define which which pages or sections of pages in your document will be included in which variant.
To be able to define conditional content with Confluence page labels and the Scroll Conditional Content macro, you need to first create one or more variants of your document.
Define Conditional Content at a Page Level
Using Confluence page labels, you can define which pages of your document are available in one or more variants.
When you’re viewing a page in Confluence, you can add a page label by clicking the label icon at the bottom right corner of the page.
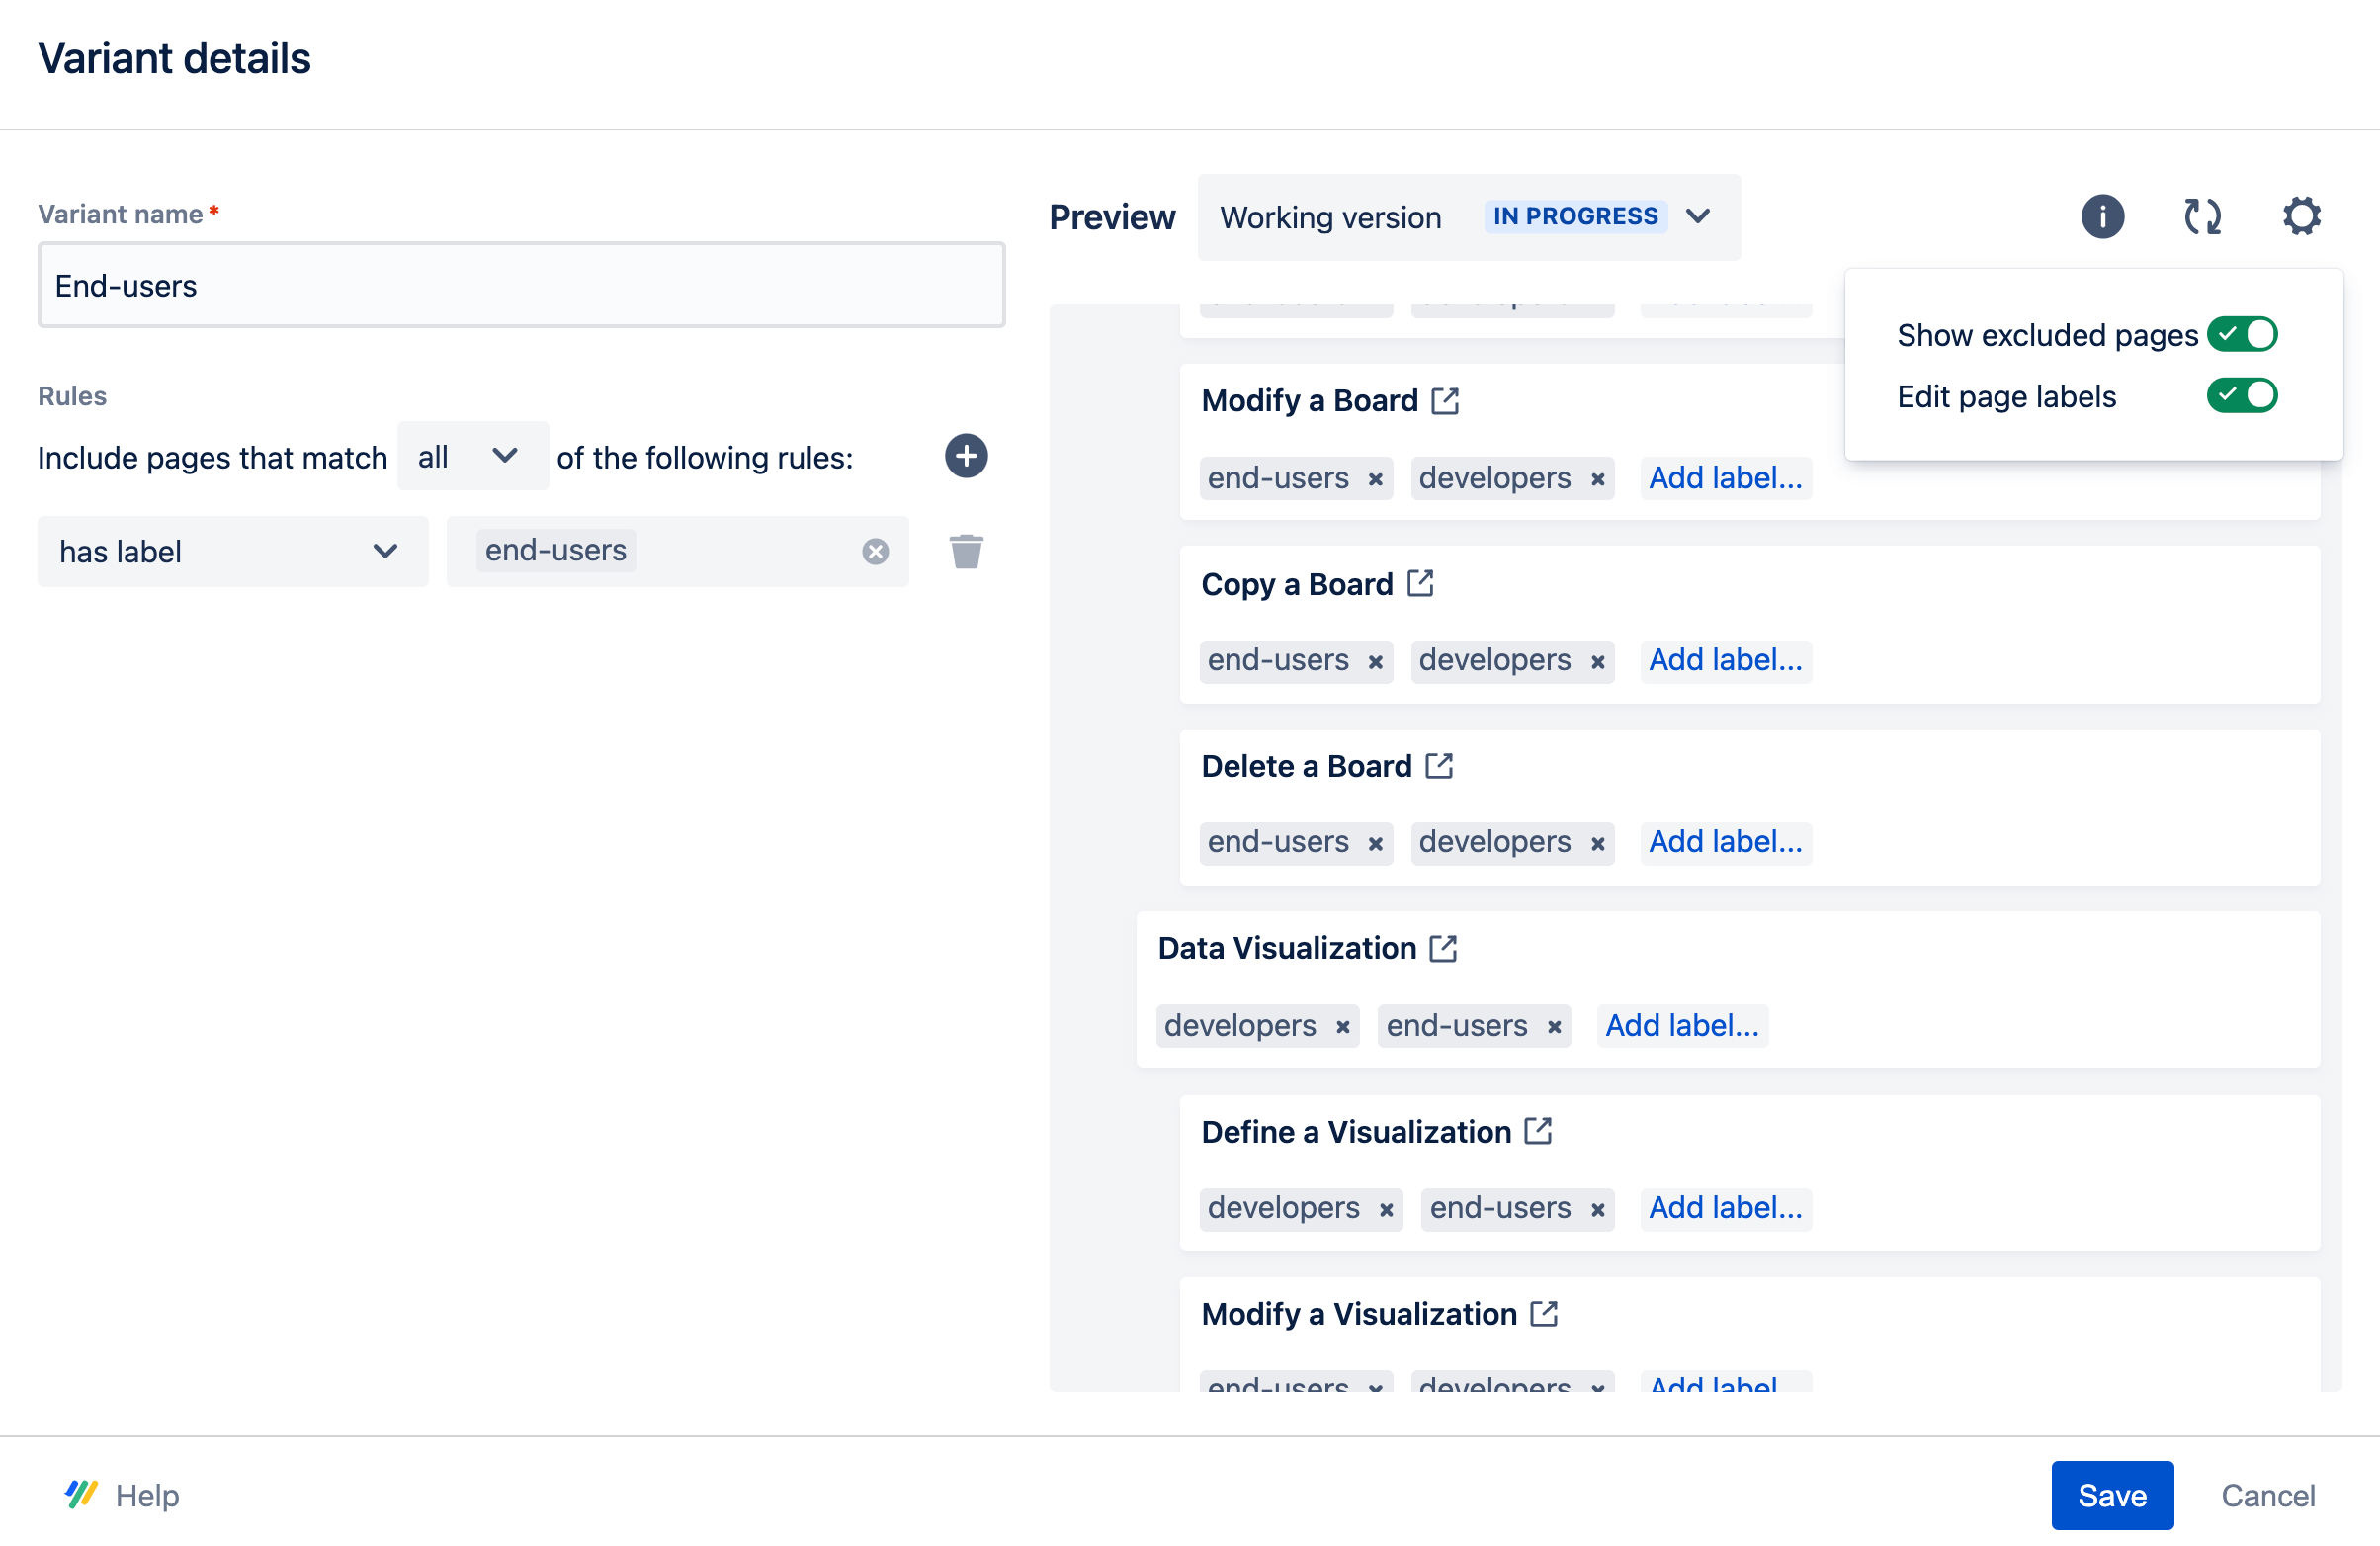
If you need to add labels to multiple pages, we recommend you use the label edit option in the Variants Manager. When you click New variant or Edit on an existing variant, you can switch from a dynamic page tree preview to a label edit mode. This mode allows you to add multiple labels at once without having to switch views.
Please note: Managing labels from the Variants dialog is only available if you have extended Scroll Documents with Variants for Scroll Document.
Step 1: Navigate to the Variants manager
Navigate to the Document Library of the space where you have created your Scroll Documents.
Click on the document card to navigate to the Document Manager.
Click Manage.
Select Variants.
Step 2: Add Confluence page labels from the Variants dialog
Click New variant or the pen icon in the variants list to edit an existing variant
In the Variant details dialog, click the cog icon in the top right
Click the Edit page labels toggle to switch to the label edit mode:

For each page you want to add a label to, click Add label under the page title
Type your label and hit enter or click

Scroll down the page tree to continue adding labels to the pages in your document. Use the version picker at the top to switch to the page tree of a different version.
To add or remove labels in bulk for all child pages, from the label field of a parent page hold down the Alt/Option key and click ![]() or
or ![]()
Labels are applied to the pages right away and are visible in the page view mode just like any other Confluence page label. Page labels are inherited when you save a version.
To edit page labels, you can alternate between the Confluence page view and the Variants details dialog and use both options interchangeably.
Define Conditional Content at a Paragraph Level
Using the Scroll Conditional Content macro, you can define sections of content within a page to be available in specific variants.
This is useful when you have content on a page that is applicable to only a particular variant. For example, an additional tip or instruction targeted to admins only.
To define conditional content at a paragraph level:
Navigate to a page in your document page tree.
Click Edit (pencil icon) on the top right of the page. The Confluence editor will open.
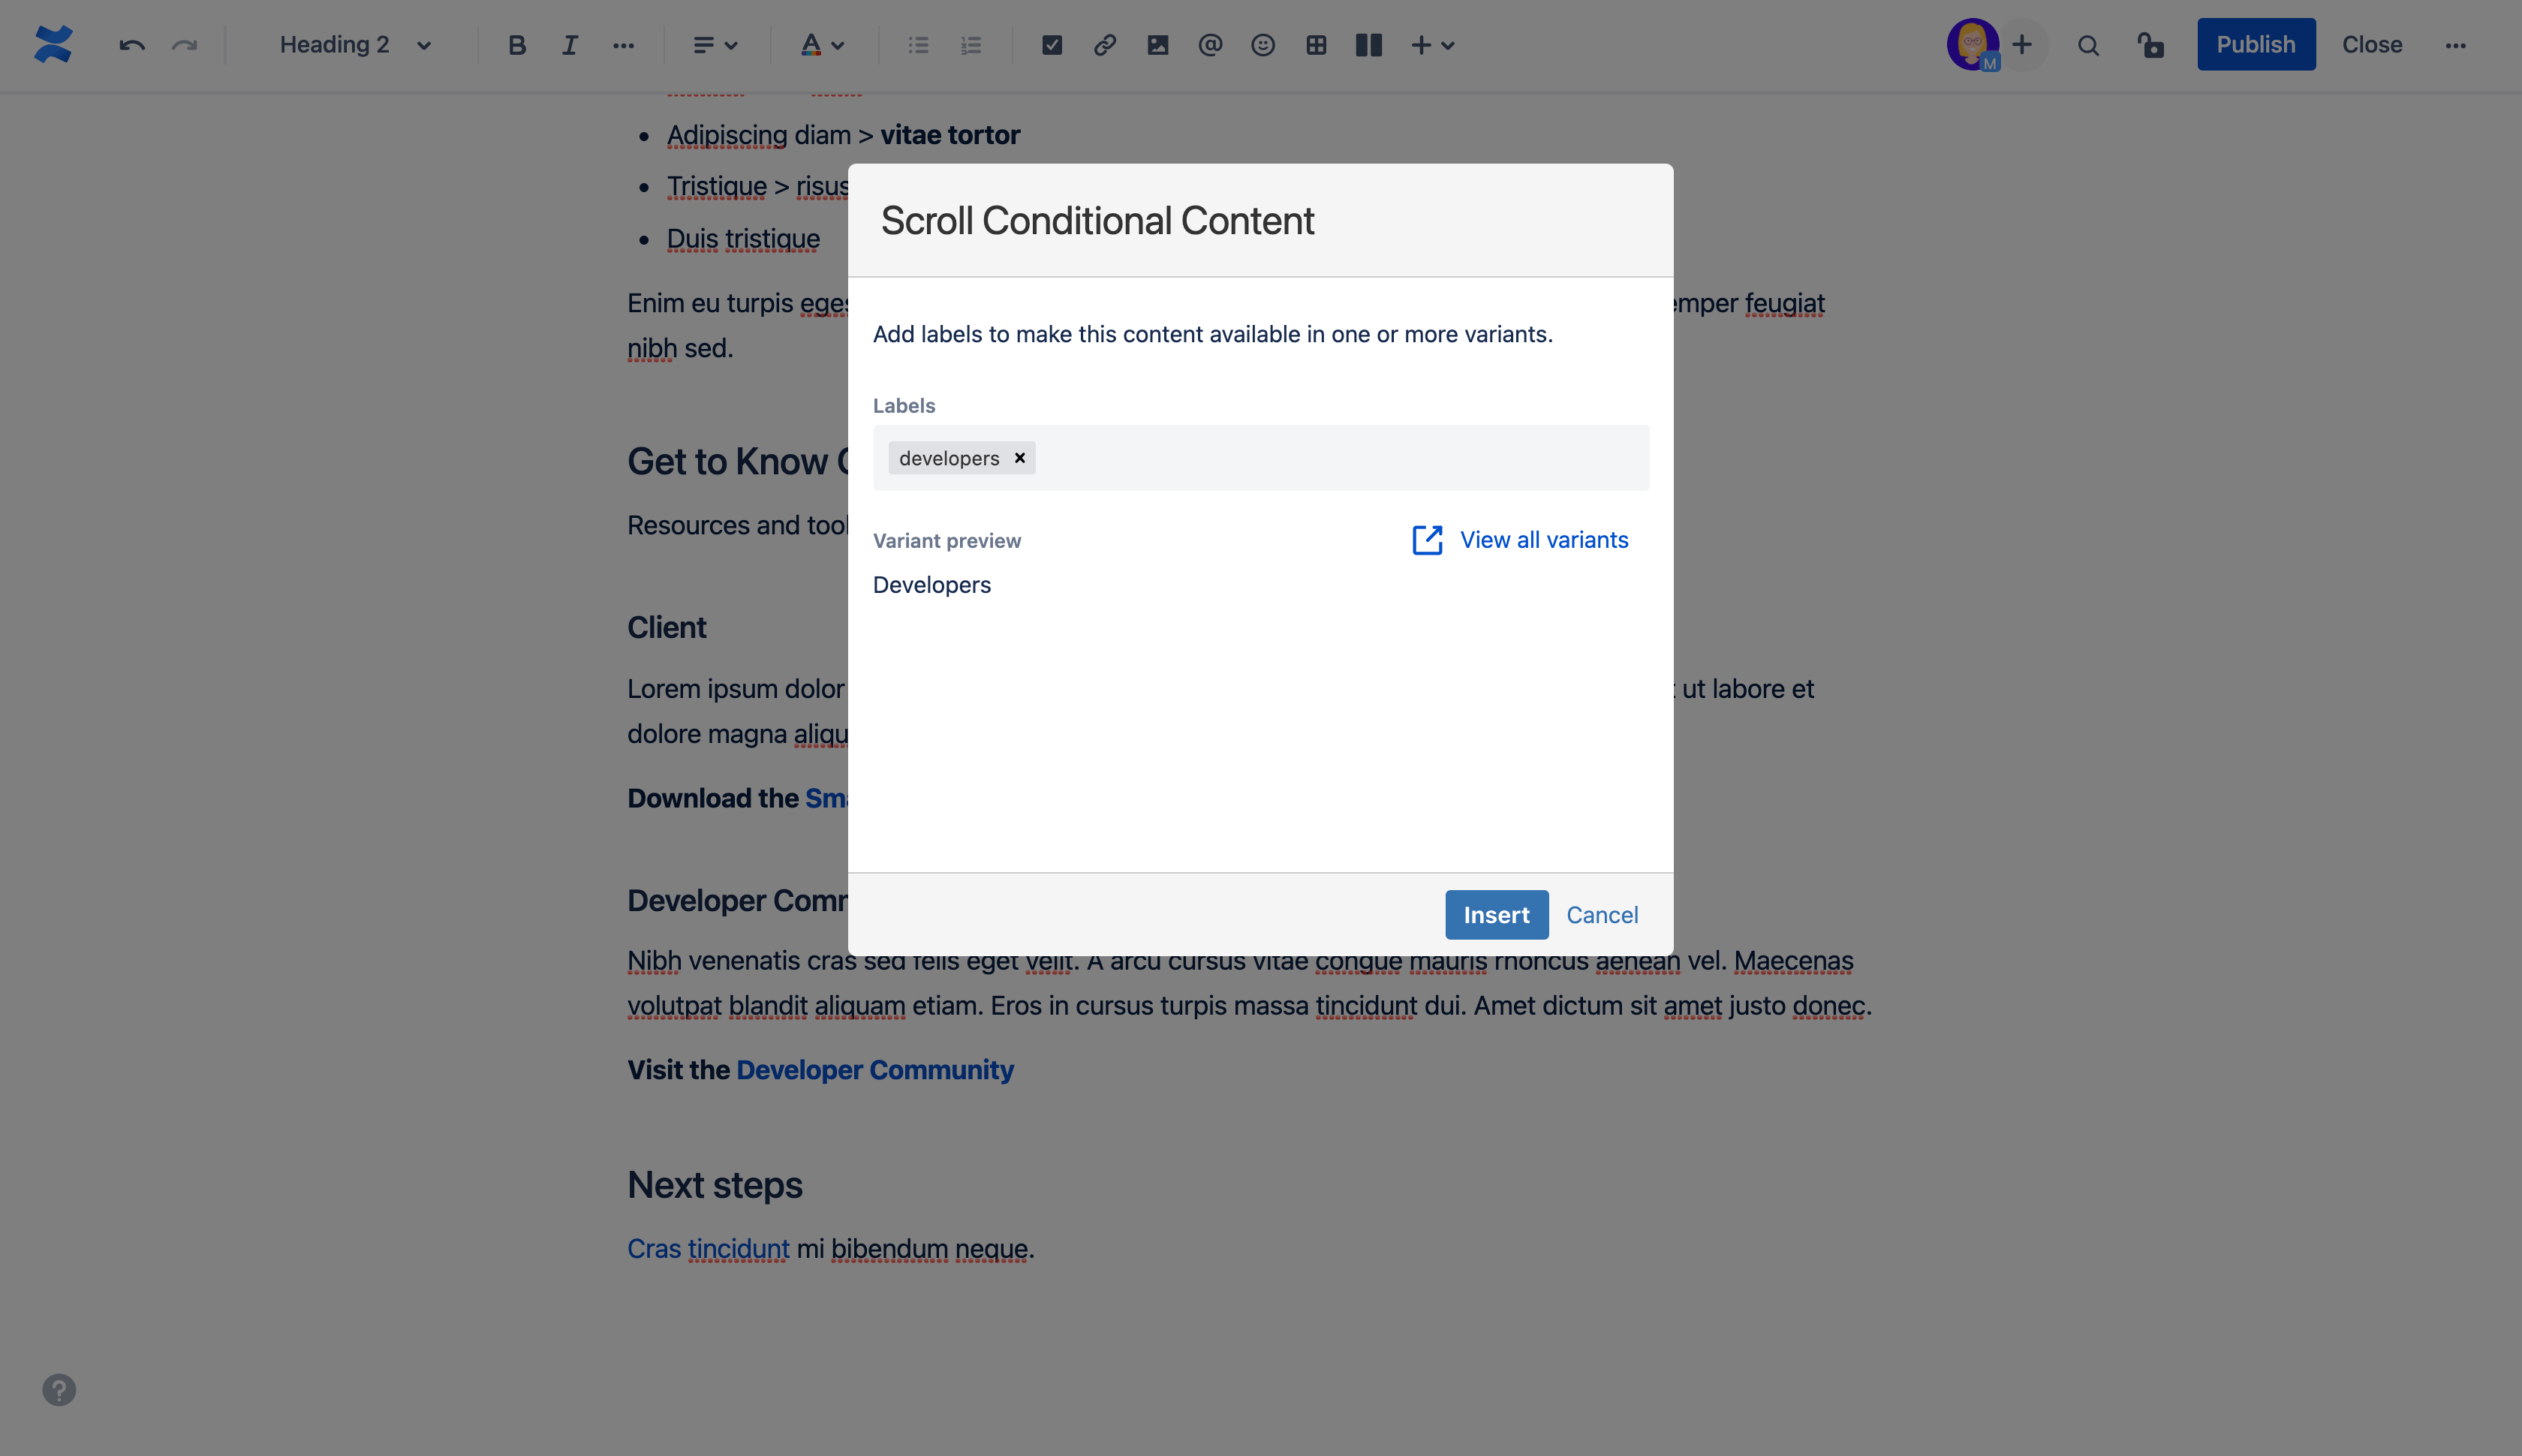
Place your cursor at the position where you would like to add the conditional content. Type '/' (slash command) and search for Scroll Conditional Content macro. Press enter.
In the macro editor, add one or more labels that you have defined in the variant rule, e.g. developers.

The Variant preview below the label field will confirm which variants the content of the macro will be valid for.When ready, click Insert.
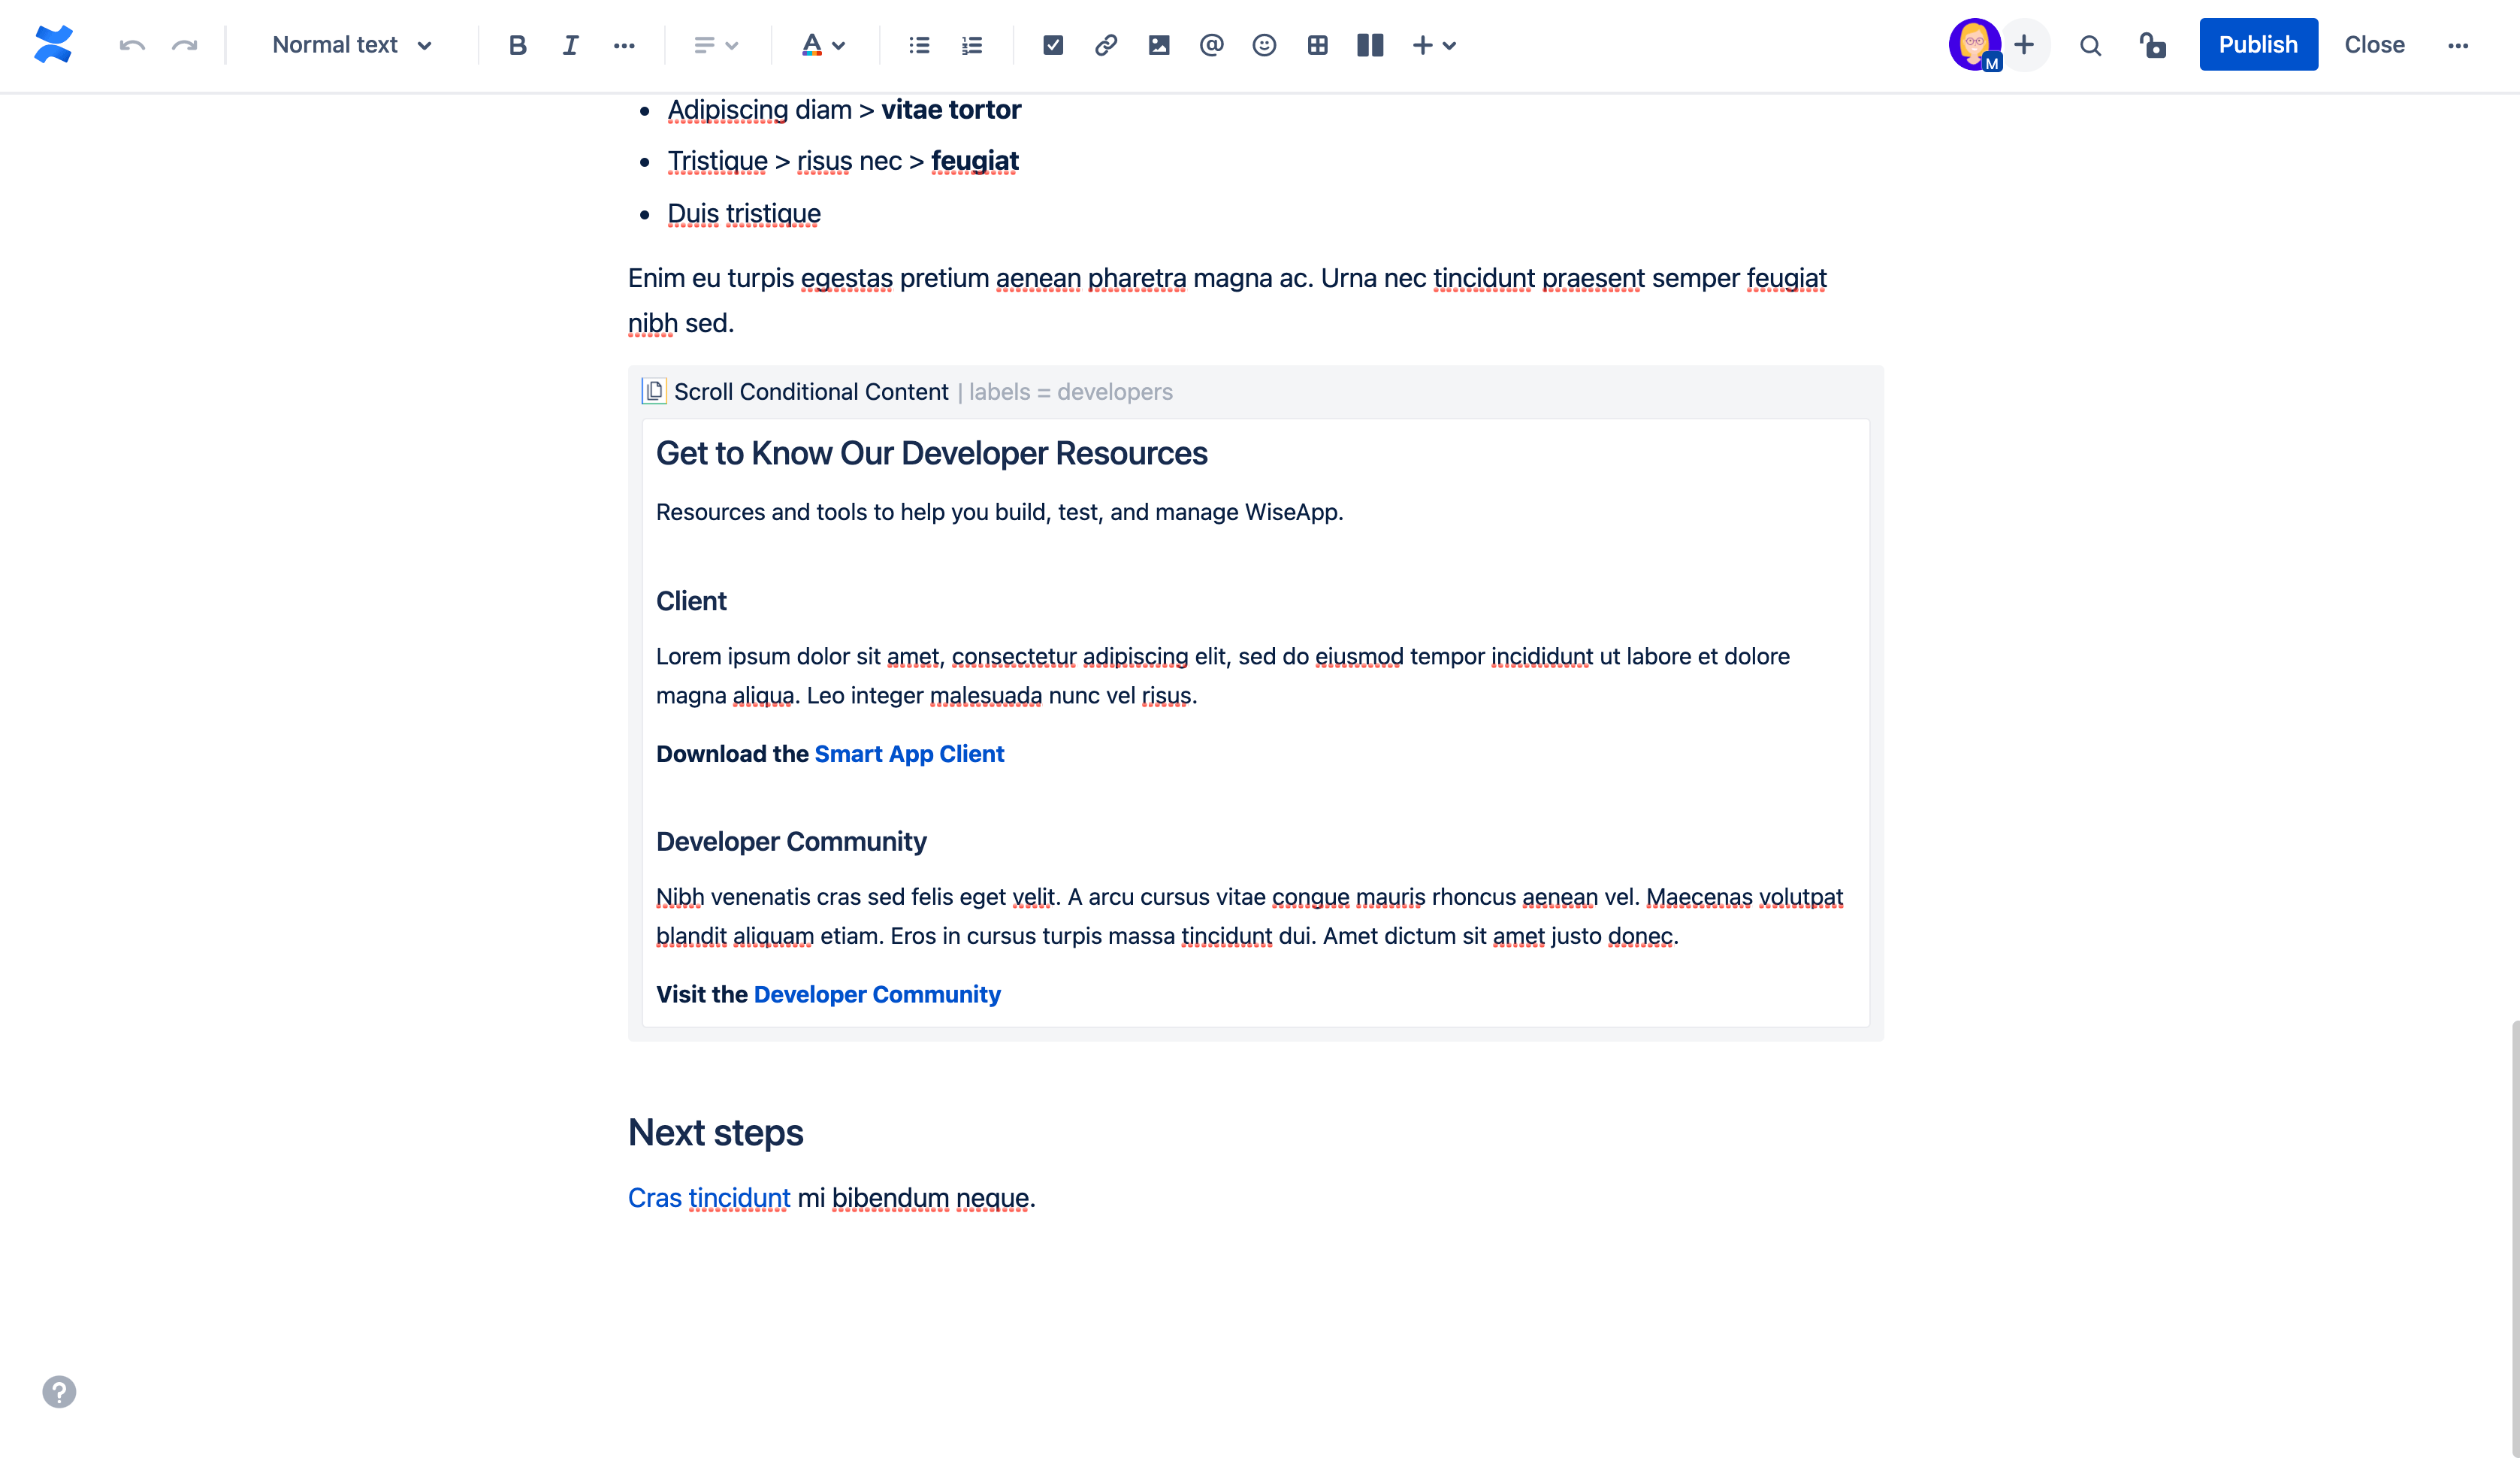
Add your content to the body of the macro.

Click Publish.
The content in the macro will now only be included when you select the relevant variant for publishing.
You can add multiple conditional content macros to a single page that display content for different variants.
Define Conditional Content at a Sentence Level
You can use the Scroll Conditional Content Inline macro to adjust content within a sentence, like changing a word or phrase, which is handy for things like updating product names or client details.
Here's how to do it:
Go to the page where you want to make the change.
Click Edit (the pencil icon) to open the editor.
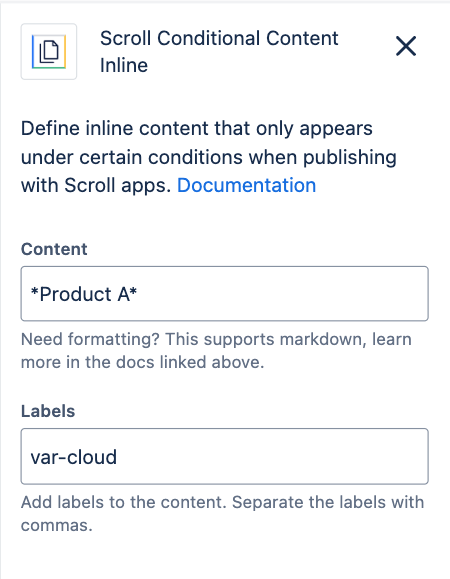
Type '/ ' to start the command and search for "Scroll Conditional Content Inline” macro.
Enter the conditional text in the "Content" box.
Optionally, format the text using markdown.
You'll find a table containing the supported markdown syntax in the section below.
Add a label to specify which variant the content belongs to.
Click Insert when you are done.
Format inline content with markdown
You can highlight your conditional inline content using markdown. For example, by typing **product A** you can make the text content bold. In the macro preview, you can view the outcome of your markdown.

In the table below, you'll find markdown syntax supported in the macro:
Style | Supported markdown |
|---|---|
Bold |
|
Italics |
|
Underline |
|
|
|
|
|
Please note that this markdown syntax is only supported in the Scroll Conditional Content Inline macro. It's important to be aware that it will not function in the Scroll Conditional Content macro.
