Assemble Several Spaces into One Document
Do you have existing content of documentation saved in different spaces?
It is not unusual that teams – before managing their documentation with Scroll Document – used to save each version of their documentation as an individual space.
In this article you’ll learn how to import older pages of your documentation into a new Scroll Document as separate versions.
How to Define Existing Content as Proper Versions of a Scroll Document.
This how-to consists of a process of steps which have been divided into three parts:
Define your most up to date content as a Scroll Document (working version)
Prepare a location to store previous and upcoming versions (in that same space)
Move older content as proper versions to the new Scroll Document
To avoid unwanted content loss
Before starting, we recommend:
Doing a space backup of each space, in case something unexpected would occur during this process
Try this out with some test spaces first
1. Define your most up to date content as a Scroll Document (working version)
First you need to find the most up to date content of your documentation in Confluence. In the following steps we will define this content as the working version of a new Scroll Document:
Navigate to space where the most up to date content lives.
Navigate to the root page of your documentation.
 Info: Please note, if the whole space is the most up to date content, you’ll need to go to the Space Overview page. That would be your root page.
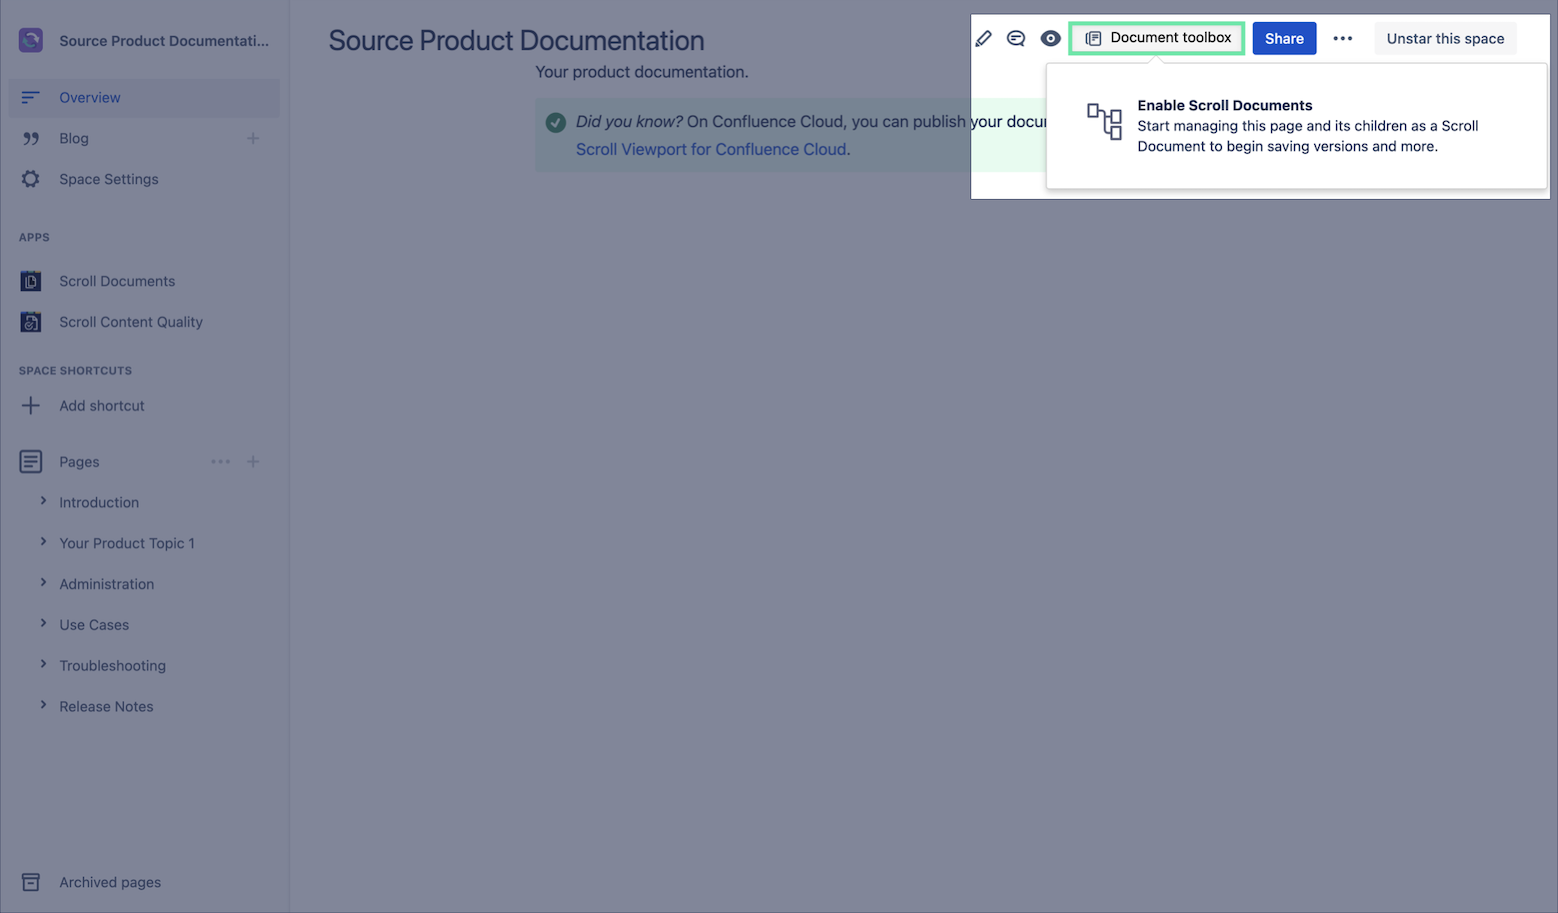
 On the root page click on the Document toolbox > click Enable Scroll Documents, you should now be redirected to the Document Manager.
2. Prepare a location to store previous and upcoming versions (in that same space)
You will now see that your most up to date content has been defined as the working version of your new Scroll Document. In that same space, we will now prepare a “home” to store all older versions. This will also be the location for all future versions. Now, continue with the steps below:
In the Document Manager, click Save a version > in the version dialog that will appear click Save.
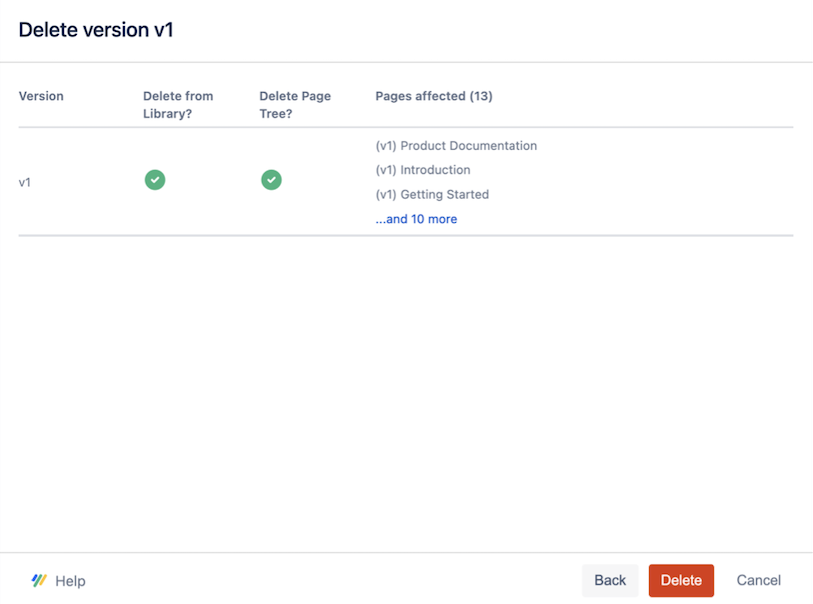
Click More page tree actions (•••) for the newly saved version > click Delete .
Make sure the boxes “Delete from Library?” and “Delete from Page Tree?” are checked > Next > click Delete.
Go to Space tools > click Reorder pages.
In the reorder page tree, make sure that you can see a page with the name “Versions of….”. This is a special page that we need to store existing and new versions of your documentation.
Now that we have created our Scroll Document and located the “Versions of..” parent page, we are ready to move to the next part.
3. Move older content as proper versions to the new Scroll Document
We can now start moving any existing content (content that constitutes older versions) to this new Scroll Document and start defining these as proper versions of the document. To do this proceed with the following steps:
Navigate to one of the spaces where you have content of an older version.
Navigate to the root page of that content.
 Info: Again, if the whole space is the content of an older version, you’ll need to go to the Space Overview page.
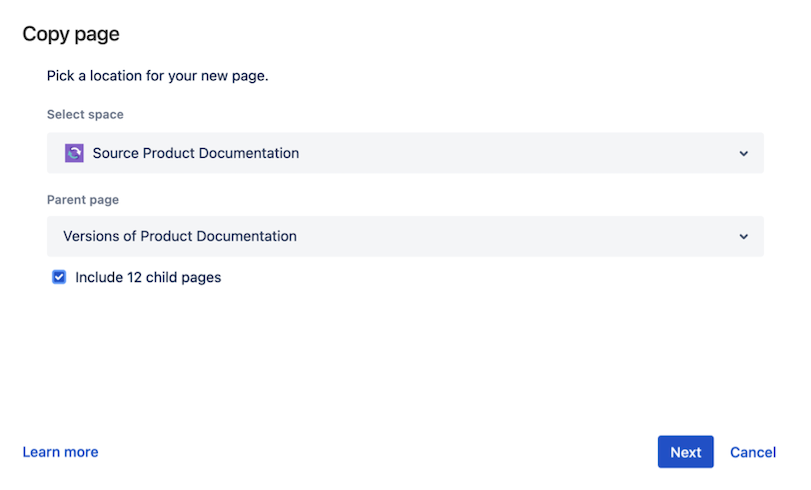
 On the root page click on the page tools icon (•••) > choose Copy to open the copy dialog:
Select the space where the Working version is stored (the same space from Part-1).
Select the “Versions of…” as parent page.
Check the box “Include all X child pages” > click Next.
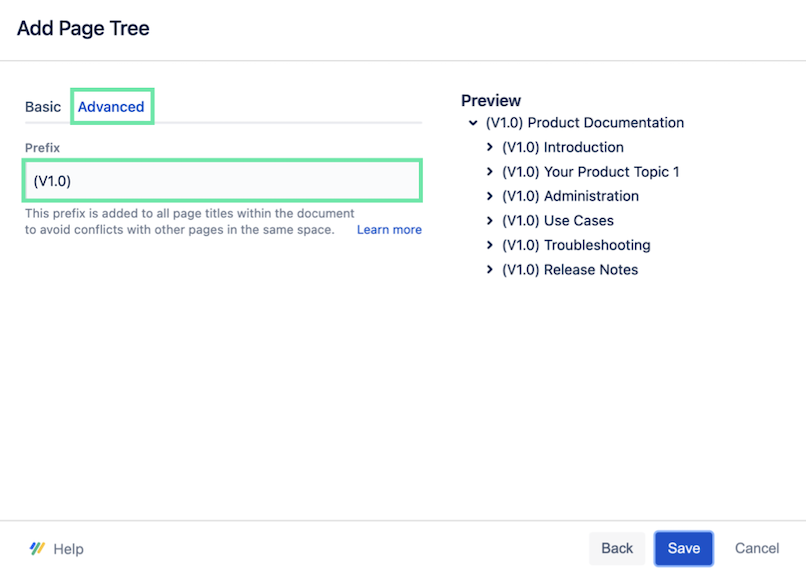
Add a prefix in the field “Start all titles with,” please use a prefix format such as (VERSION_NAME) so the page title and prefix may look like this: (v1.0) Product Documentation
⚠ Important: You should add a blank space after the last bracket in the prefix.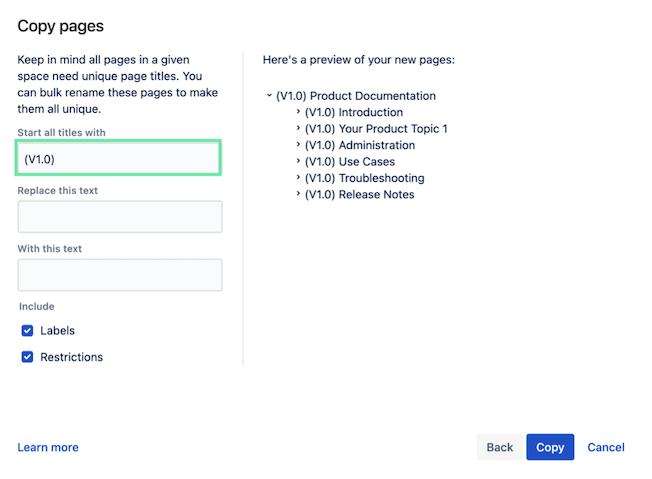
Click Copy, this will copy all the pages over to the space with the Working version.
Navigate to the space where you store the Working version.
Click Scroll Documents in the Apps section.
Select the document card belonging to your document.
In the Document Manager, click More document actions (•••):
Choose Advanced options > click Add existing page tree.
Search for the root page of the page tree you just copied over and select it.
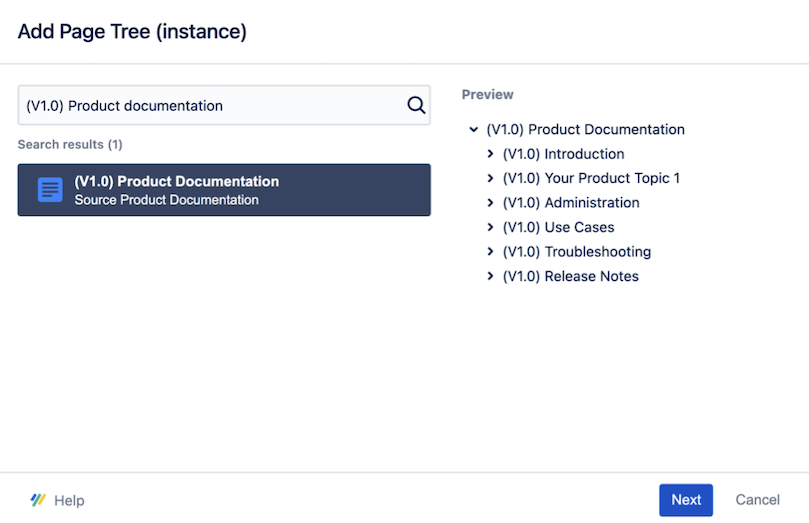
Click Next.
In the Basic tab make sure the version name is correct. If not, change it to reflect the correct value.
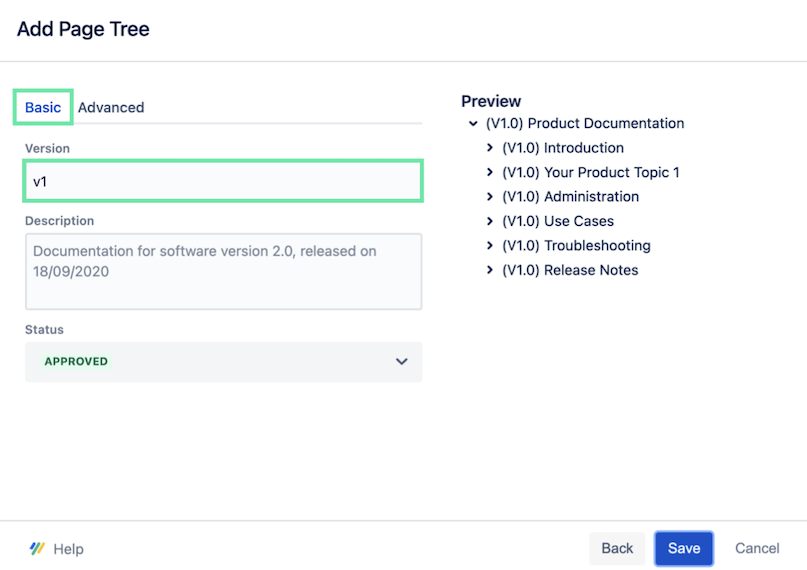
Click Advanced and confirm the prefix is correct, make sure that the prefix is same as the name of the version.
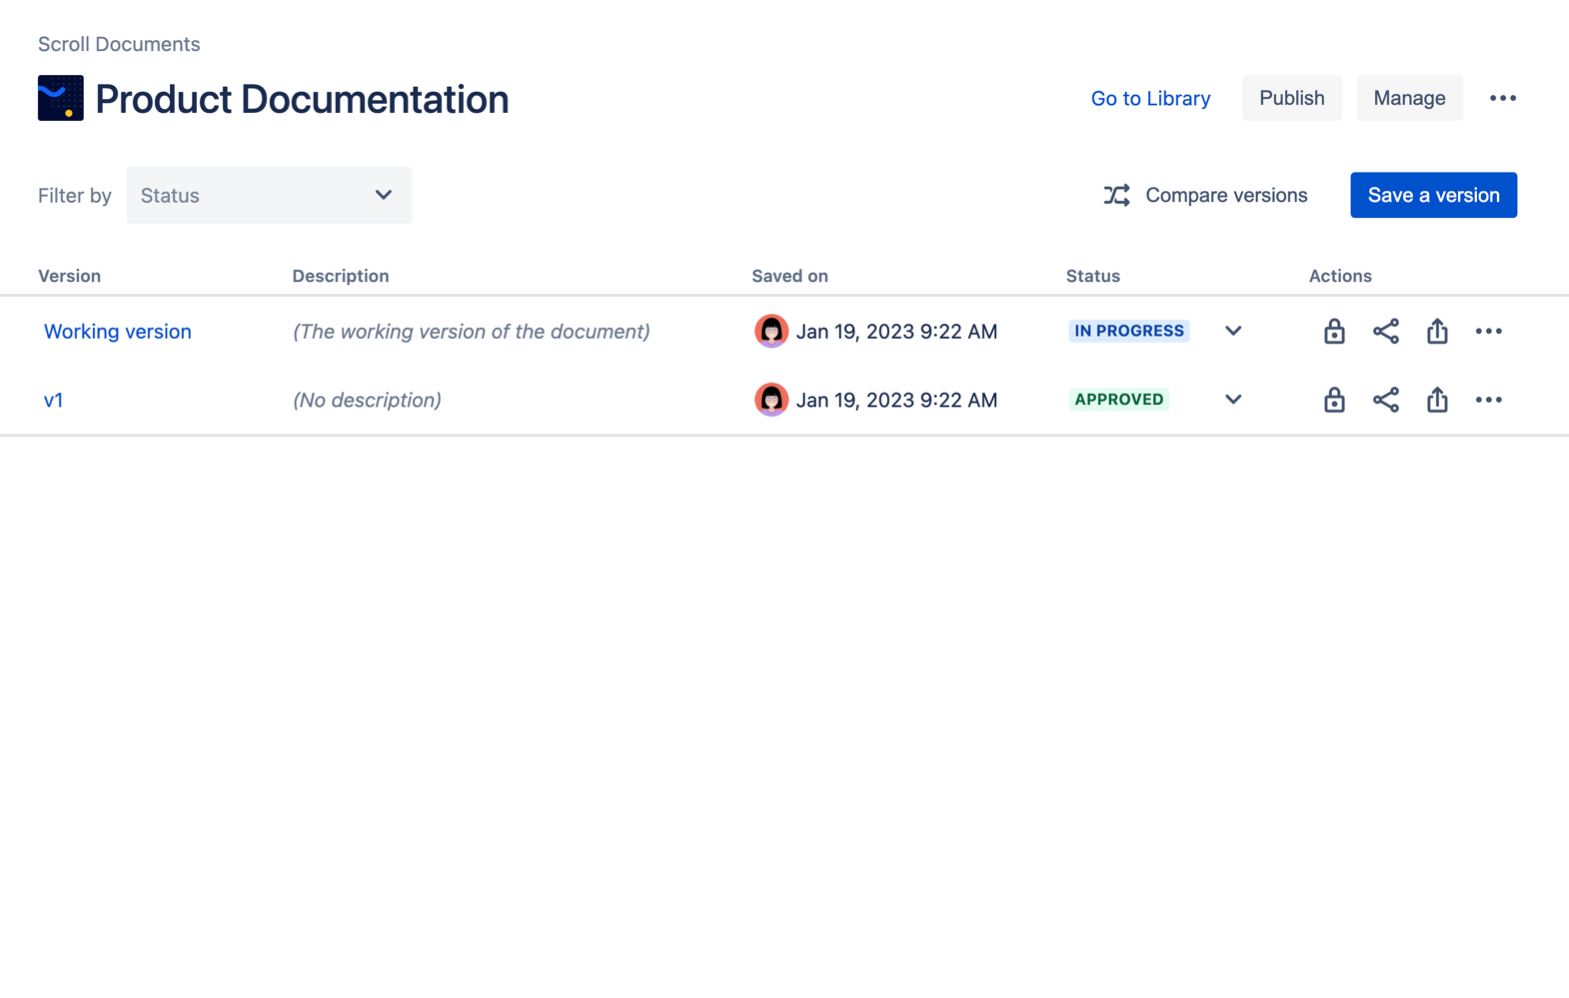
Click Save, this should add your copied page tree as a version to your document like version V1 in the screenshot below:
Now, click More document actions (•••) > Advanced options > select Manage page groups:
In the Manage page groups dialog, click Auto-Group in order to assign matching Scroll Page IDs to the pages in your Document.
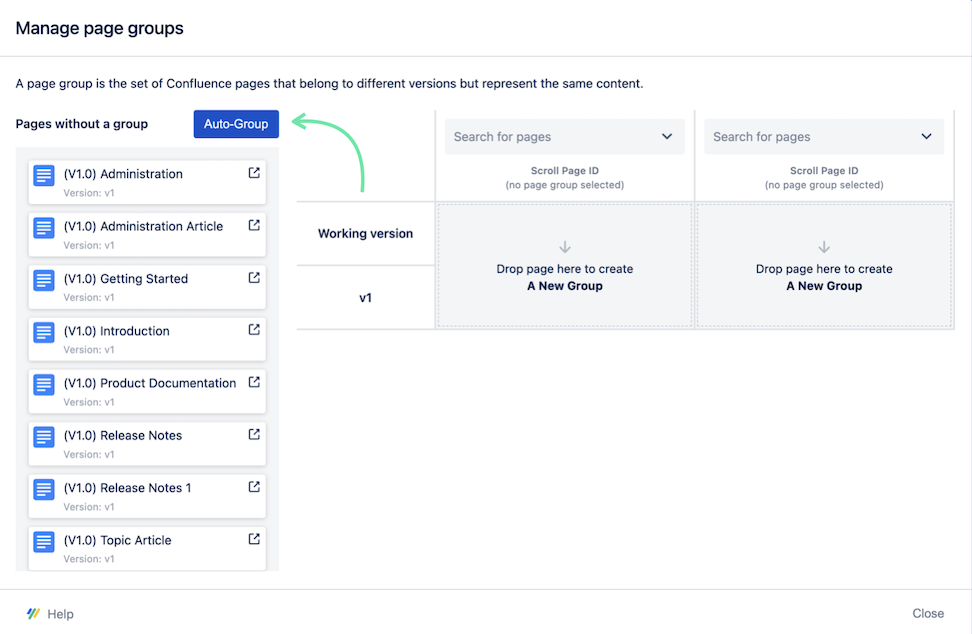
b. Click Close when you are done.
Repeat steps 1-8b for each of the “older versions”/spaces you want to add as versions to your document.
Check that all content got copied over as expected for each one of your new document versions.
You’re done! When you have established that all content has been copied over as expected you can go ahead and delete the old spaces if you don’t want to keep them.
