
Thanks for choosing Backbone Work Sync for Jira. Backbone helps you simplify collaboration on projects, internally or across organizations, by synchronizing Jira work items in real-time. This guide helps you set up Backbone Work Sync for the first time. You can either quickly test Backbone using our guided onboarding flow, or follow the full setup steps to configure your first synchronization manually.
-
Watch the video - get a quick overview of what Backbone can do for you.
-
Try out Backbone - test functionality without manual setup.
-
Set up your first Synchronization - connect two spaces and start syncing.
Watch the Video
To learn more about what Backbone can do for you, watch the Get Started video that introduces Backbone’s features.
Try Out Backbone
New to Backbone Work Sync? Use the onboarding flow to explore core features without any manual setup
We've introduced a new onboarding flow to help you get started quickly and see Backbone Work Sync in action. The flow creates two copies of an existing Jira space and automatically sets up a sync between them, so you can start testing Backbone right away.
To try it, follow these steps:
-
Go to Apps and open Backbone Work Sync.
-
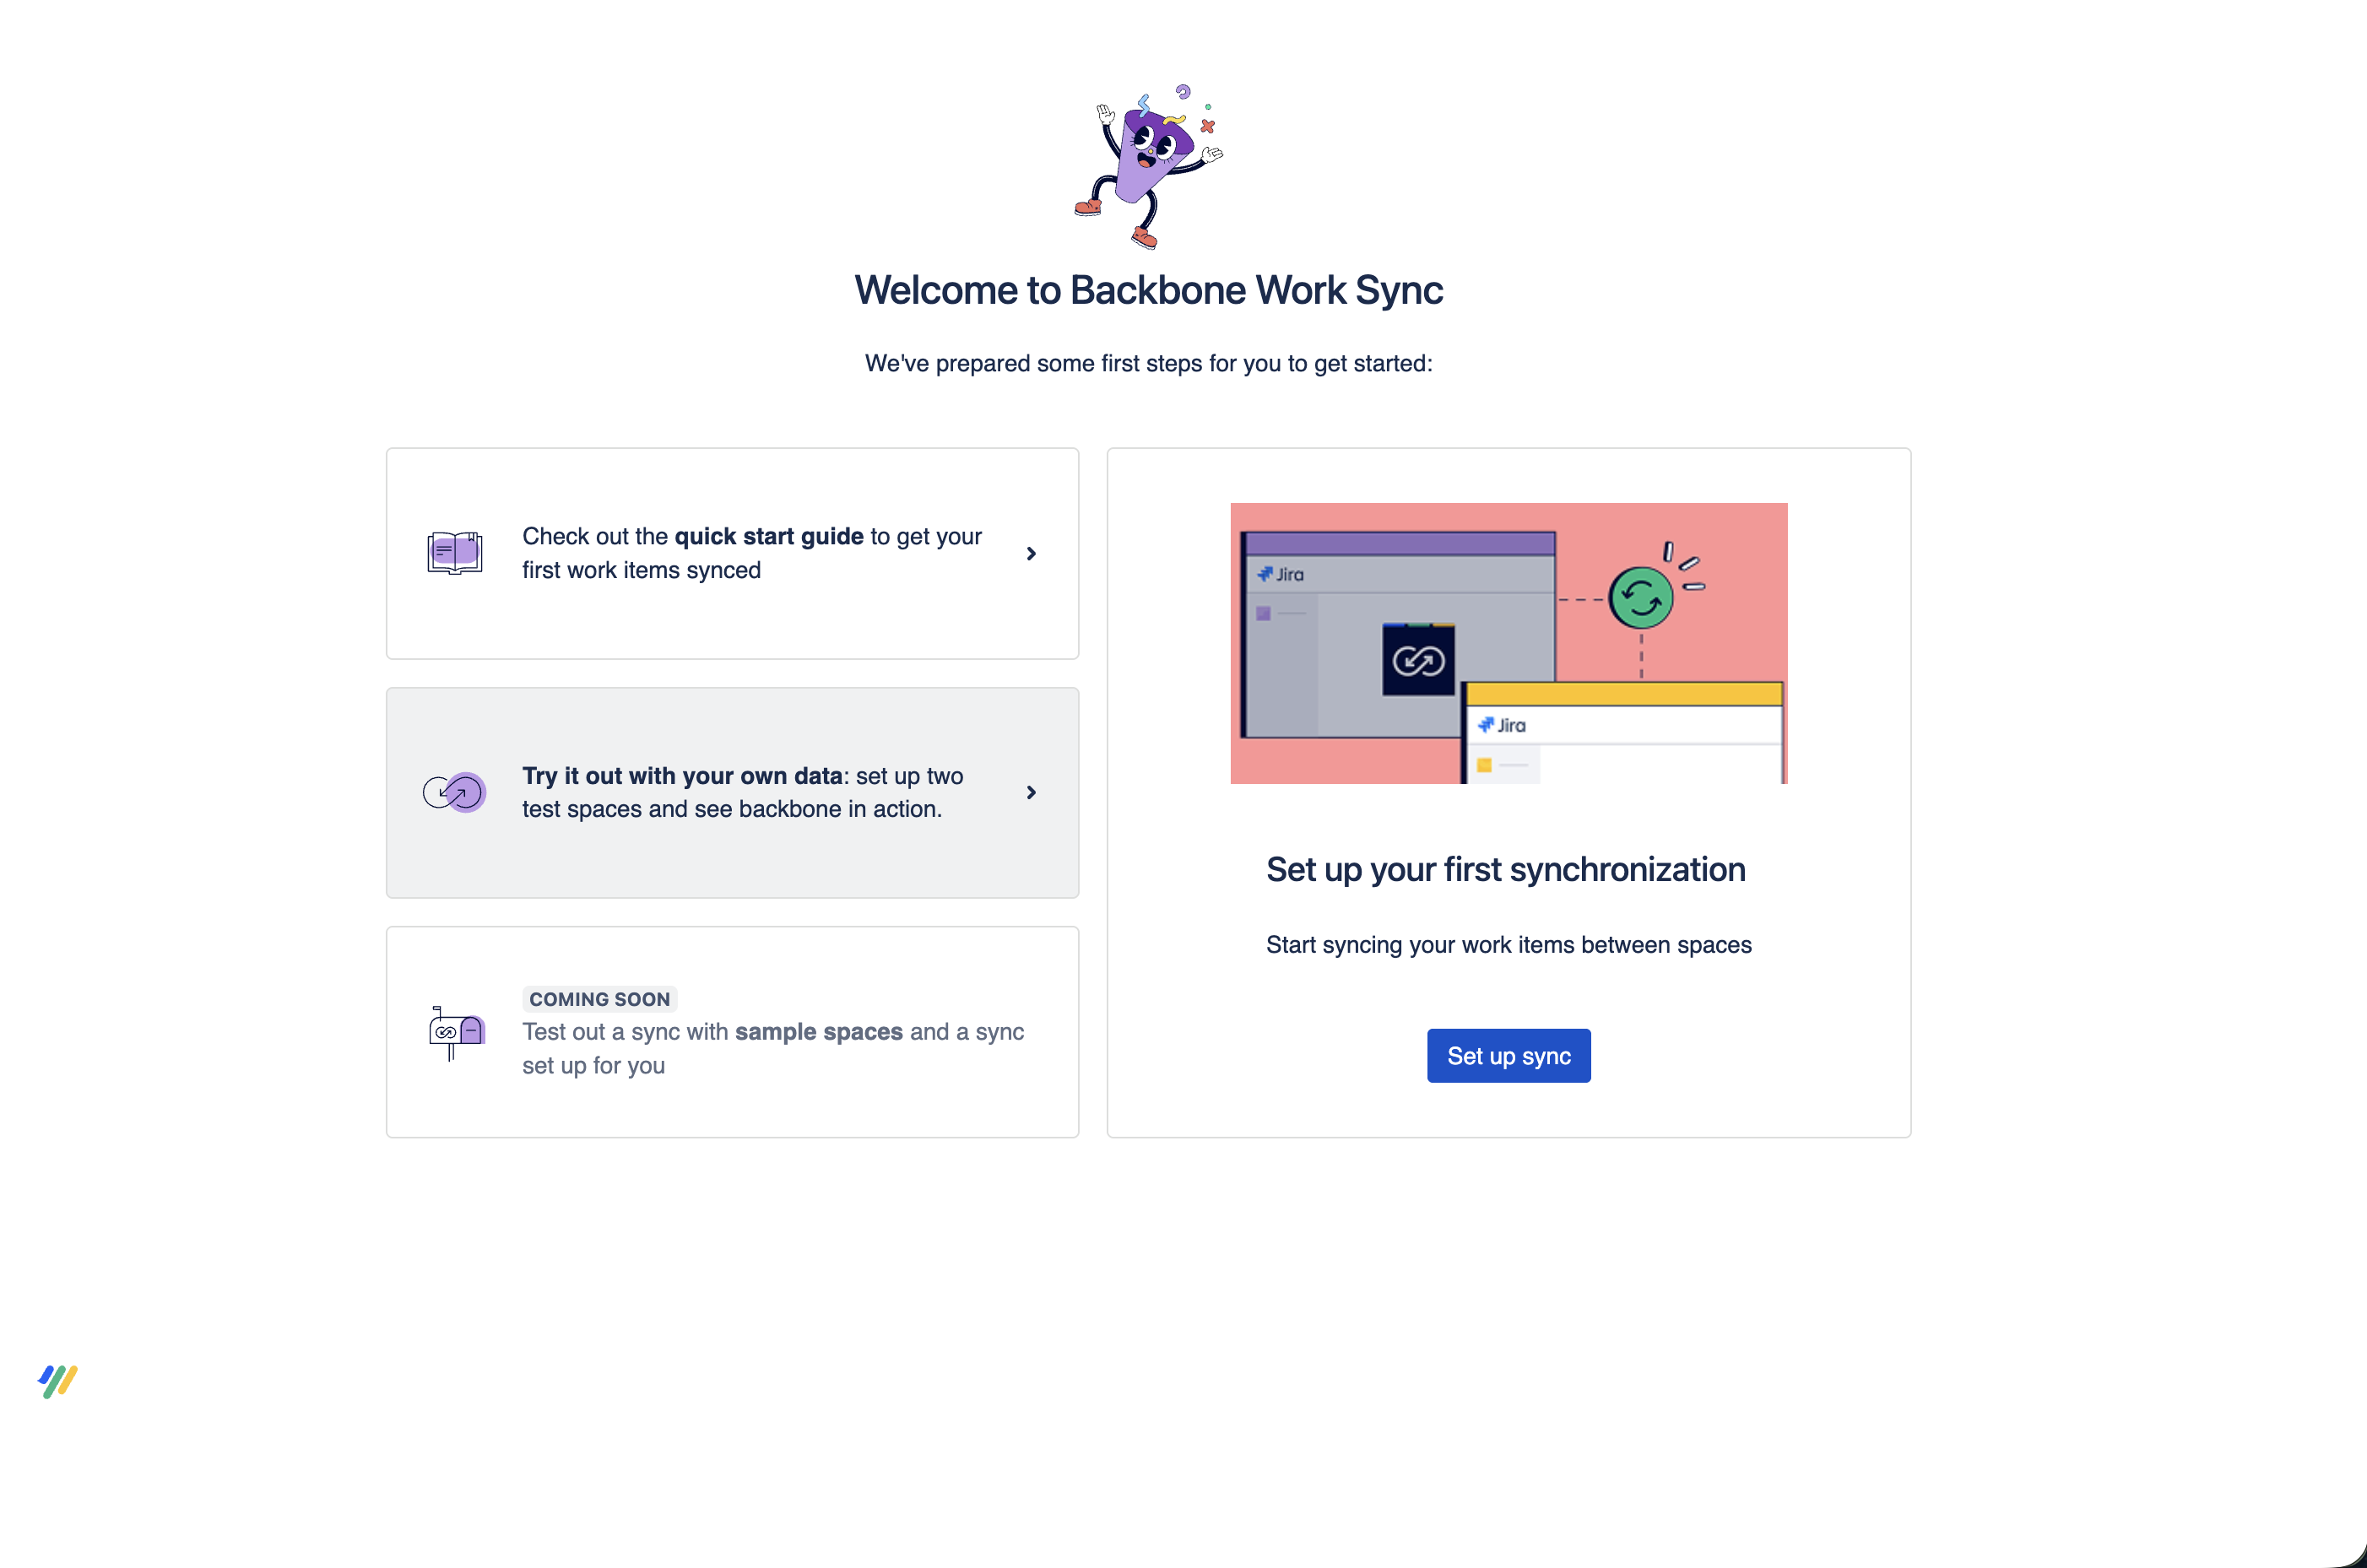
On the Get Started page, select Try it out with your own data.
-
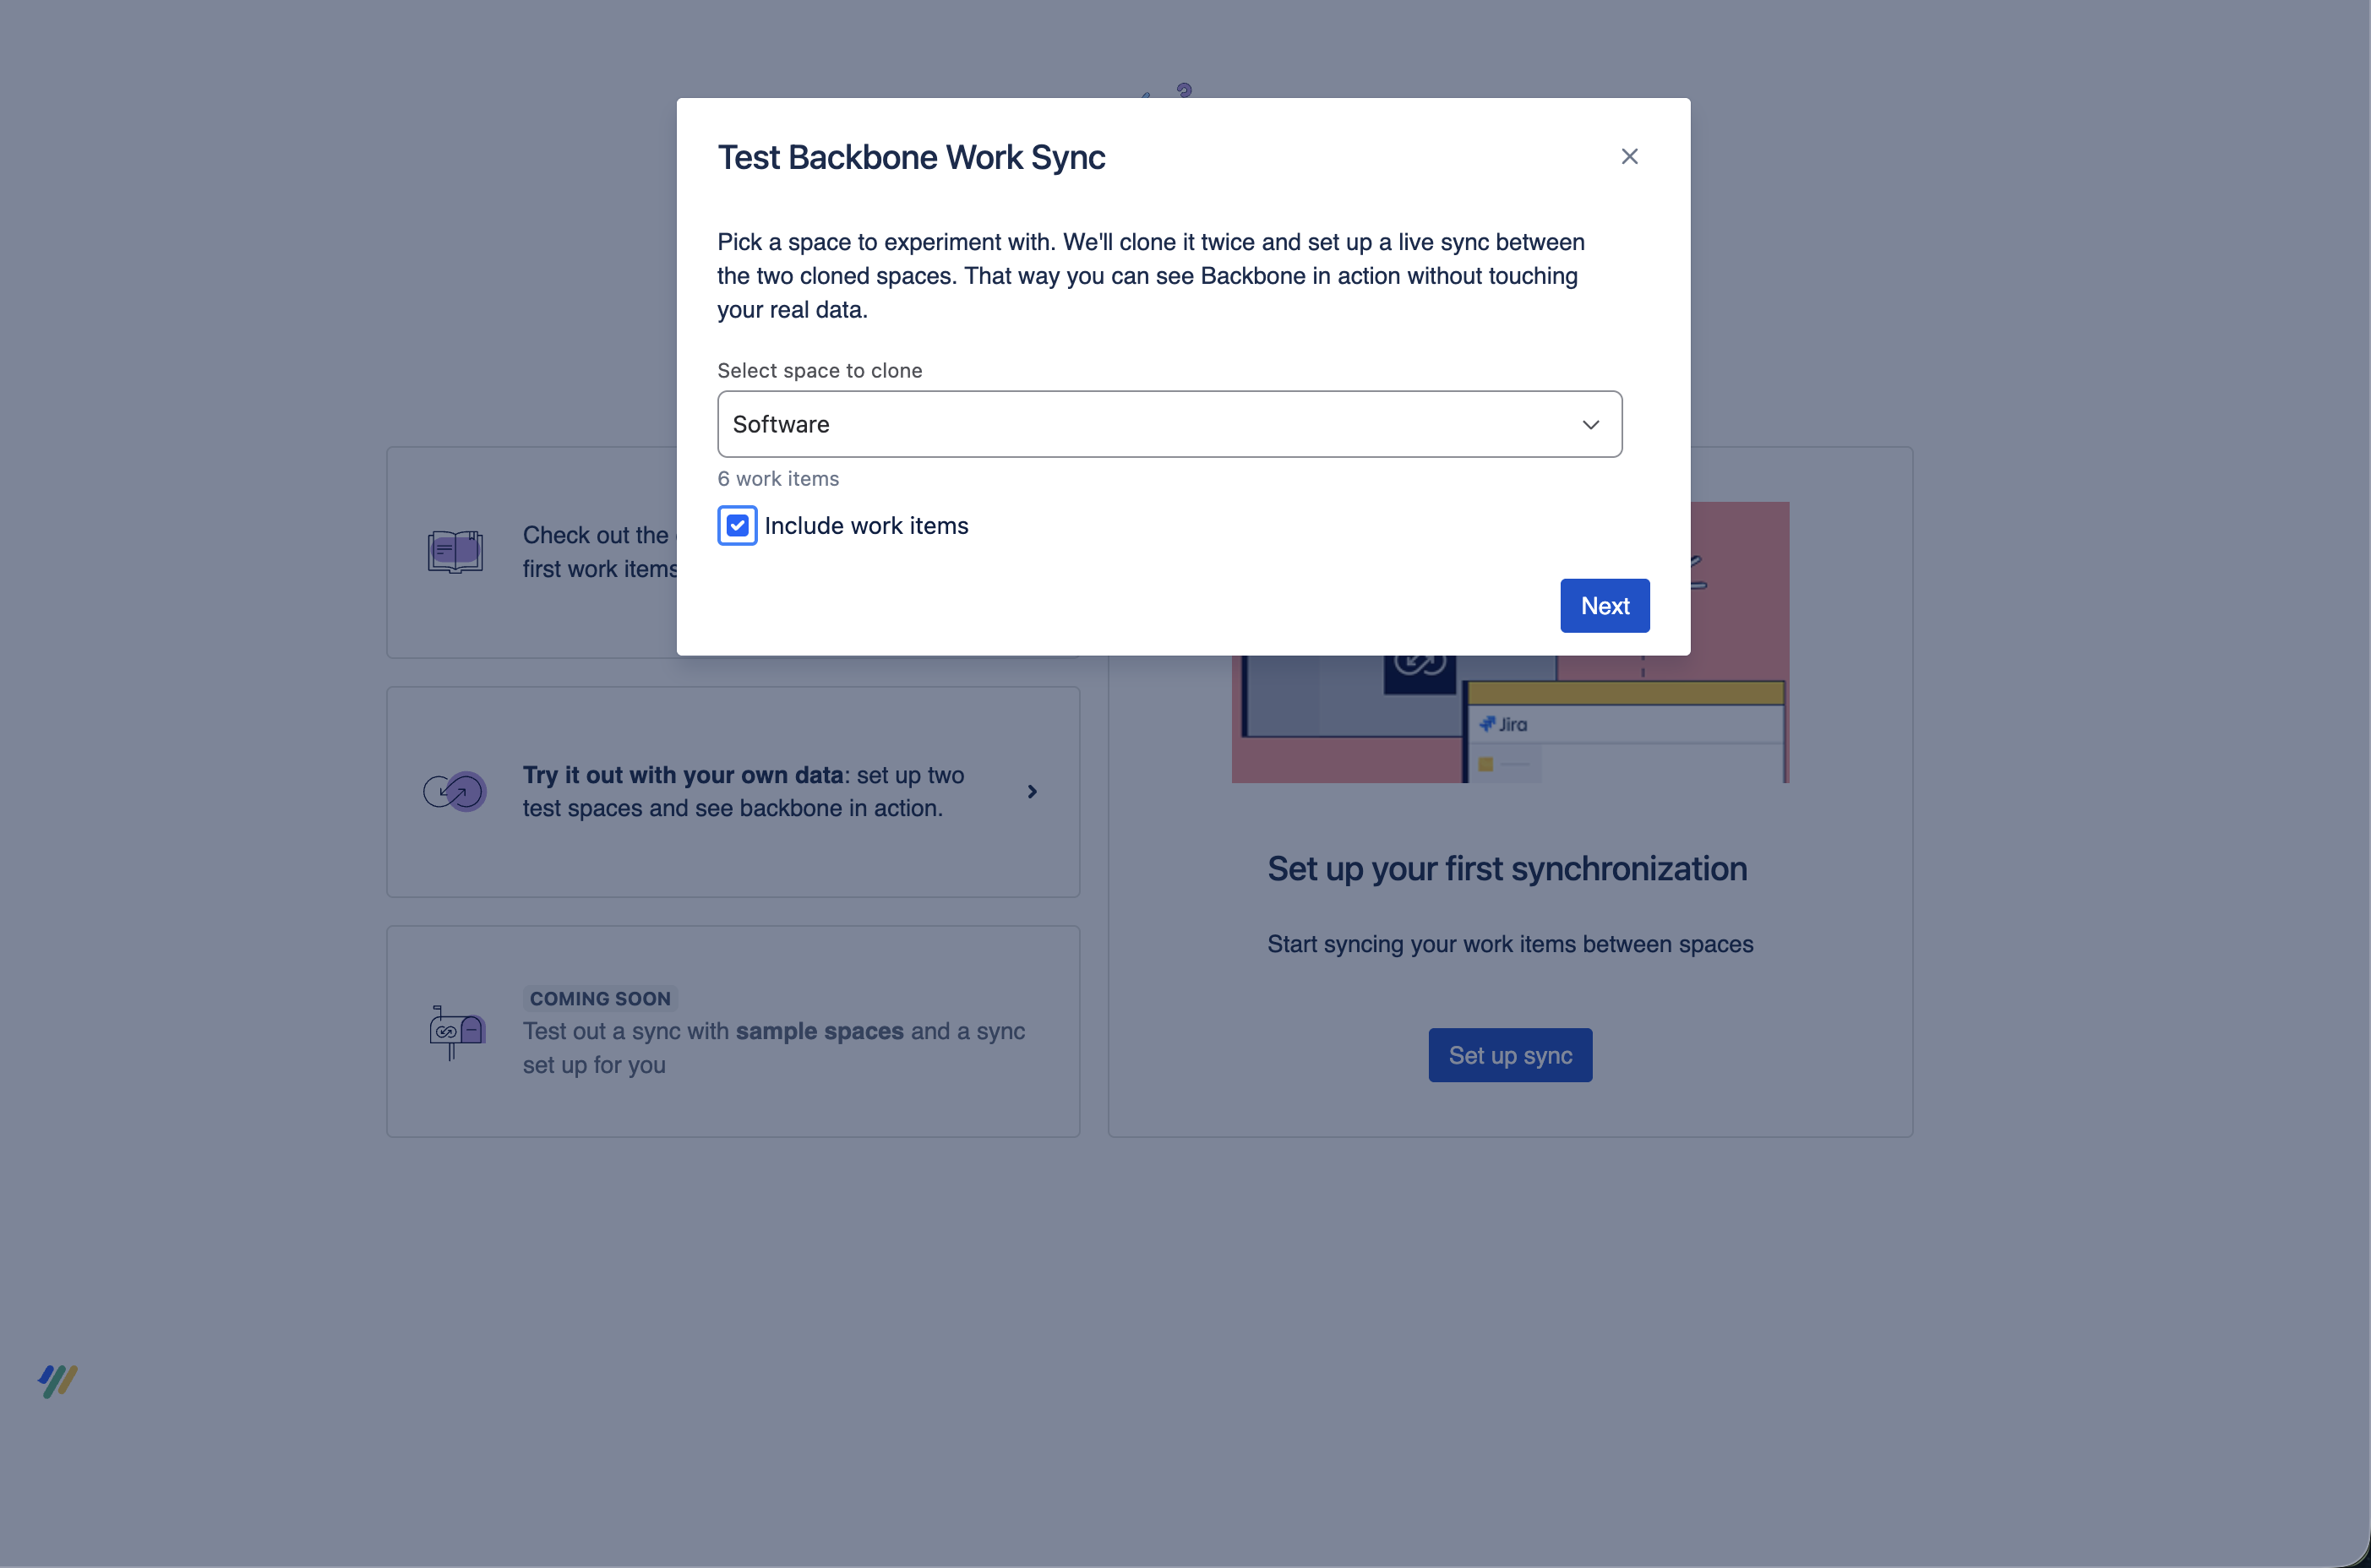
Choose an existing space as your starting point.
-
Decide whether to include or exclude work items, then select Next
-
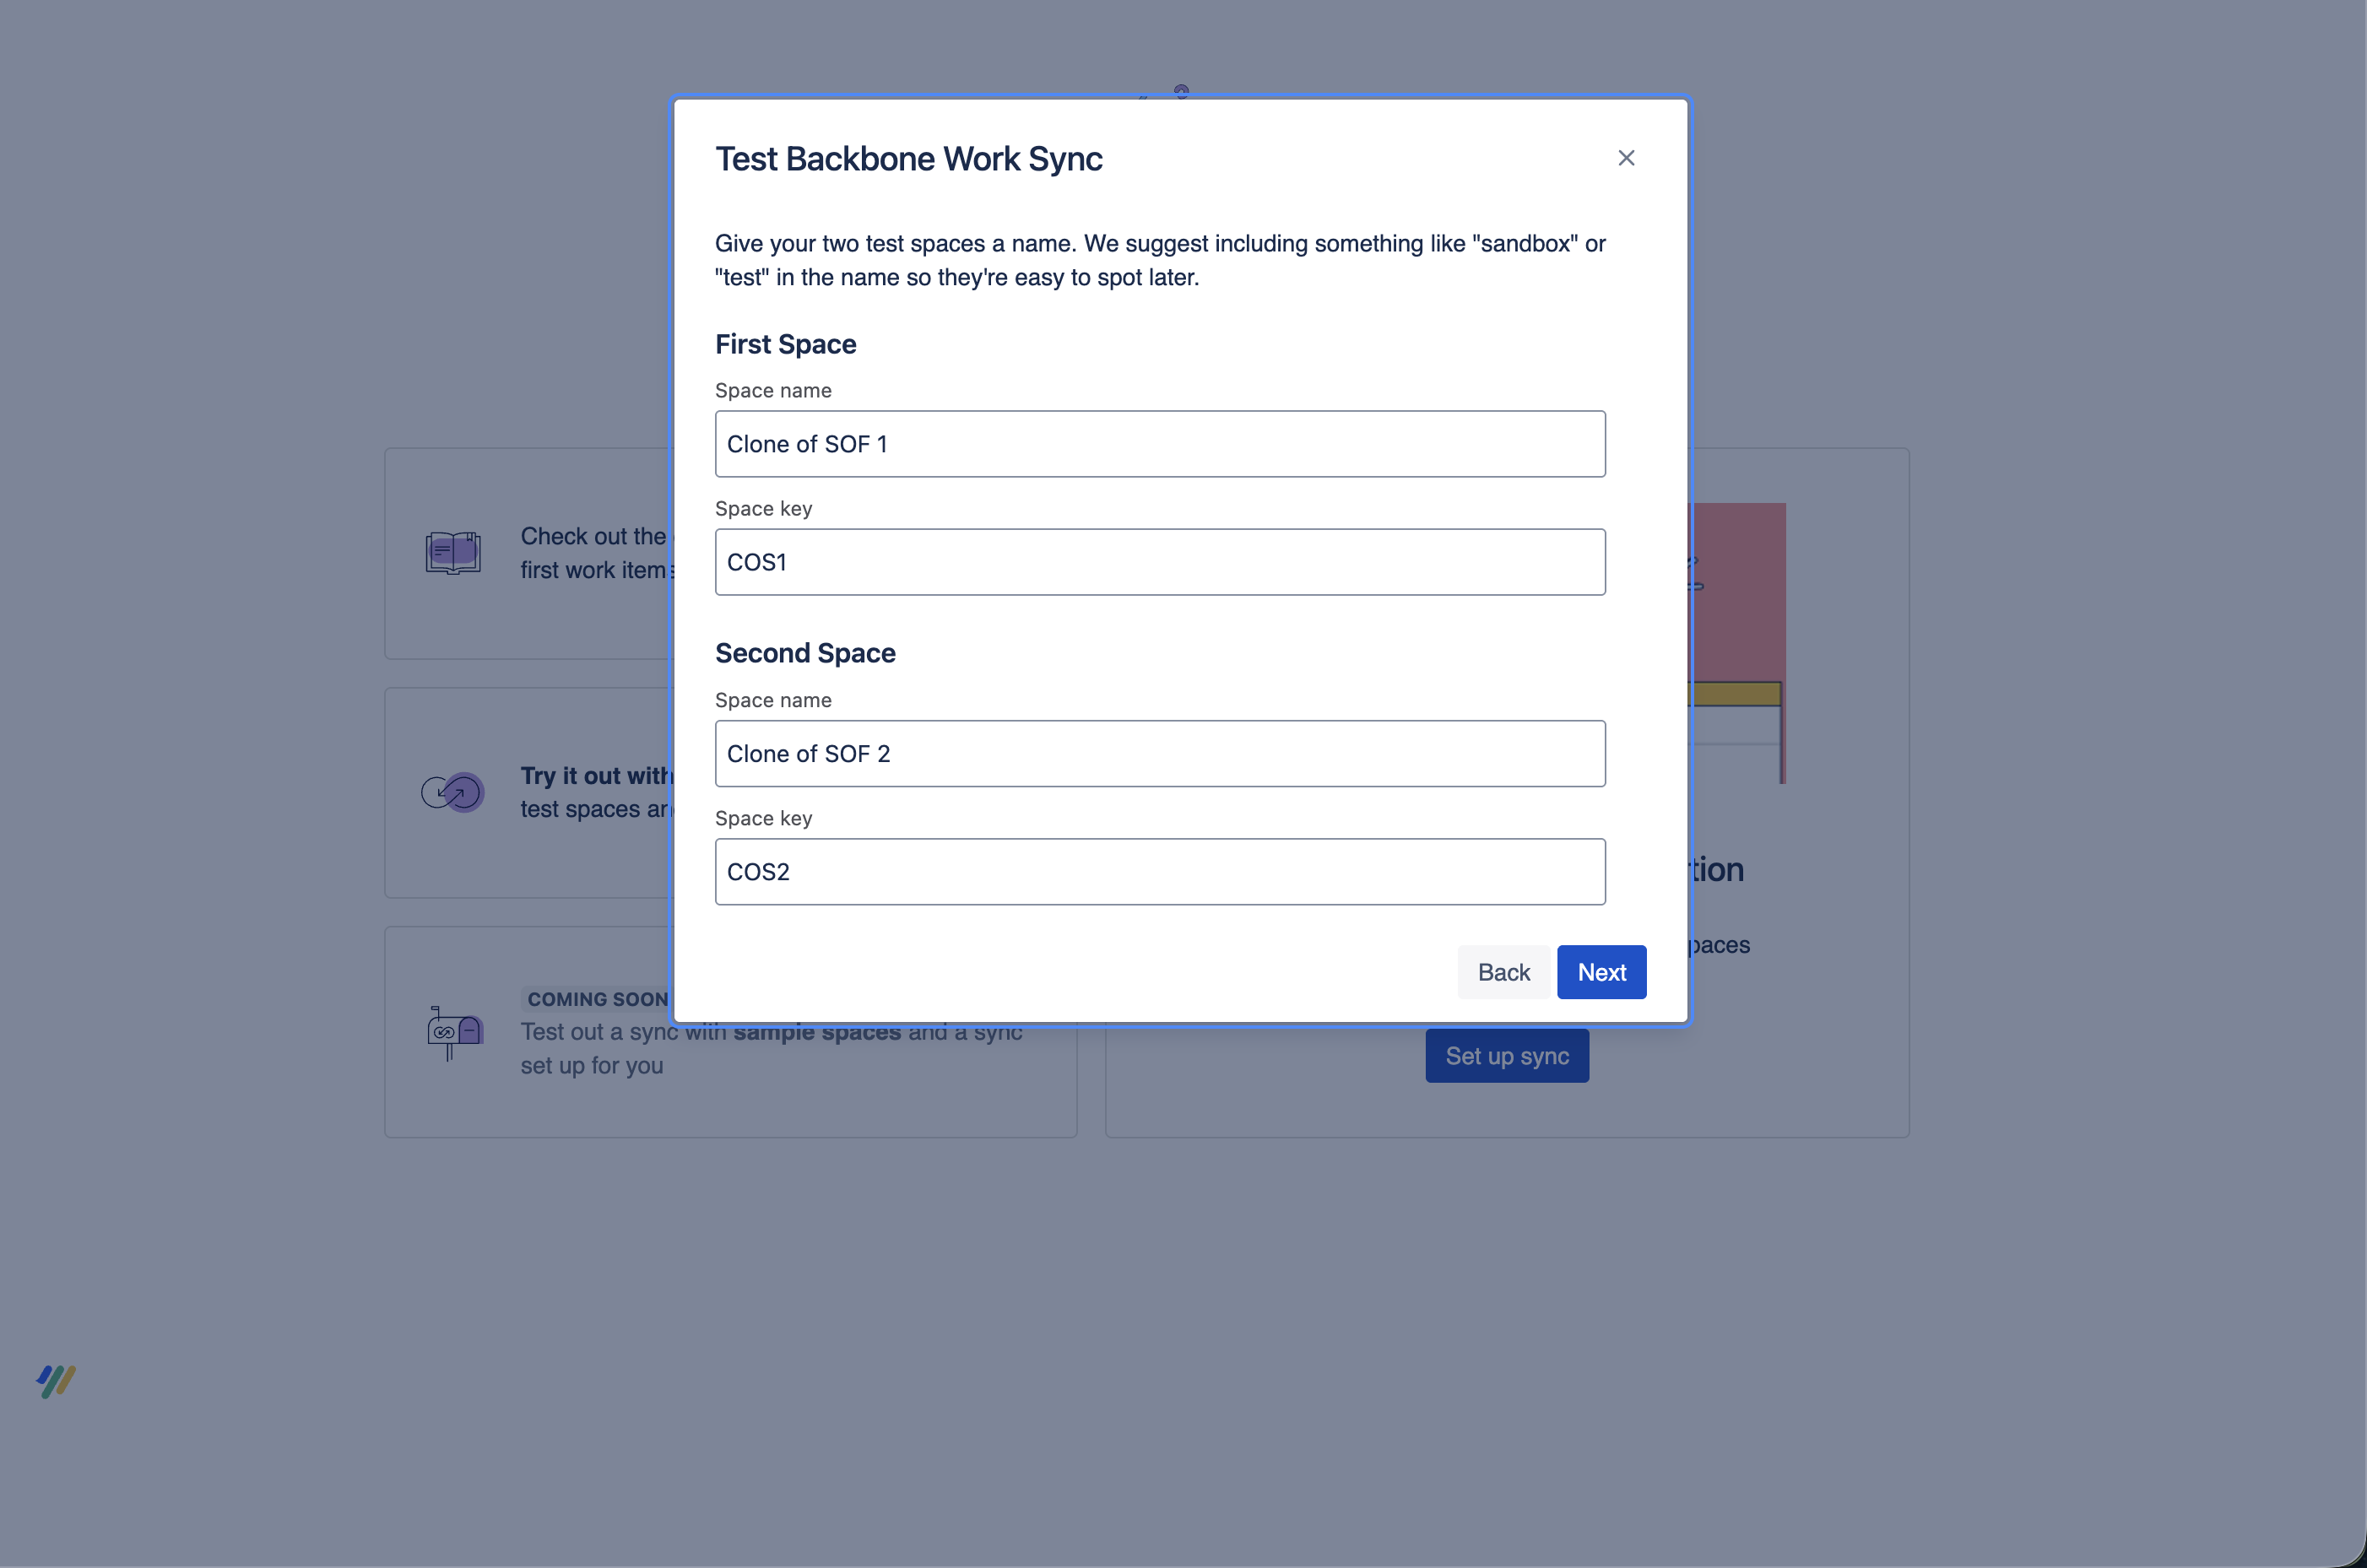
Give the cloned test spaces a name and key, or stick with the prefilled suggestions, then select Next.
-
Confirm what gets created on the overview page.
-
Select Clone & Sync. Backbone creates the cloned spaces based on your selections.
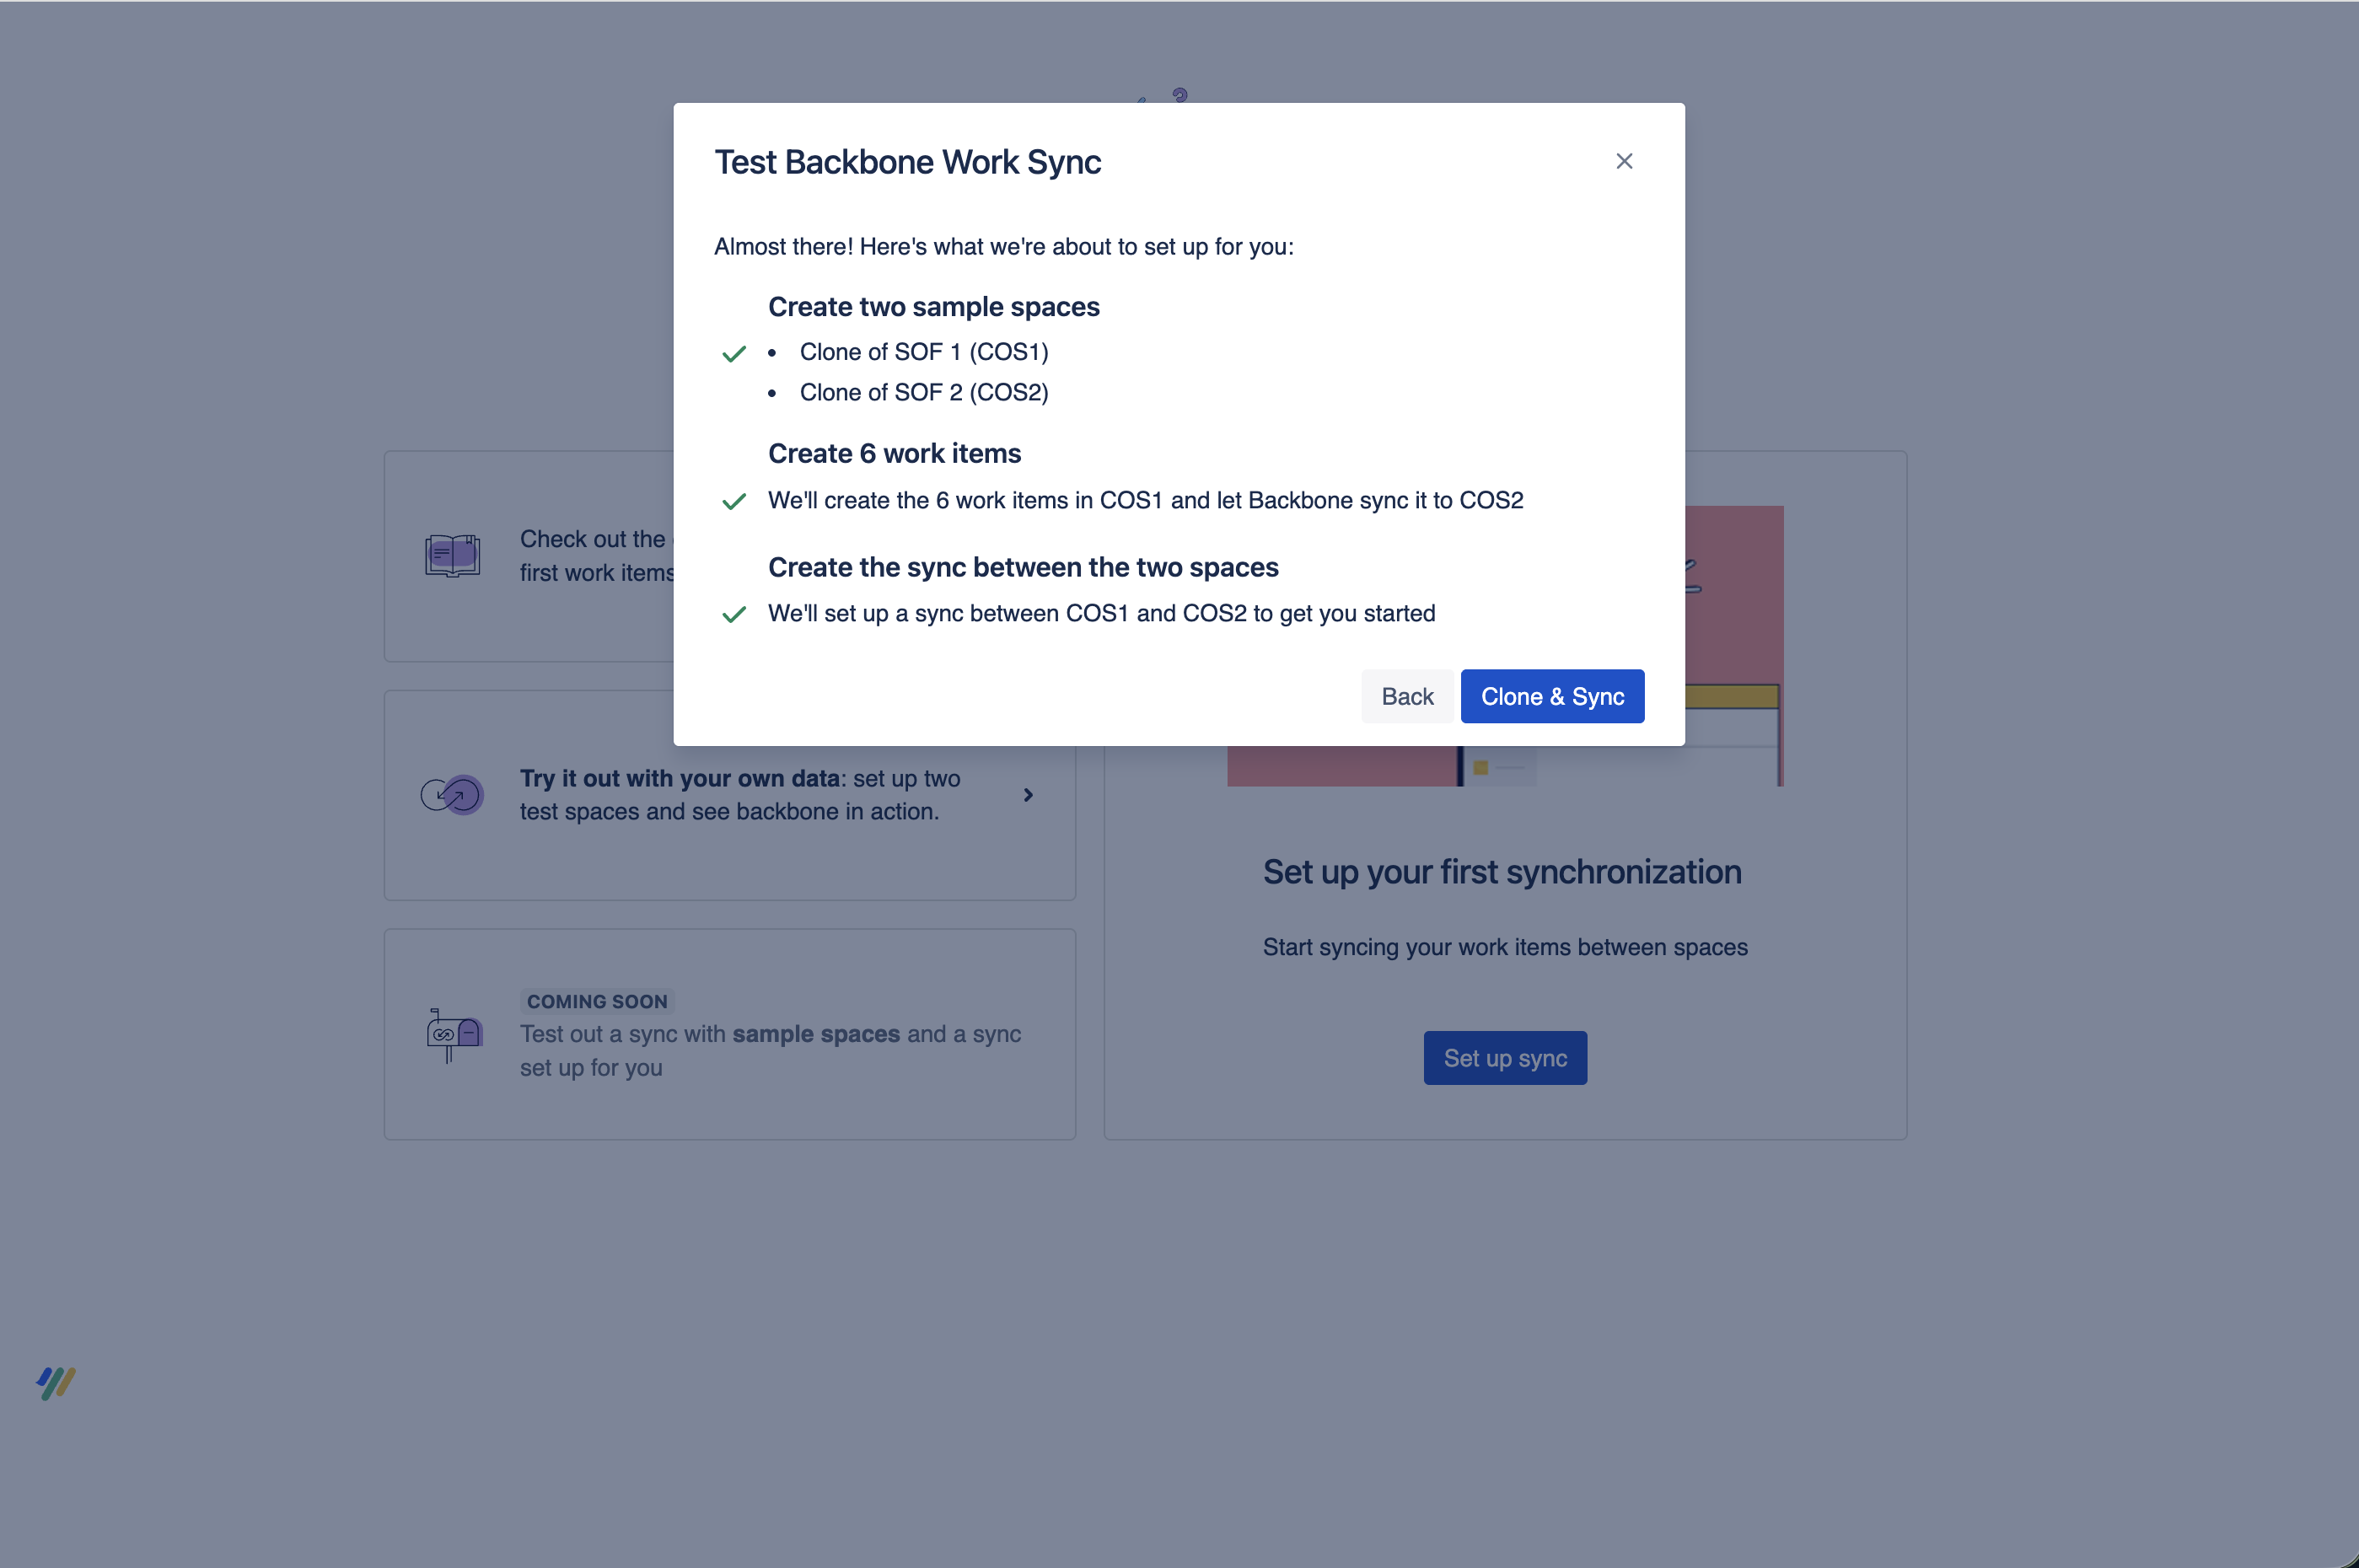
Backbone creates:
-
-
Two cloned test spaces
-
The work items from your existing space, if you chose to include them
-
A sync connection between the two cloned spaces.
This gives you a ready-to-use Backbone setup for testing.
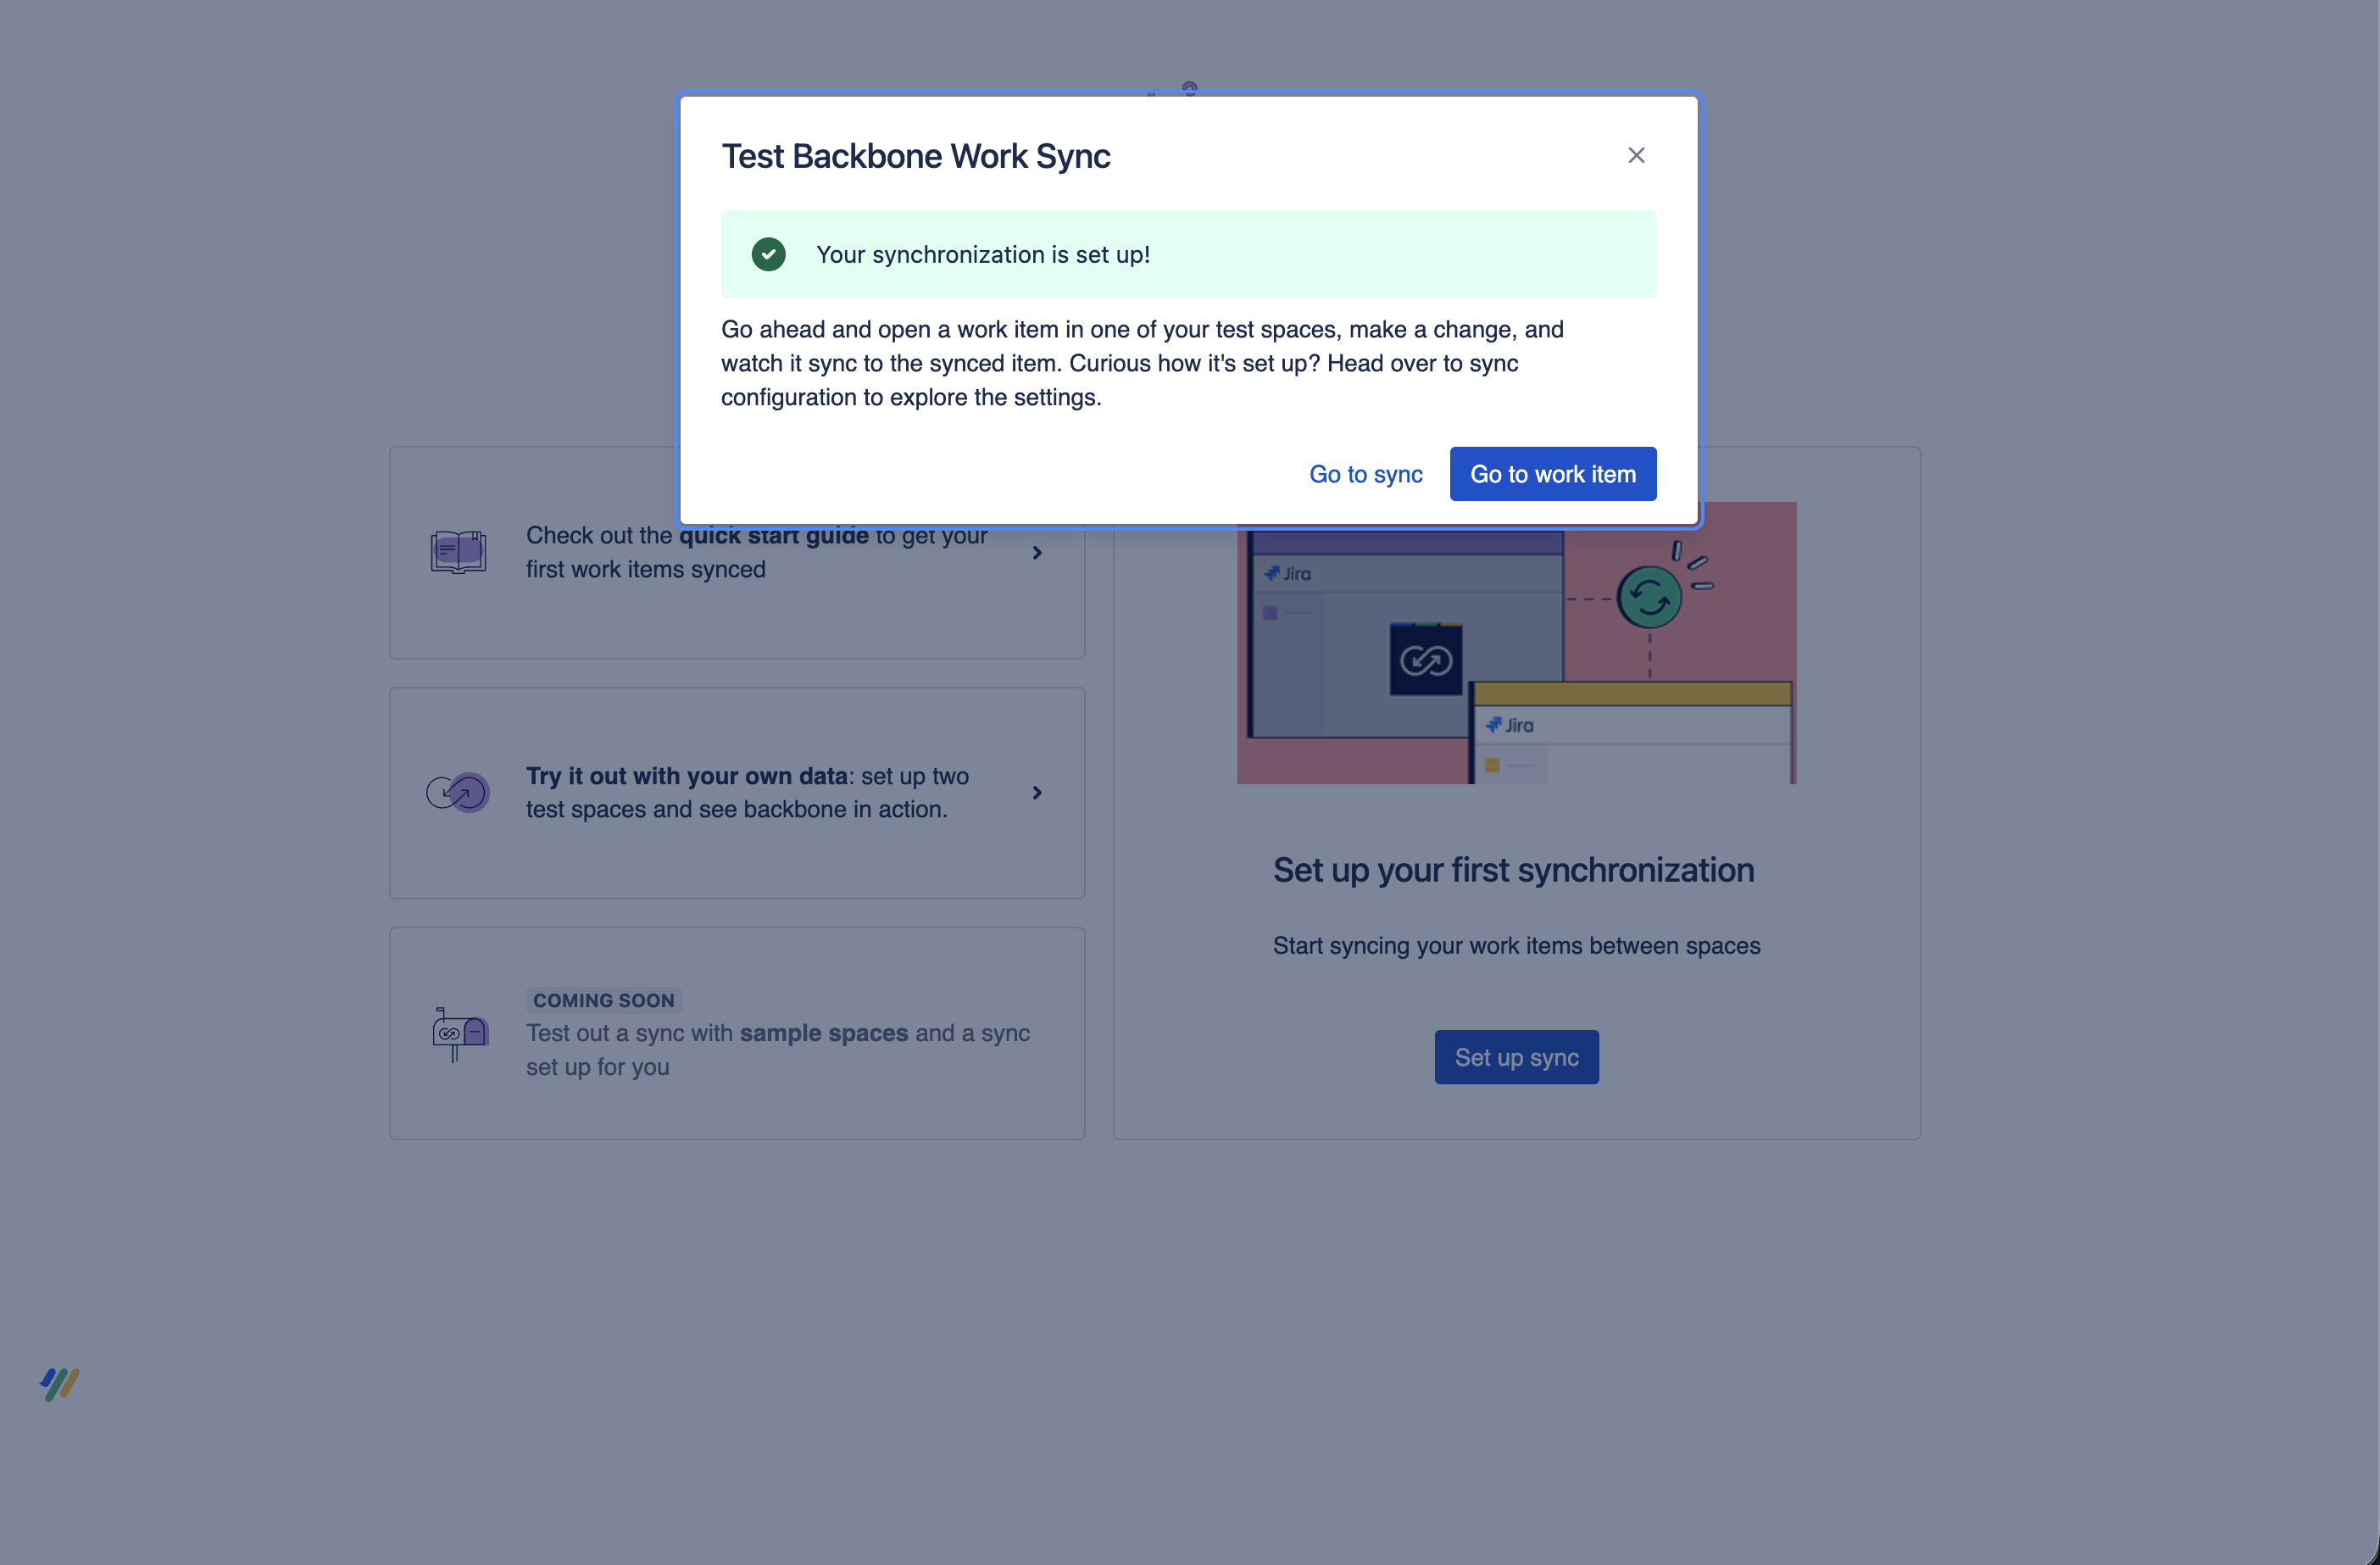
Once cloning and sync creation are complete, you can:
-
Go to the sync and configure it manually
-
Go to the work items and start updating data
-
Start syncing additional work items
-
-
Set Up Your First Synchronization
If you prefer to configure Backbone Work Sync manually with existing spaces, follow the steps below.
1: Finding Backbone in Jira
After installing Backbone Work Sync for Jira from the Atlassian Marketplace, you can find Backbone in the project settings under apps.
To create your first project synchronization, follow these steps:
-
Go to Space settings > Apps > Backbone Work Sync.
-
Click New Synchronization.
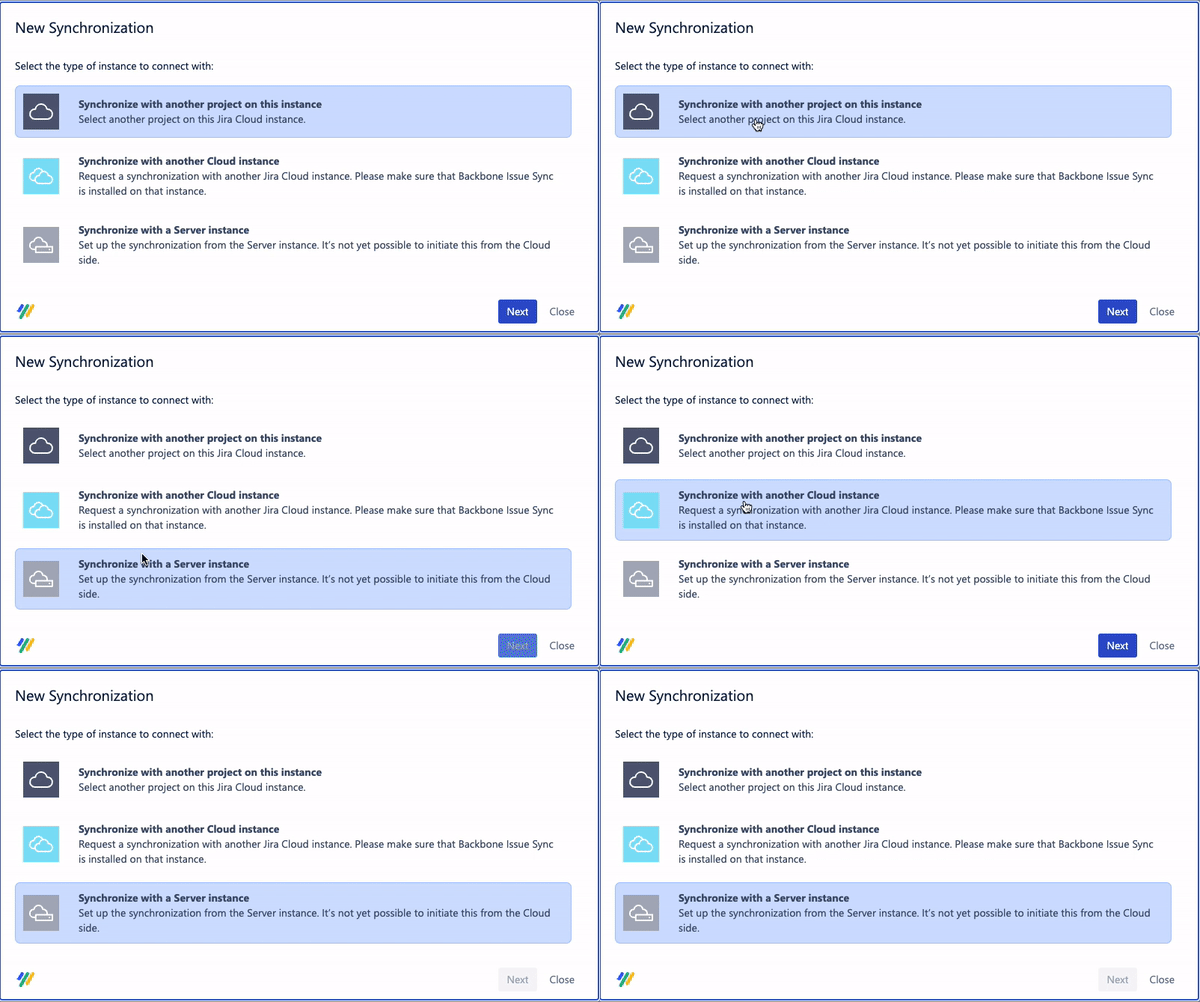
As illustrated below, Backbone allows you to create a synchronization:
-
With another space in the same instance.
-
With another Cloud instance.
-
With another Data Center instance.
2: Synchronizing Spaces Using Backbone
There are two separate sections in this guide:
-
Synchronizing spaces on the same Jira instance.
-
Synchronizing spaces on a separate Jira Cloud instance.
Information on syncing to a Data Center instance can be found in this article.
3: Configure Synchronization Settings
After establishing a connection between two Jira spaces, you can now select the exact type of Jira data you want to synchronize. The following steps will guide you on how to successfully set up a sync.
Work Type Mapping:
-
To start editing the synchronization, click Edit Configuration.
-
Open the Work Types tab and click Start with simple mappings.
-
Select the work types you want to map across Project A and Project B.
a. In this example, we will select the work type Task. -
You can use the drop down box and choose to synchronize the work types either in both directions between Project A and Project B or in one direction.
-
Click Create to save the work type mapping.
Field Mapping:
-
Navigate to the Fields - Mappings tab > + Field Mapping.
-
Select the fields you want to synchronize. In this example, we will select Summary and Description.
-
You can use the drop down box to synchronize fields either in one or both directions.
-
Click Create to save the fields configuration.
Comments Mapping:
-
Navigate to the Comments tab.
-
Use the drop down box to choose between uni-directional or bi-directional comment mapping.
-
Click Enriched mapping to get the complete information about the reporter and comment date and time.
-
Click Publish Draft > Start Synchronization.
Well done! You've configured your first Backbone synchronization. Now, all work items with type Task will be synchronized between Projects A and B.
The fields Summary and Description fields will be synchronized between those work items along with any comments.
4: Using the Synchronization
Now for the fun part: let's use Backbone to test the synchronization by creating a task in Project B and testing whether the work item is automatically synchronized to Project A.
-
Create a new work item with type Task in Project B, and enter some text in the Summary and Description fields.
-
Open Project A. You can see that the work item has now been synchronized.
-
Open the synchronized work item in Project A and add a comment.
-
Go back to the work item in Project B and open the synced Task. The comment can now be seen as well.
Easy-peasy! You have successfully created and tested your first synchronization.
Next steps:
Now, you can try out more configuration options, such as different work item/field types, or comments and attachments.