
This page explains the different cloning options, how to send a sync and clone request, what the receiving admin reviews, and what to do after the spaces are created.
Want to learn more about what Quick Connect is? Read more about it here.
Setup Quick Connect
With Quick Connect you can choose for both sides whether they should be cloned. That gives you four ways to set up a synchronization with Quick Connect.
|
What you clone |
Use it when |
|---|---|
|
The first space |
You want to keep an existing partner space and give your own side a fresh start. |
|
The second space, cloned from the first |
You want a mirror of your space for a partner, client, or team. |
|
The second space, cloned from another space |
You have a template space and want the partner side built from it. |
|
Both spaces |
You're testing Backbone Work Sync, or neither side exists yet and want to start fresh |
For the full list of what is included, the exceptions, and what Quick Connect leaves out, see the requirements and limitation of Quick Connect
Send the Request
Get the sync and clone request approved
Backbone Work Sync never creates a space without approval. A Jira admin on the receiving side opens the request, selects Review clone steps, and sees exactly what Quick Connect will create in their instance.
At the top, summary cards give you the totals at a glance: how many configuration items are new, how many are reused, and if work items will be cloned (up to 200).
Each item on the list falls into one of four categories:
-
New: This item gets created on your instance because nothing like it exists yet. For example, the work type scheme doesn’t exist and will be created with the source name prefixed with "Clone of."
-
Reused: This item exists already on your instance, so it reuses that instead of creating a duplicate. For example, if the source space has a work type Bug and your instance as well, it reuses your existing Bug work type.
-
Jira default values: this item isn’t cloned from the source instance. It assigns your instance's existing Jira default. For example, the permission scheme always falls back to your instance's default, no matter what the source space has configured.
-
Skipped: Backbone Work Sync can't create this item on your instance, so it leaves it out. This usually happens with fields that belong to a third-party app that isn't installed on your instance.
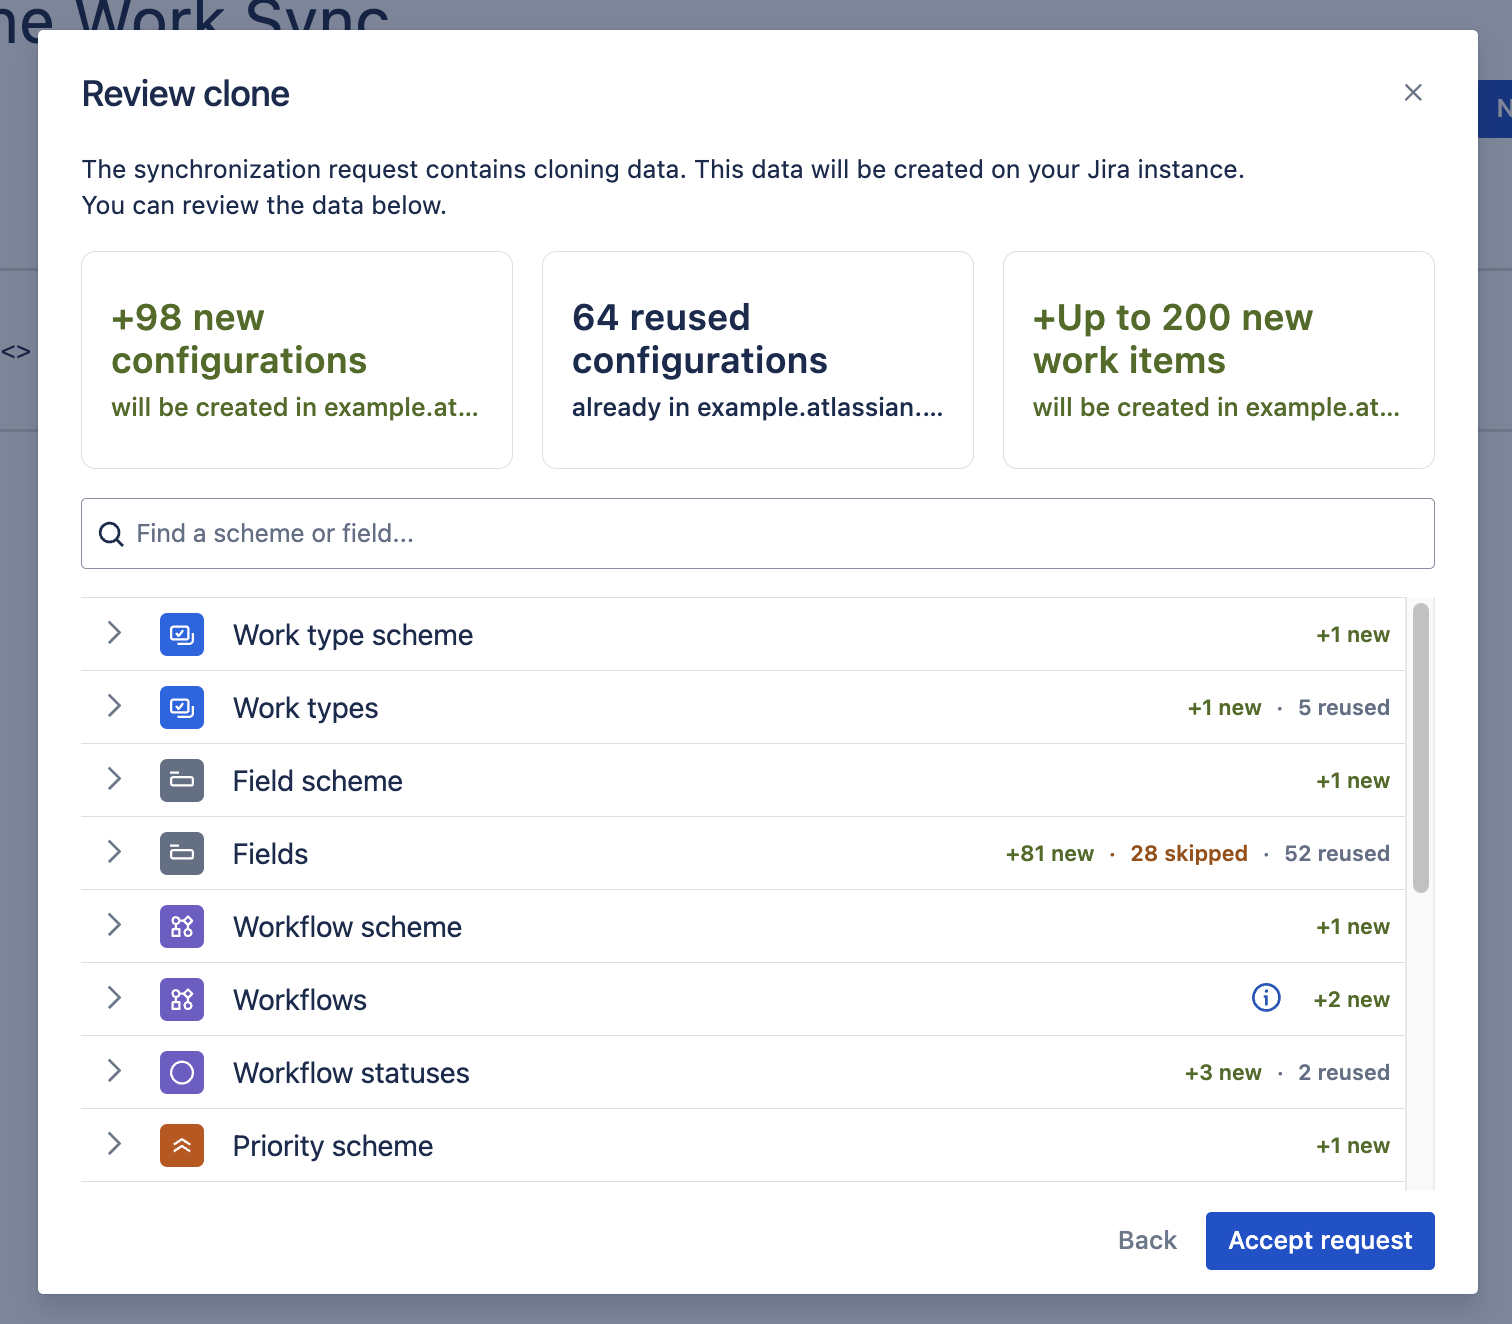
Once they accept, Backbone Work Sync creates the space.
Backbone clones your own space before the other side responds. If they decline, this space isn’t deleted by Backbone.
Configure the synchronization
After the spaces are cloned you can start configuring the synchronization by starting with the work types.