With Scroll Content Manager, you can manage restrictions for both your document and its versions, controlling who can view and edit pages, or modify metadata. If you want to prevent unauthorized users from making changes to a specific version, you can set it to read-only.
Types of Restrictions
You can apply different restrictions to your document versions:
Manage Restrictions for Document Versions
In this section you will learn how to access and manage a document’s individual version restrictions.
To access and manage version-specific restrictions:
-
Click Scroll Content Manager in the space sidebar.
-
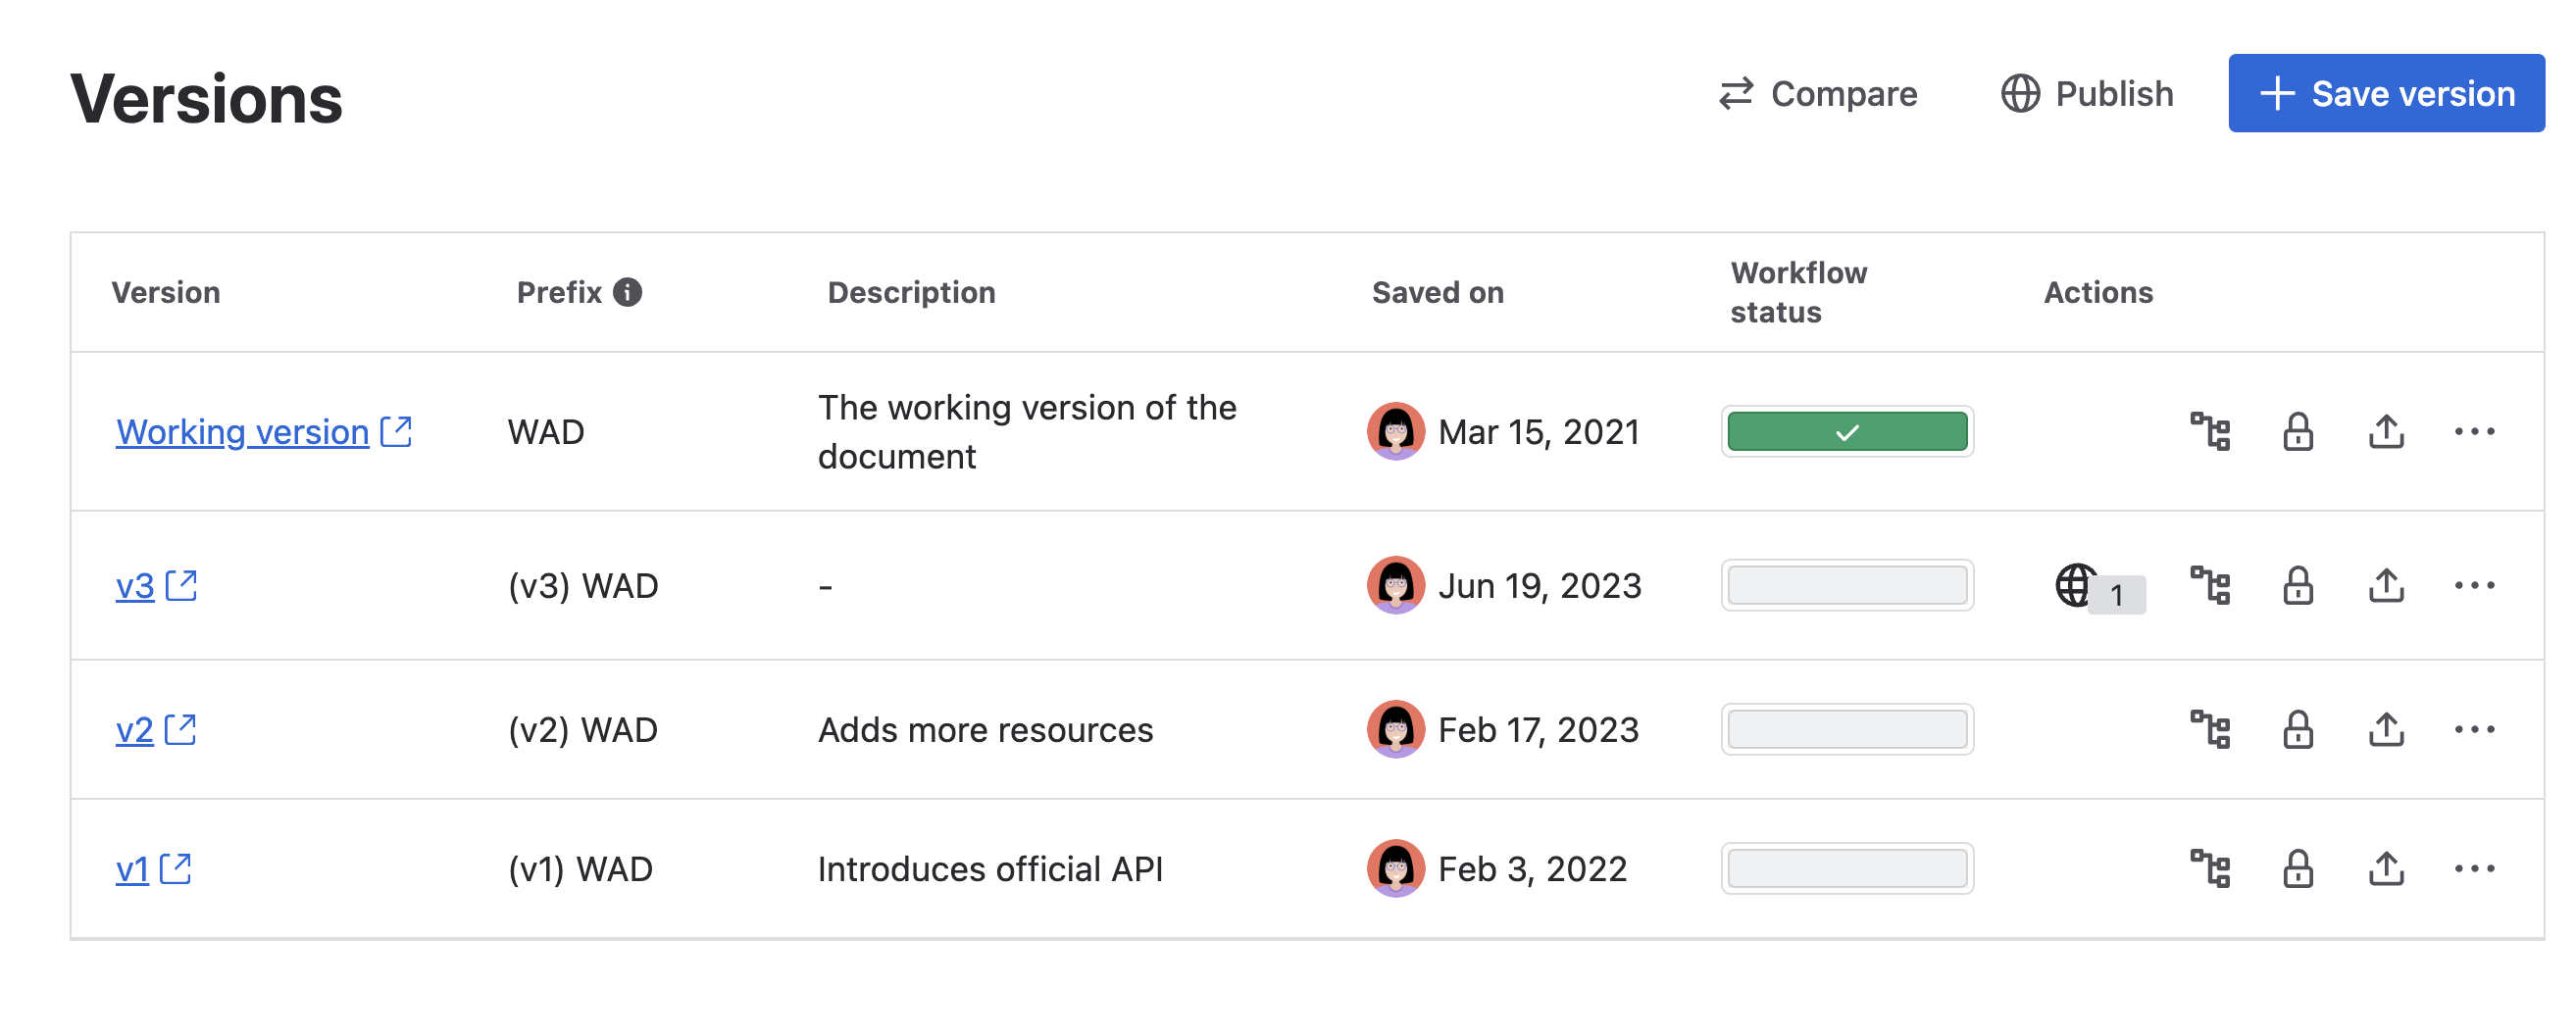
Open the Document Library and select the relevant document.
-
In the Document Manager, locate the version you want to update and click Manage restrictions (padlock icon).
-
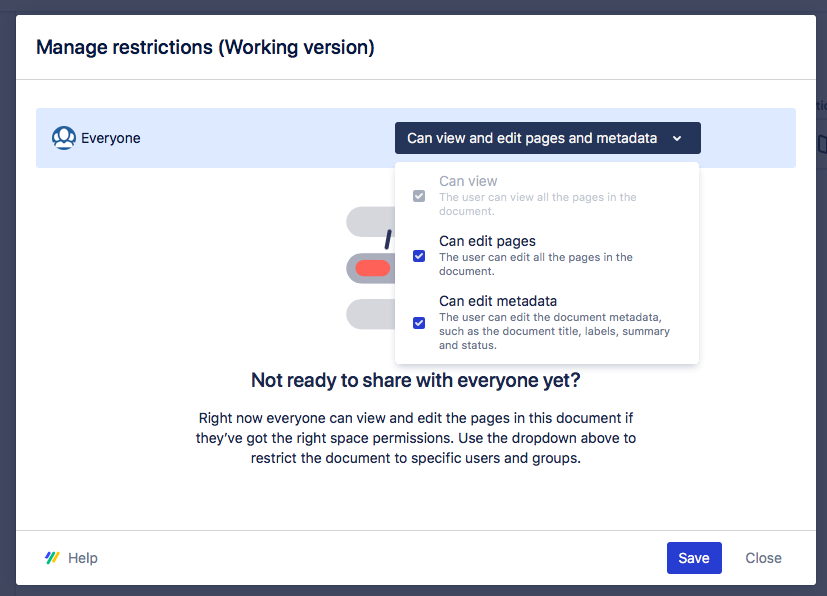
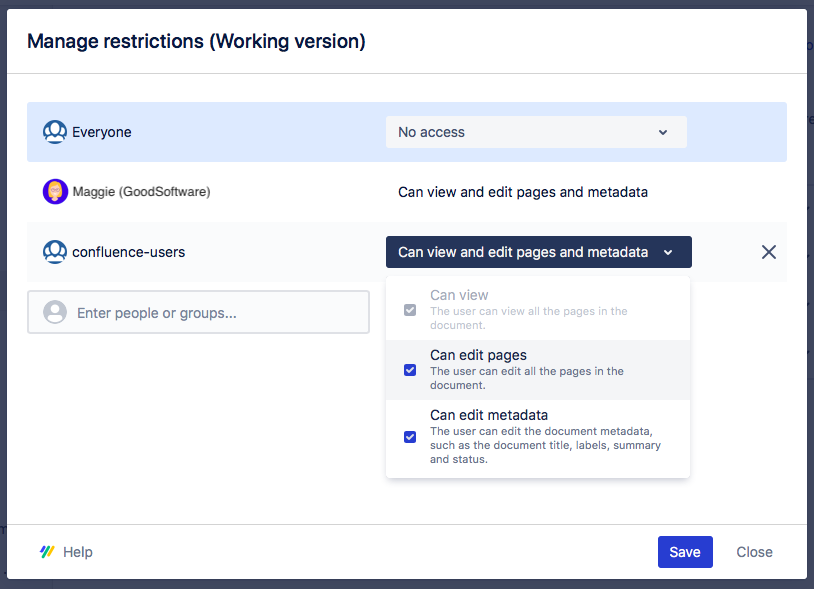
Select the restrictions to apply to groups or individuals.
-
Click Save.
Restrict a Document to Specific Users or Groups
You can restrict specific users or groups from modifying a document and its pages. To do so:
-
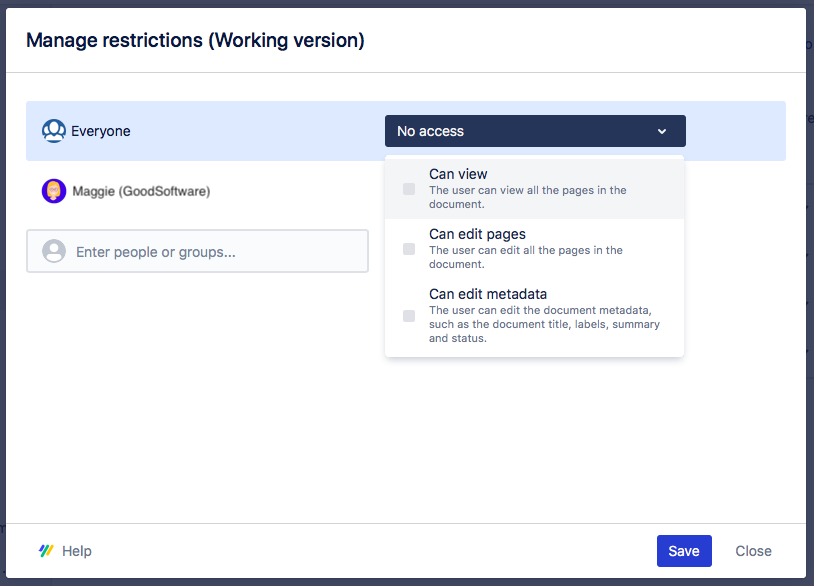
In the Manage Restrictions dialog, revoke permissions for "Everyone" by deselecting the relevant checkboxes.
-
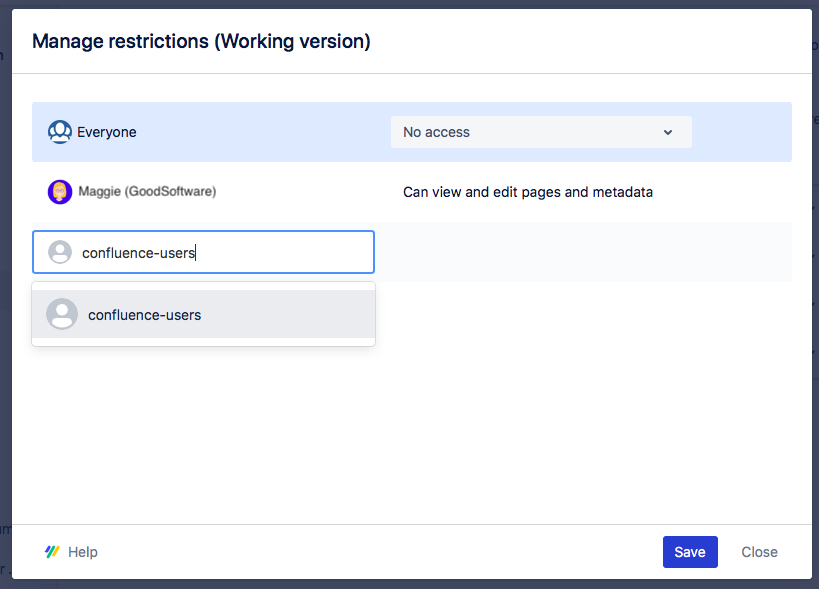
Use the user picker to add specific users or groups.
-
Assign user or group-specific restrictions by selecting the corresponding checkboxes.
-
Click Save.
Make a Version Read-Only
You can set a version to read-only either during or after saving it. A read-only version prevents unauthorized users from:
-
Updating version metadata (version name, description, workflow status, etc.).
-
Editing the content of underlying pages.
Please note
-
Users with space-level permissions to create pages can still add new pages to the version.
-
Read-only is not available for Confluence free plans.
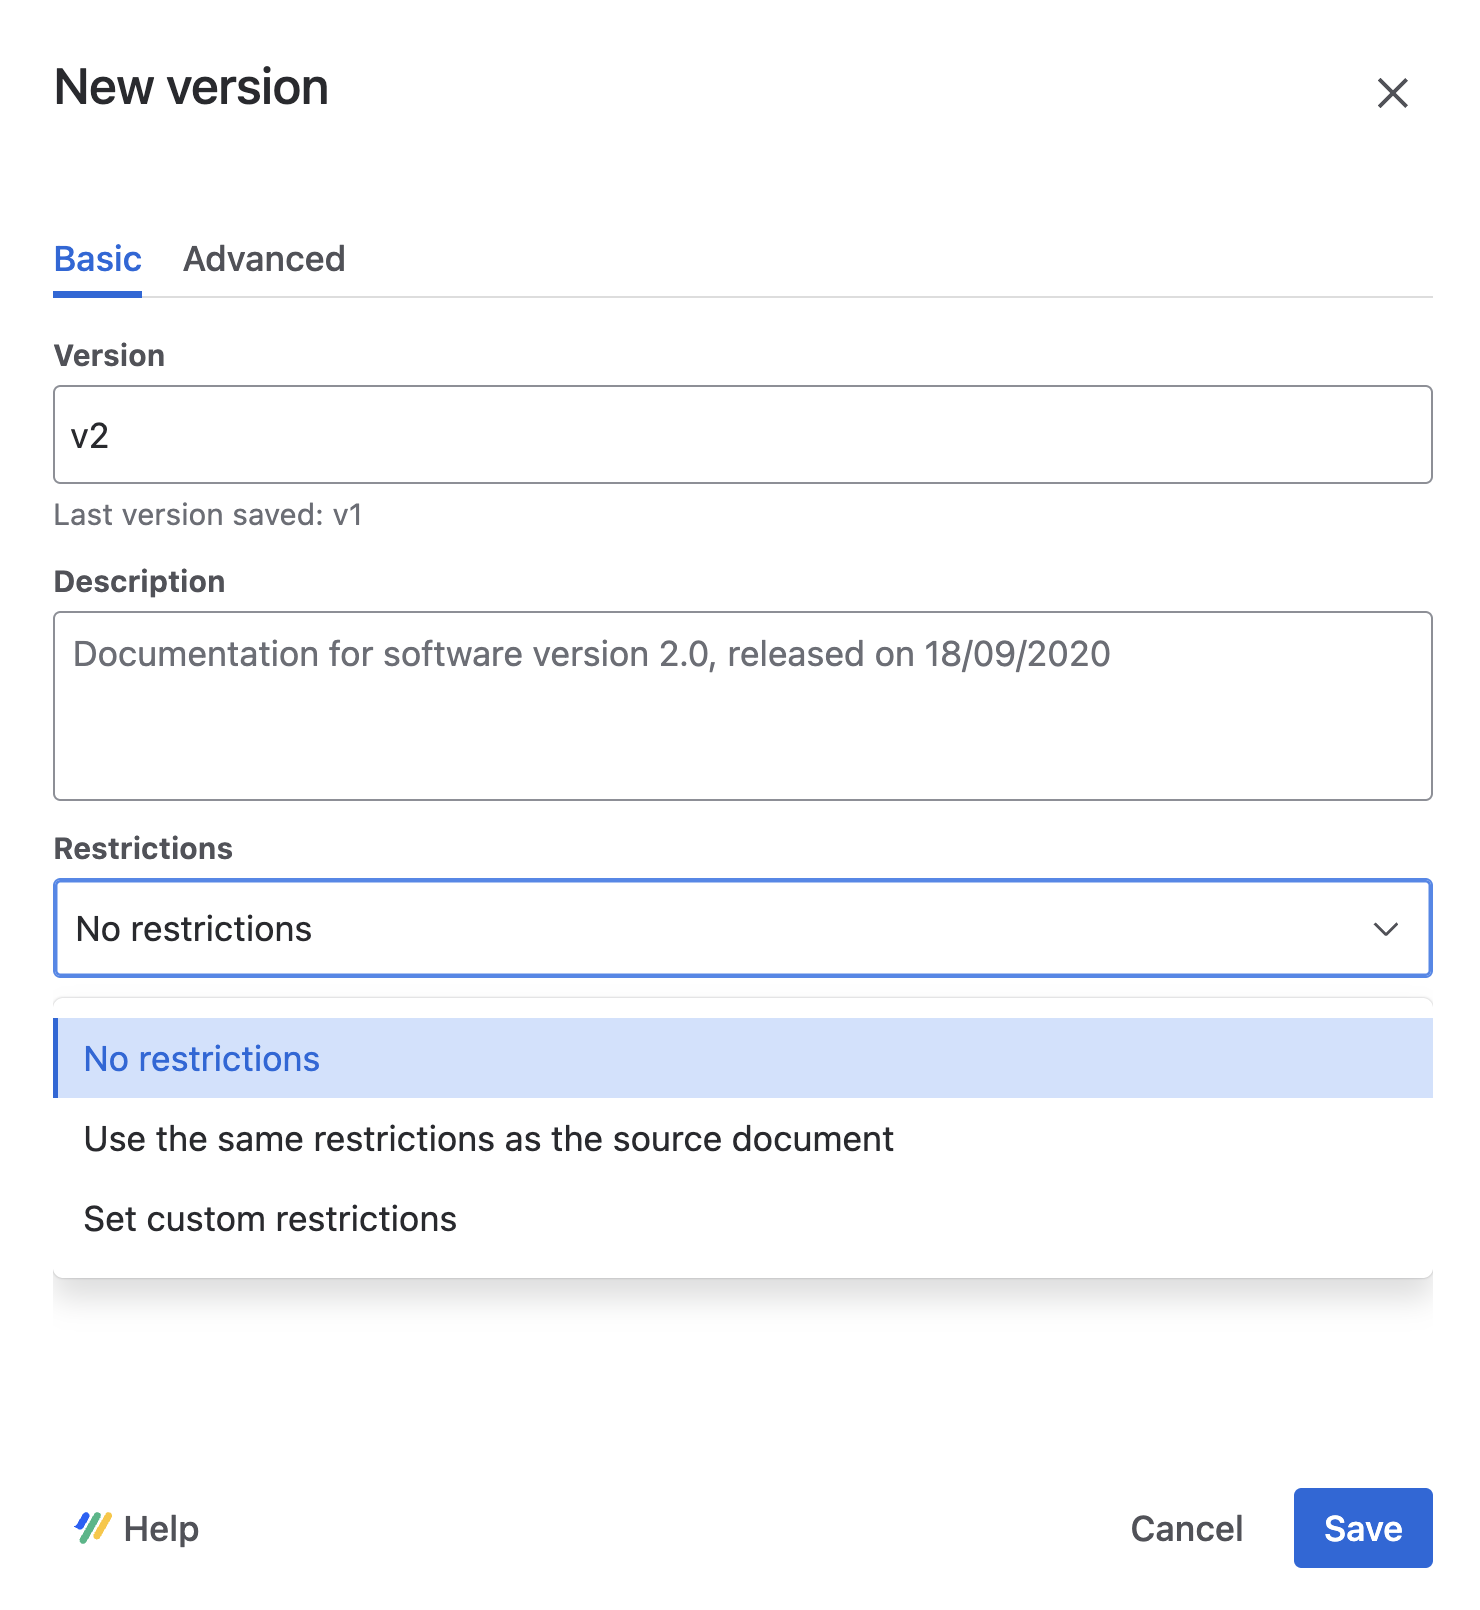
Option 1: Make a version read-only while saving
-
Click Scroll Content Manager in the Apps section of your sidebar.
-
Select the document from the Document Library.
-
Click Save a version and give it a name.
-
Under Restrictions, select Set custom restrictions.
-
Click Next.
-
In the restrictions dialog, for "Everyone," deselect Can edit pages and Can edit metadata.
-
Click Save.
The new version is now read-only and can only be edited by you.
Option 2: Make a version read-only after saving
-
Click Scroll Content Manager in the Apps section of your sidebar.
-
Select the document from the Document Library.
-
Locate the version you want to restrict and click Manage restrictions (pad lock icon) in the Actions column.
-
In the restrictions dialog, deselect Can edit pages and Can edit metadata for "Everyone."
-
Click Save.