Another important navigation element is a table of contents (TOC) – a list of all the headings in your document.
Add a Table of Contents
-
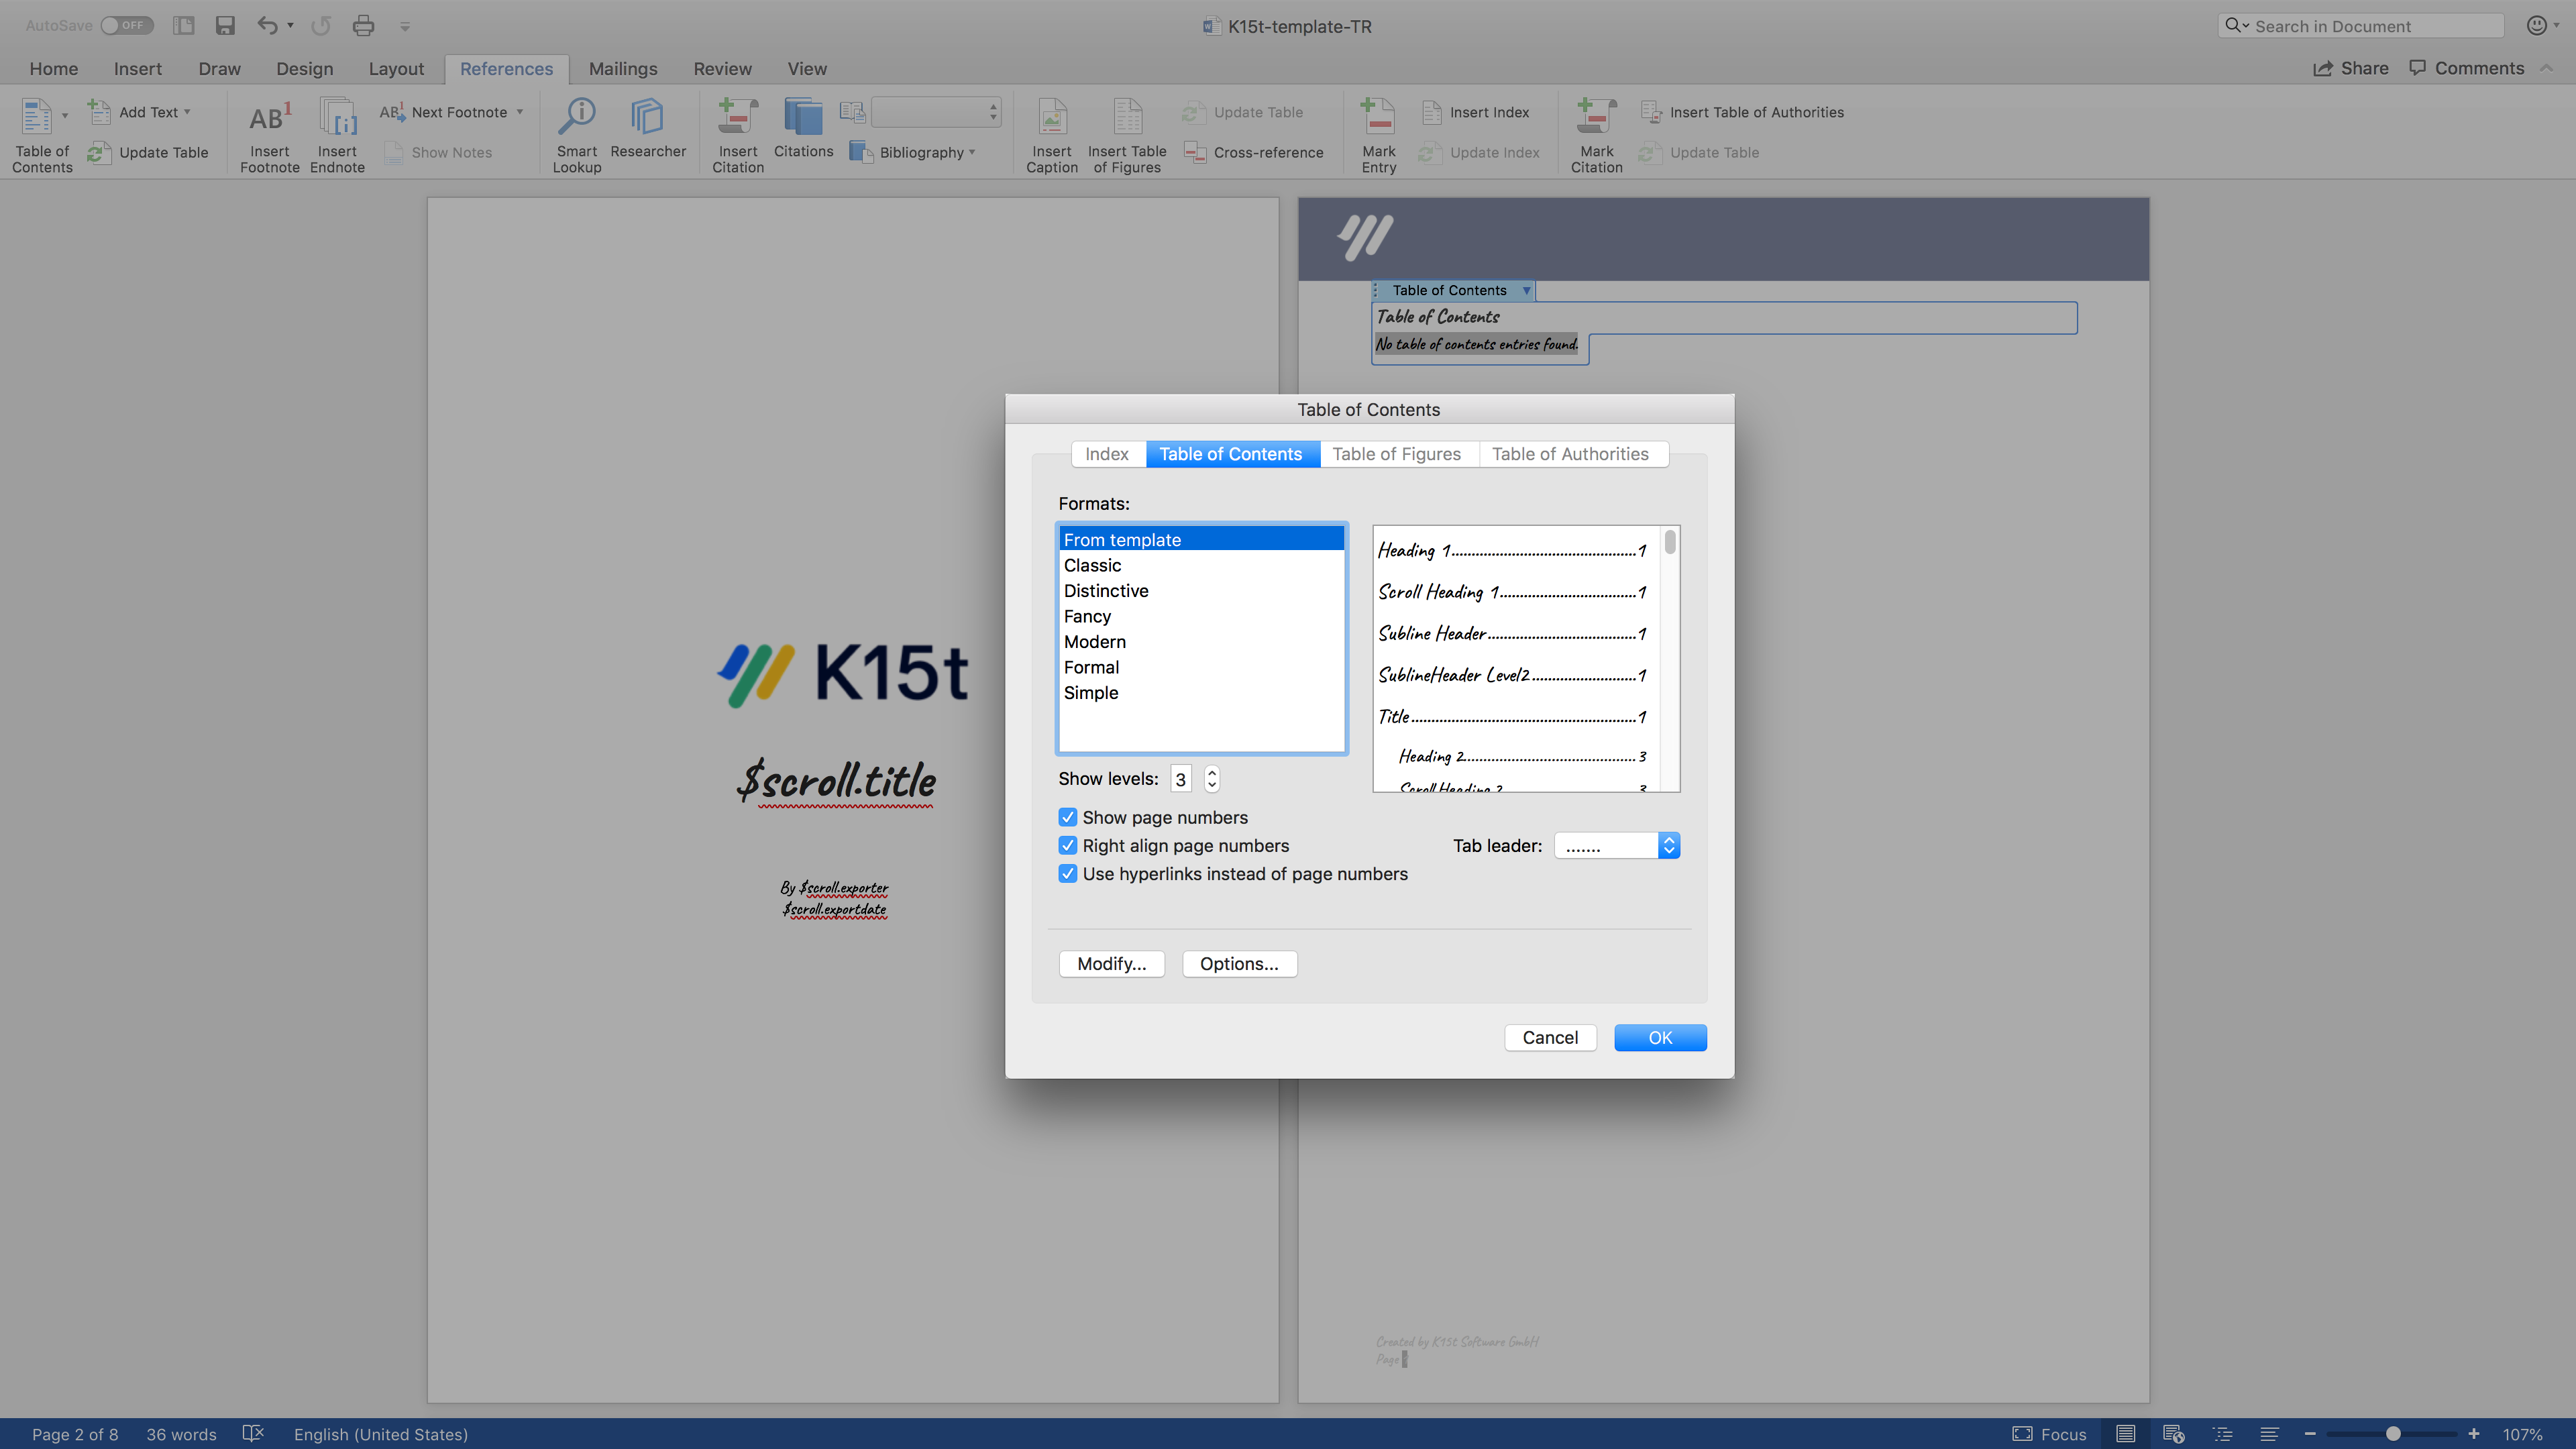
In Word, select References > Table of Contents > Insert Table of Contents
-
Choose one of the automatic table of contents provided by Word e.g. Classic
You will then get a message from Microsoft Word, asking if you want to create a table of contents. -
After you click OK, the message No table of content entries found is displayed in your template, because there aren't yet any content elements which could be listed there
Style Table of Contents
You can now edit the appearance of your table of contents:

-
In the Word template, highlight the inserted Table of Content and select References > Table of Contents > Custom Table of Contents
-
The Table of Contents dialog box will then appear and you can begin to format the inserted Table of Content
-
Click Modify in order to define the styling for the TOC heading levels
-
For each TOC heading level you can change the font, font size, color and other properties. For example, by choosing TOC 1 and then selecting Modify, you can style how heading level 1 of the Table of Contents will be formatted.
For detailed information, see Microsoft Office Help . -
Repeat steps 3 to 4 for the other TOC heading level styles and then select OK. You will then need to confirm that you wish to Replace this table of Contents
-
Save the Word template
If you later export a page with some headings, the table of contents will be populated with the headings of the defined heading level.
Get your exported Confluence content in the right place
By default, Scroll Word Exporter places your exported Confluence content at the beginning of the document. Of course, in this case, you would not want to the content to begin before this structural element.
To avoid this happening, insert the placeholder $scroll.content in the position where you want the content to start.
