Skip table of contents

Create and customize your own PDF template

Work through the steps below to create your own PDF template and customize its look and feel using the PDF Template Editor. In this three-part tutorial you will learn the basics of the PDF Template Editor, customize the cover page, add a header and footer, update text styles, customize page breaks, and test out your new template.

Before you begin

Make sure you have completed the following tutorials, in order, before working through this page -

Create a new PDF template

1

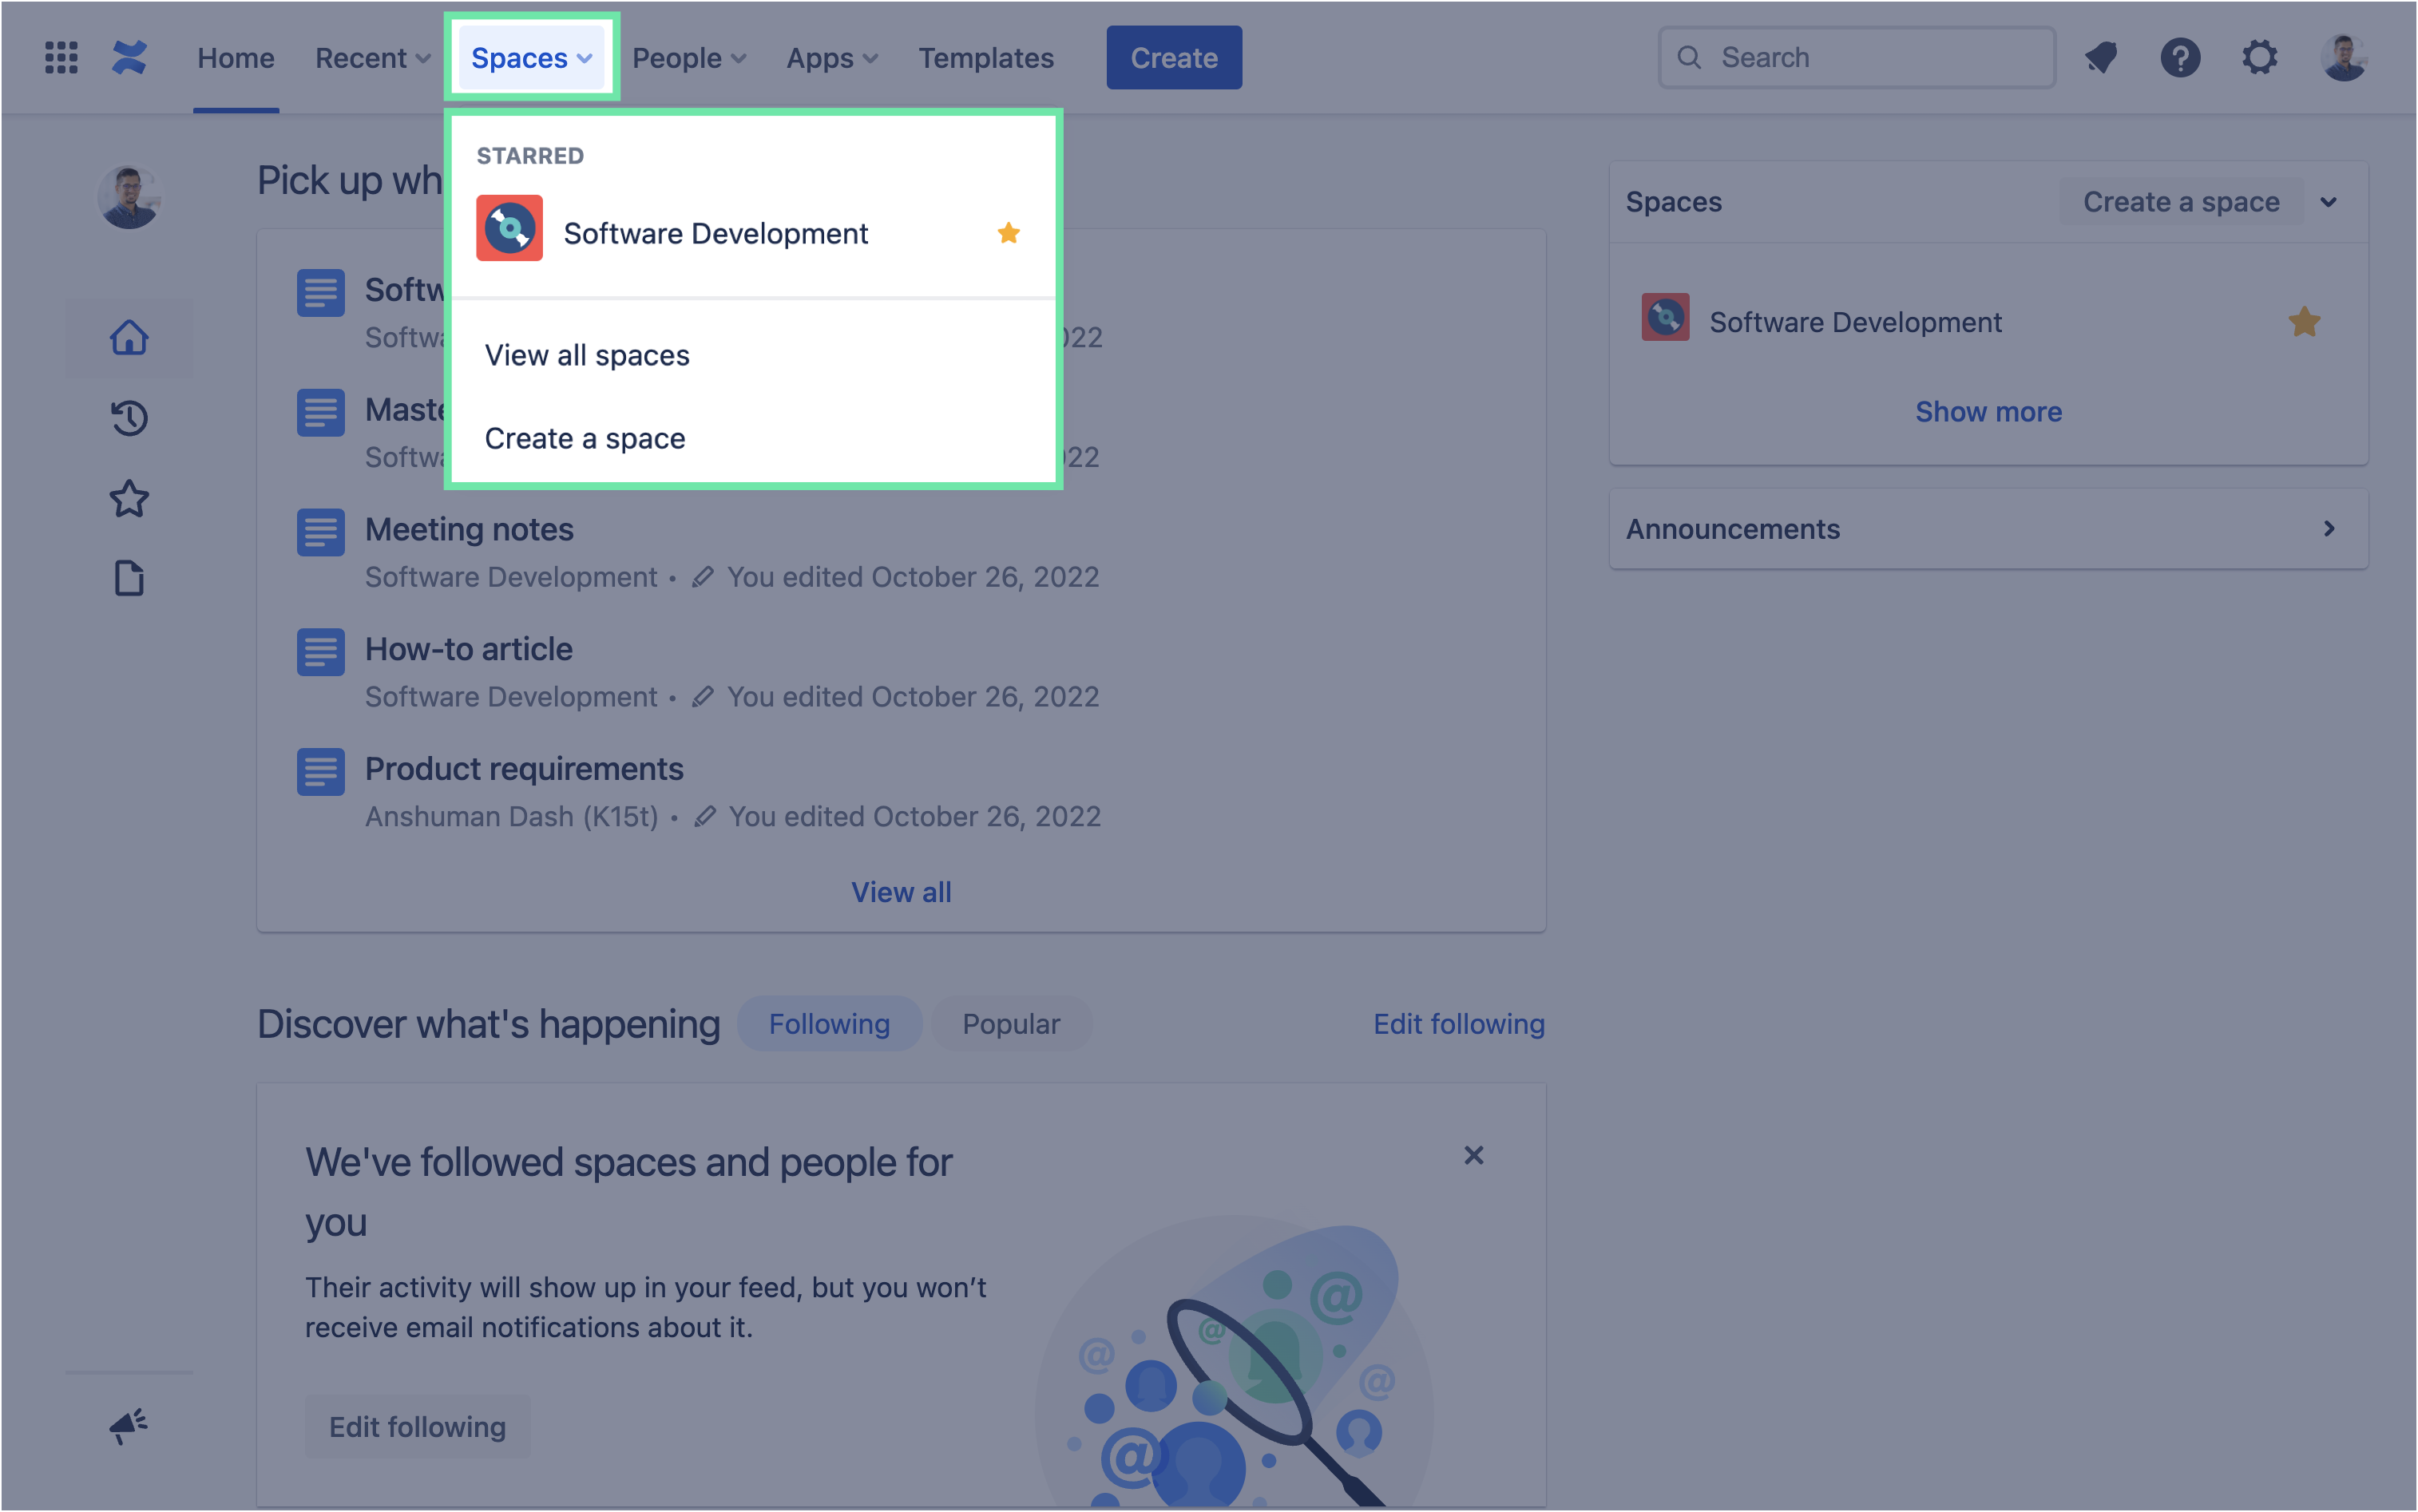
To begin, navigate to the space that you had created in Getting Started -

  • From the Confluence menu, click Spaces → <YOUR SPACE NAME>

2

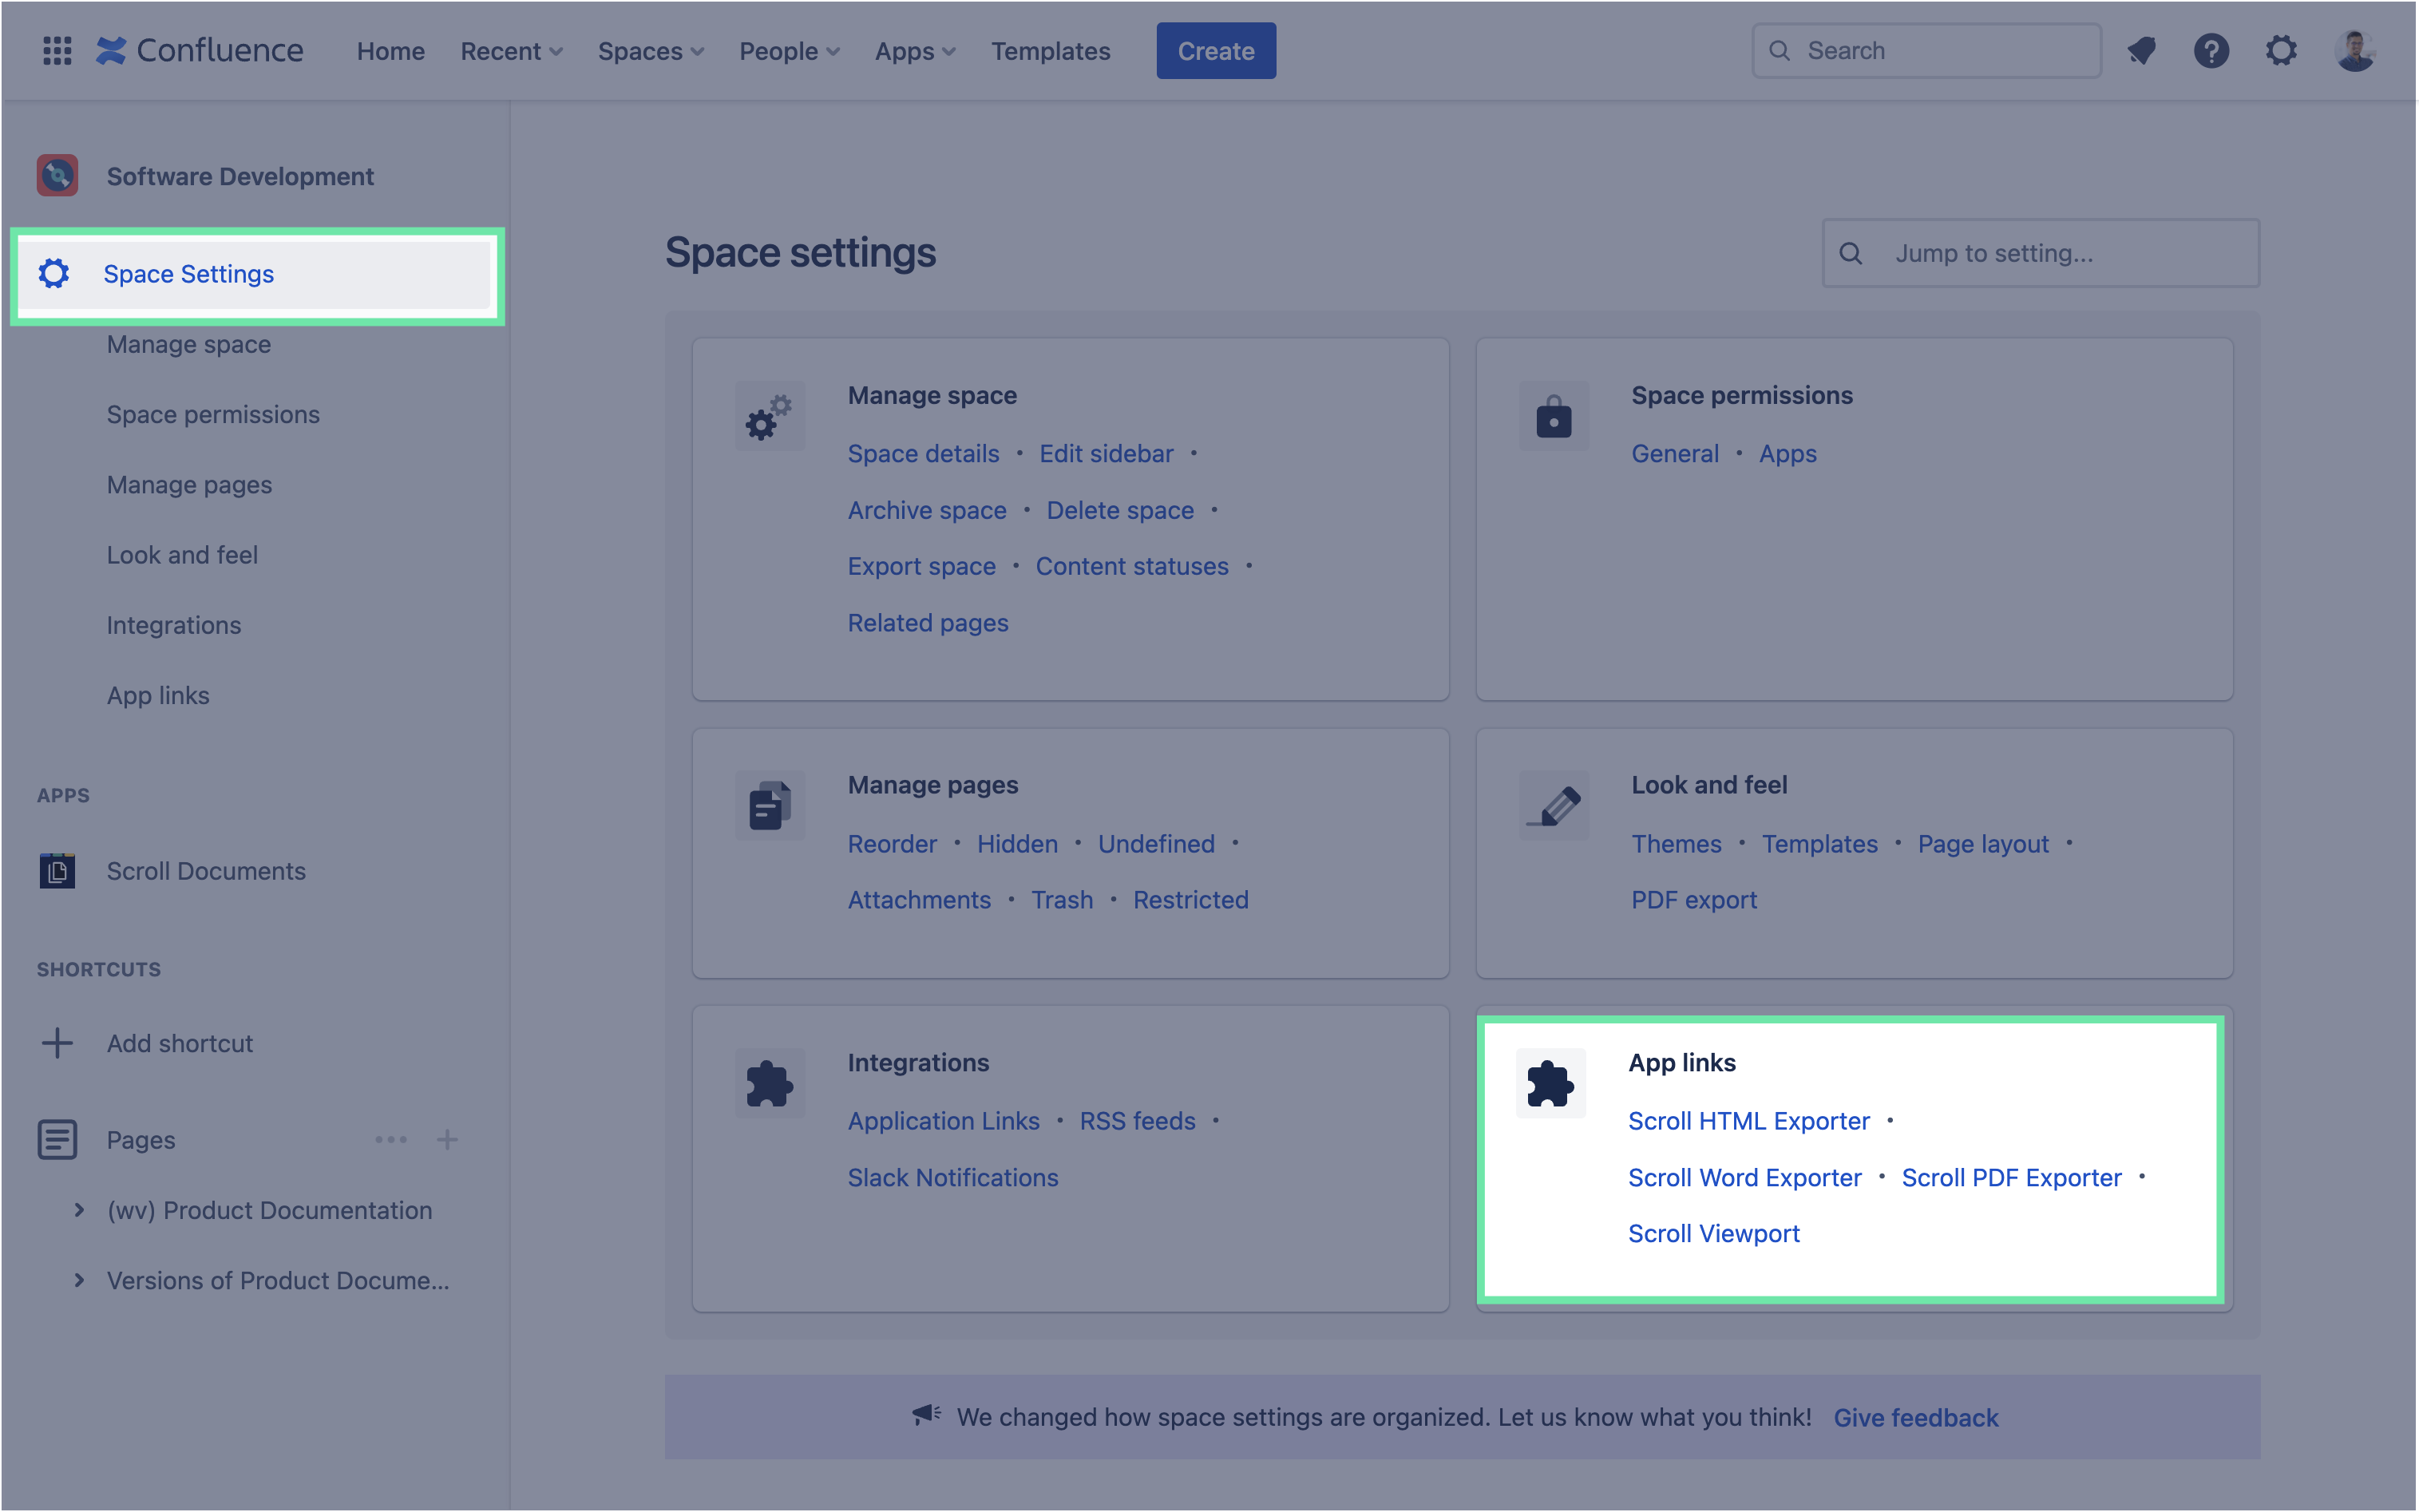
Next, open the PDF Template Gallery -

  • From the space menu click Space settings → App links → Scroll PDF Exporter

(question) Can’t see the App links? Make sure that you have installed the Scroll PDF Exporter app and have the Space administrator permission.

3

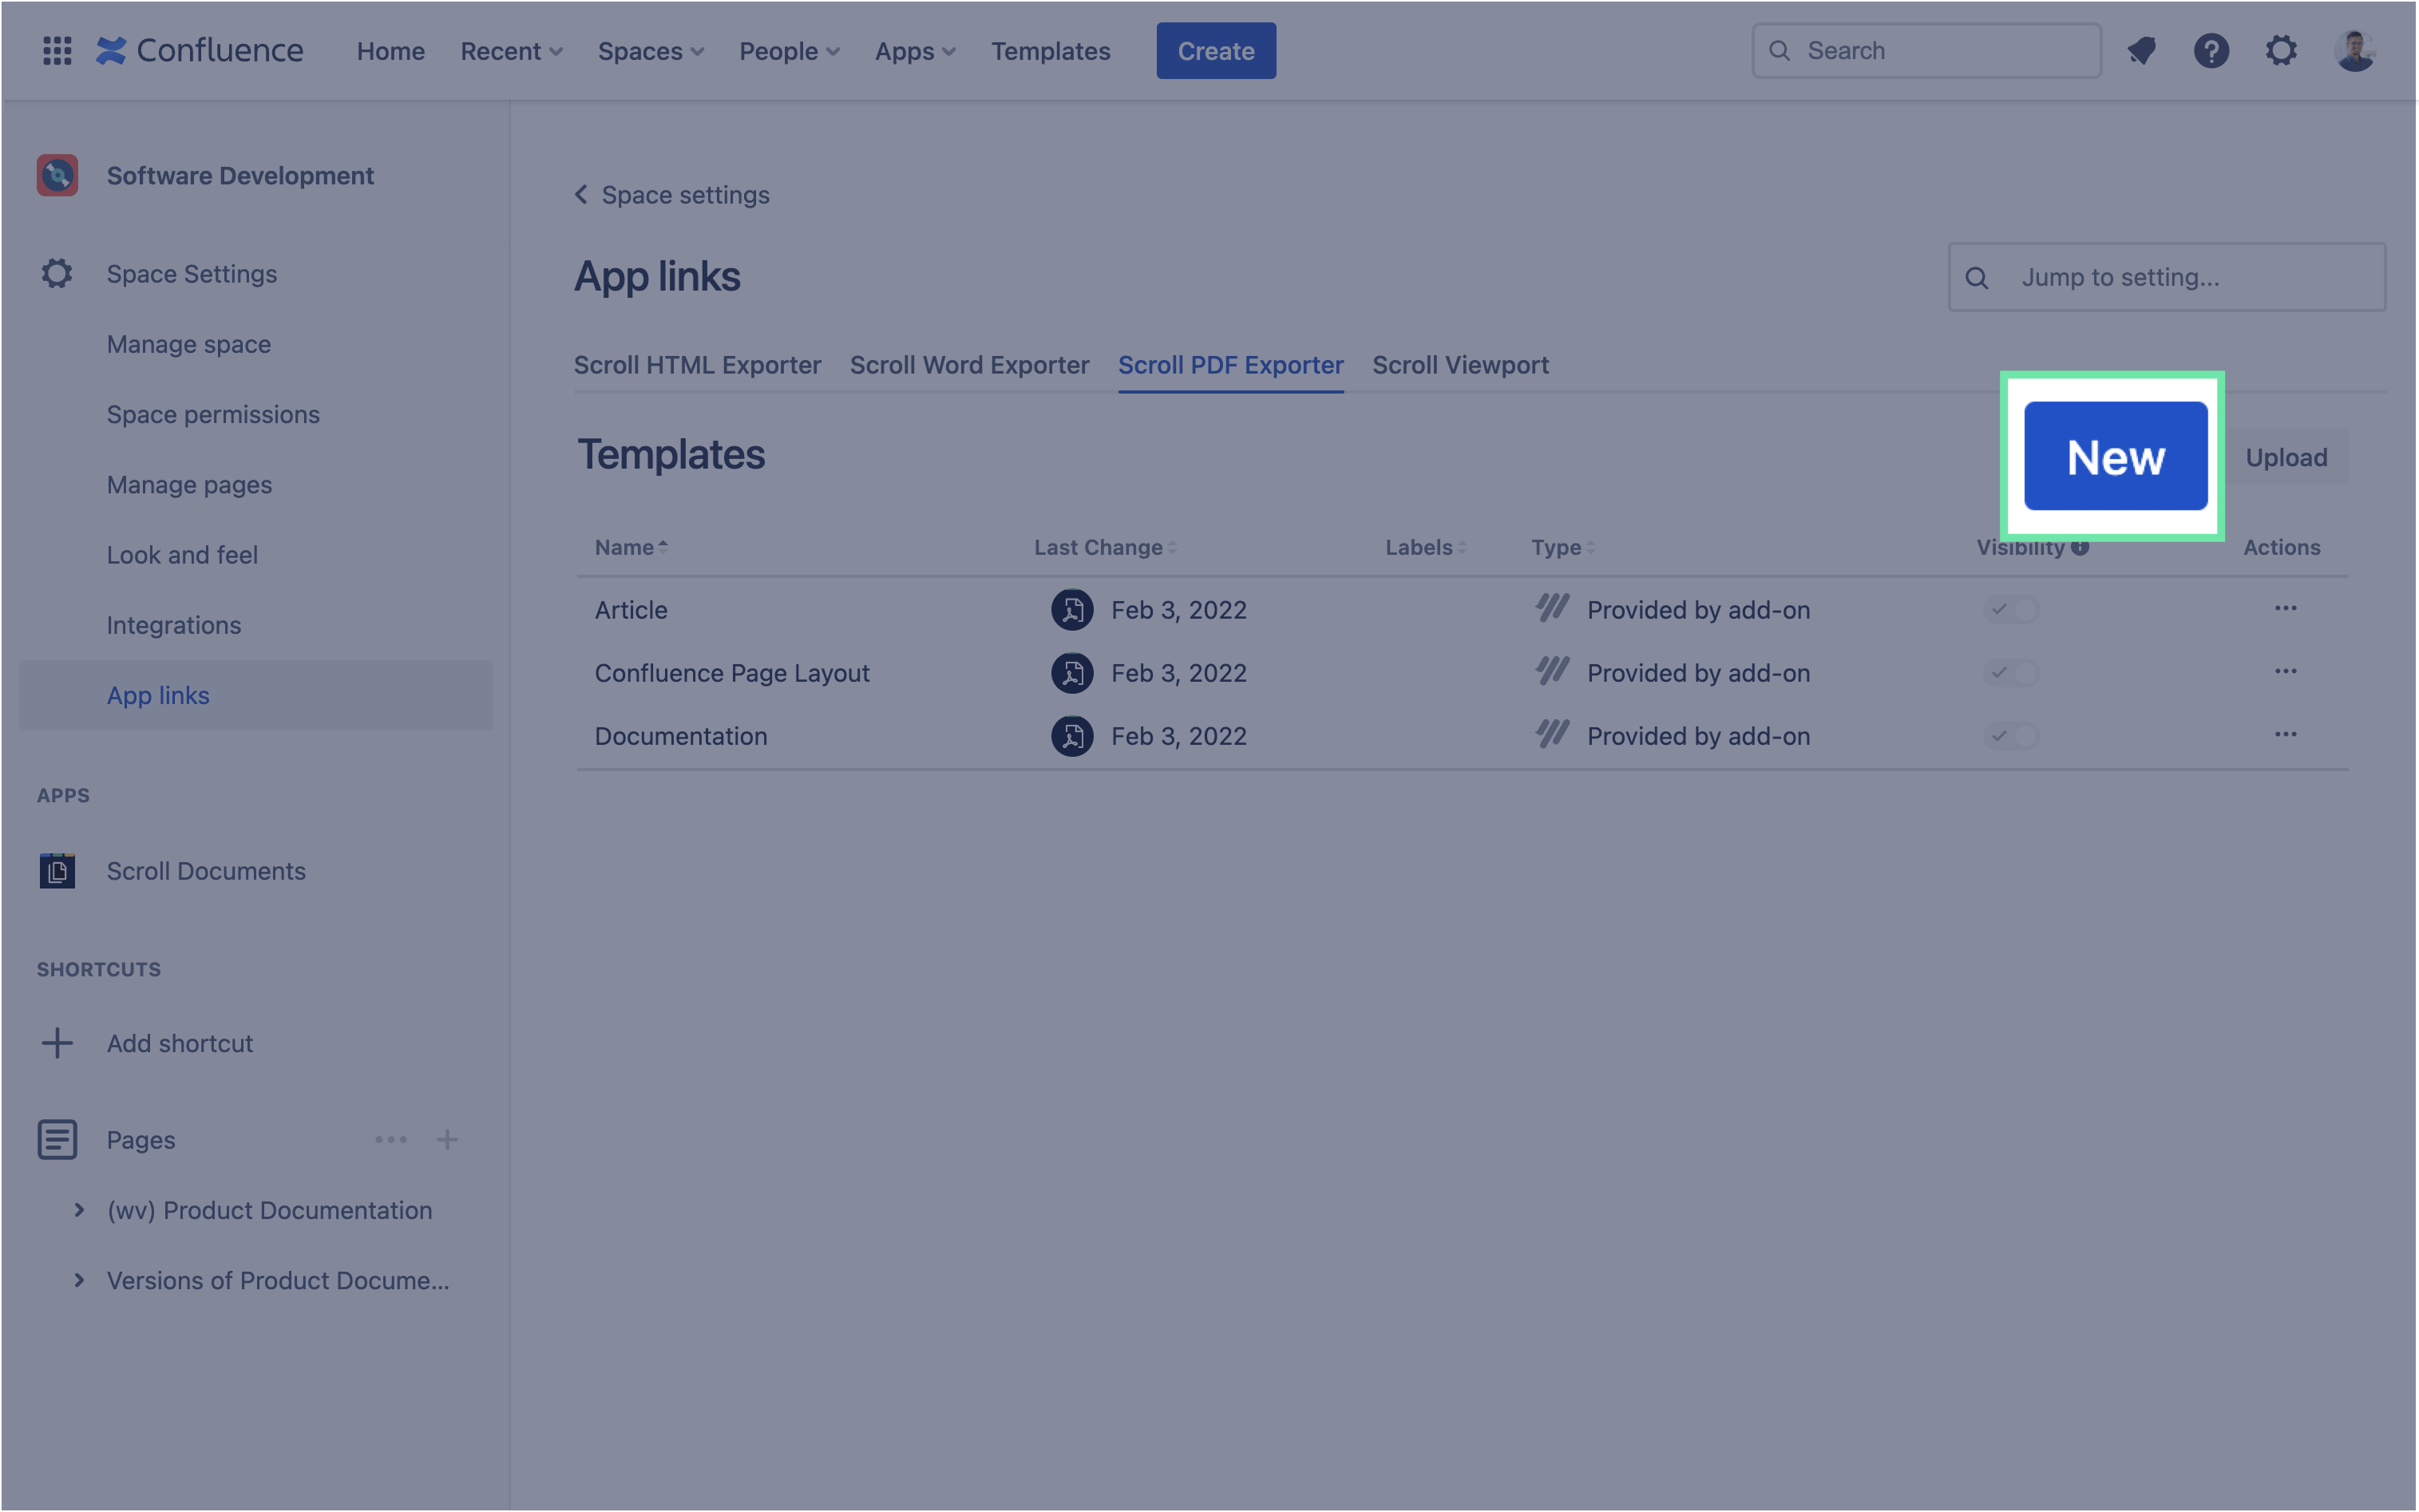
Now you are in the PDF Template Gallery.

To create a new template click New.

This will create a new template with some default settings and open the Template Editor.

4

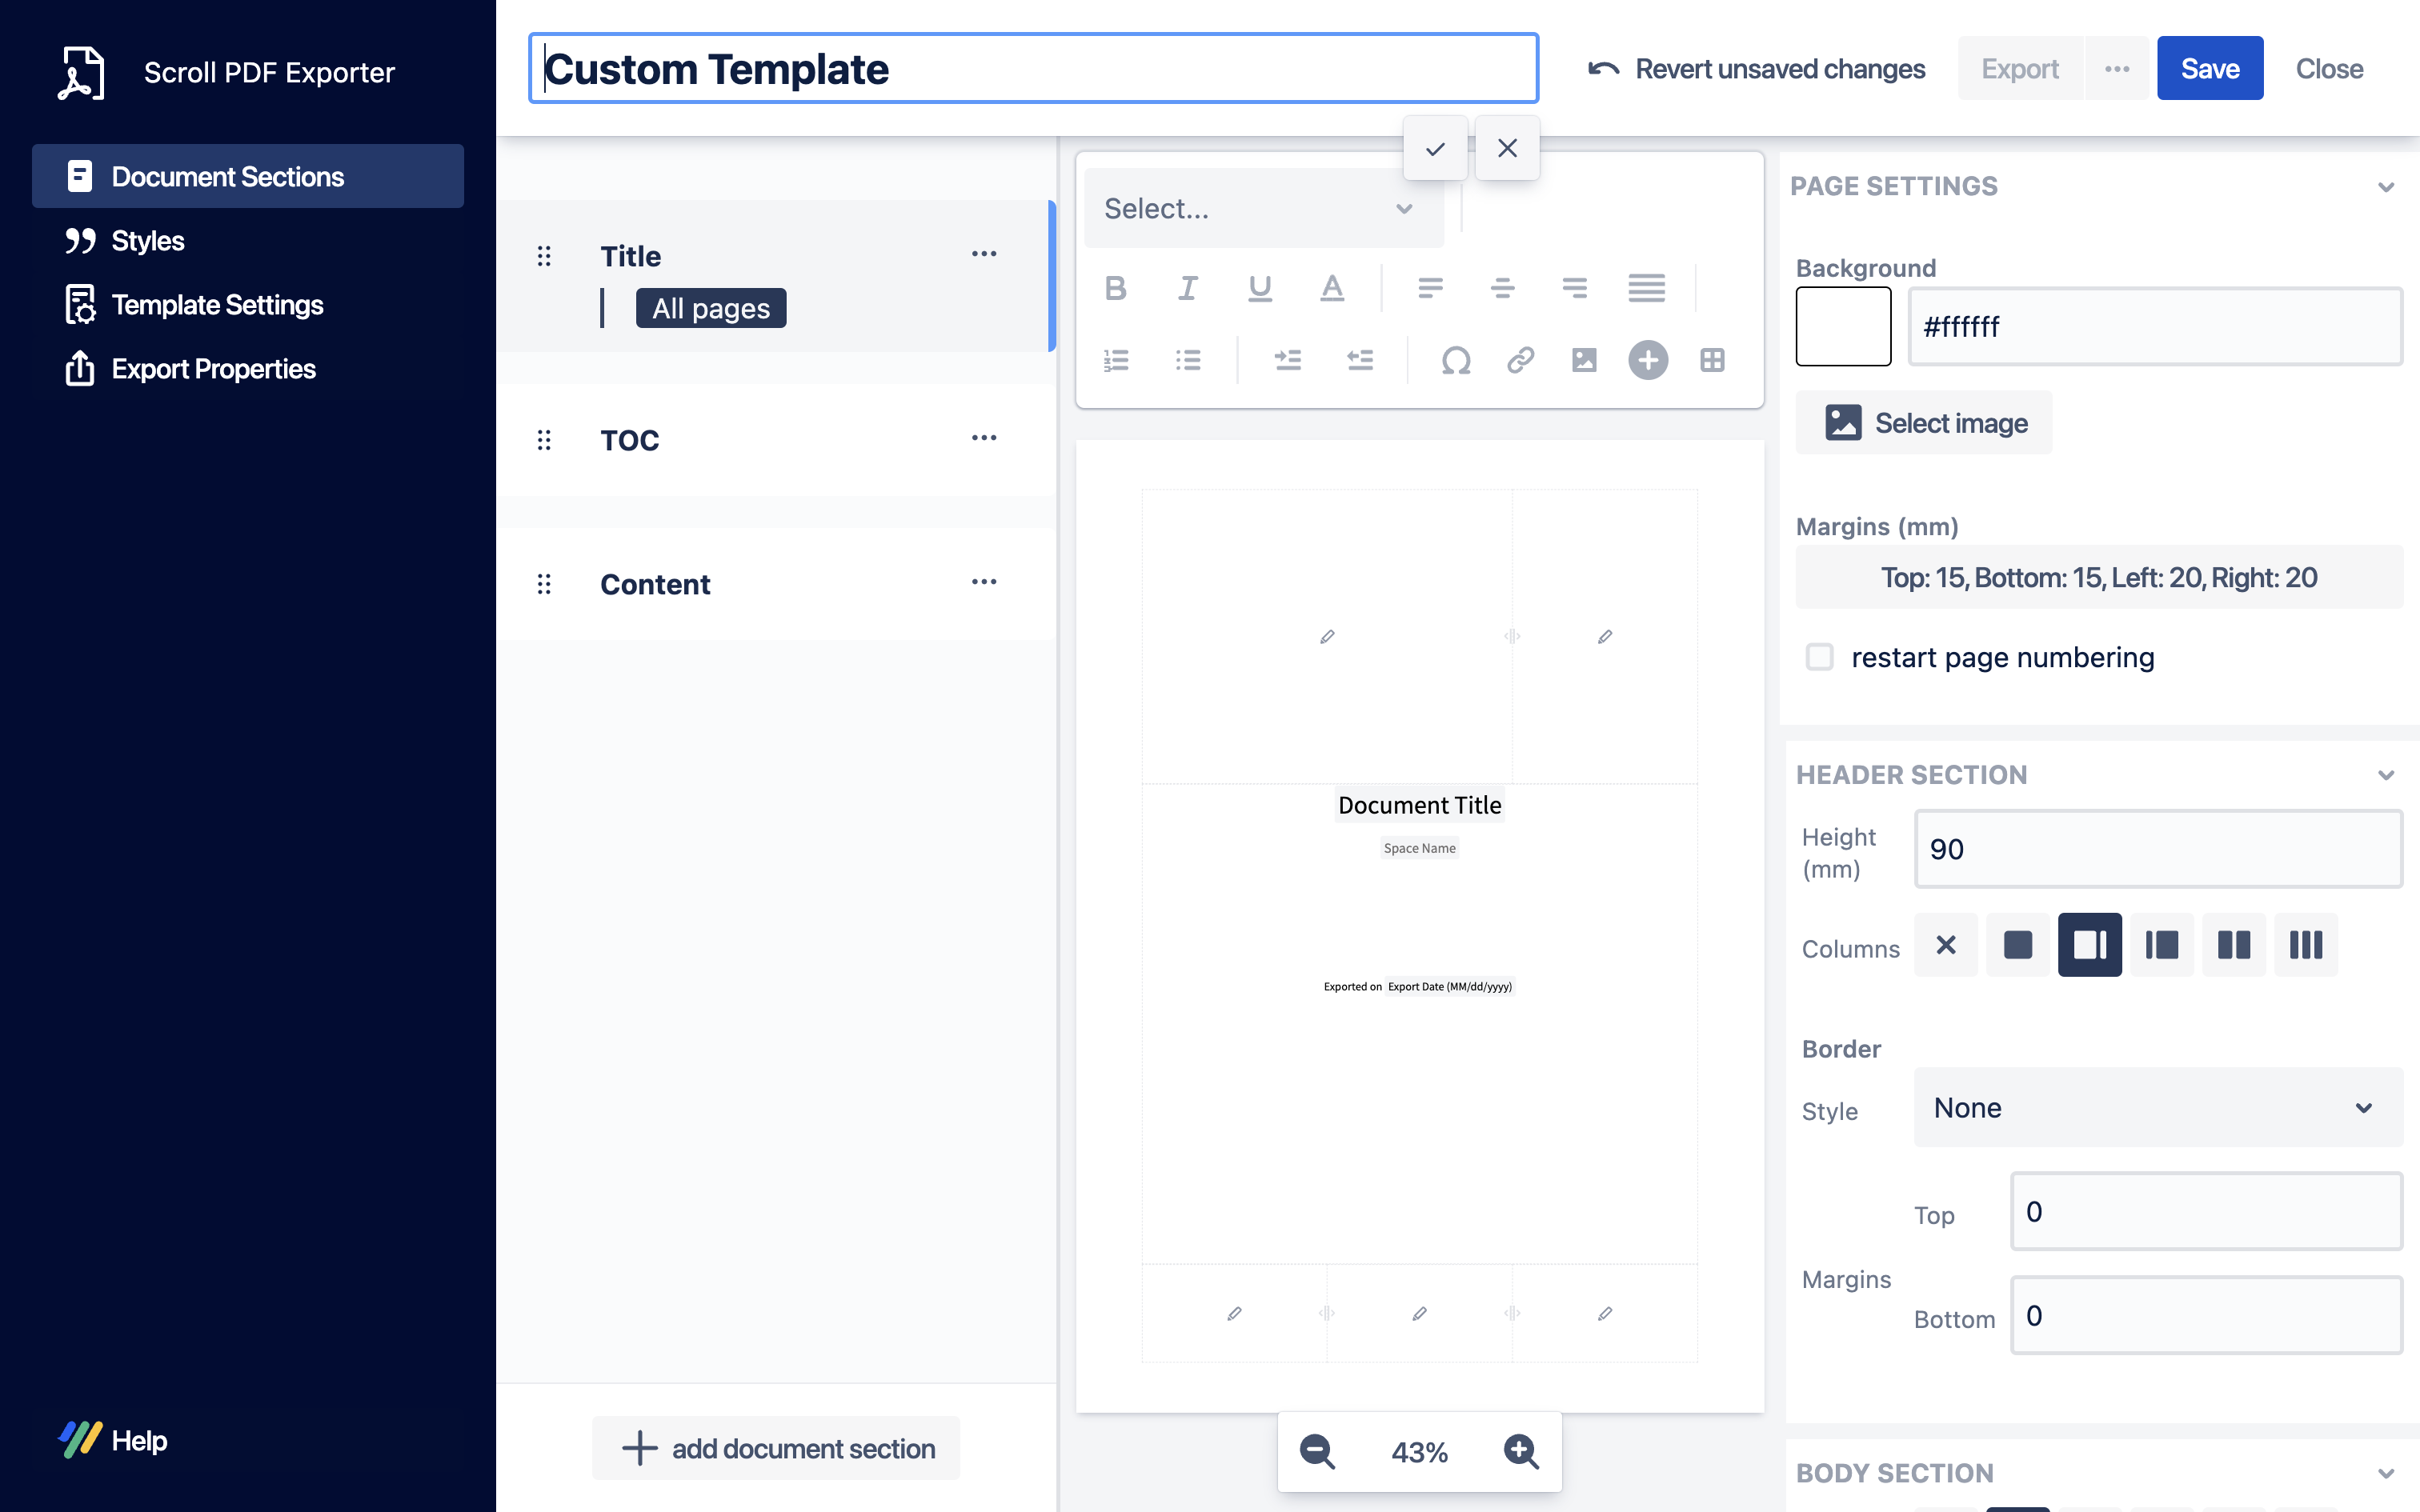
In the Template Editor, start by giving your template a meaningful name -

  • Click on the text on the top that says My Template.

  • Clear the field and type Custom Template, then hit Enter.

  • Click Save

Congratulations! 🎉

You have created your first custom template.

➡️ Next, we will customize the template.

Customize the PDF template

Customize the title page

1

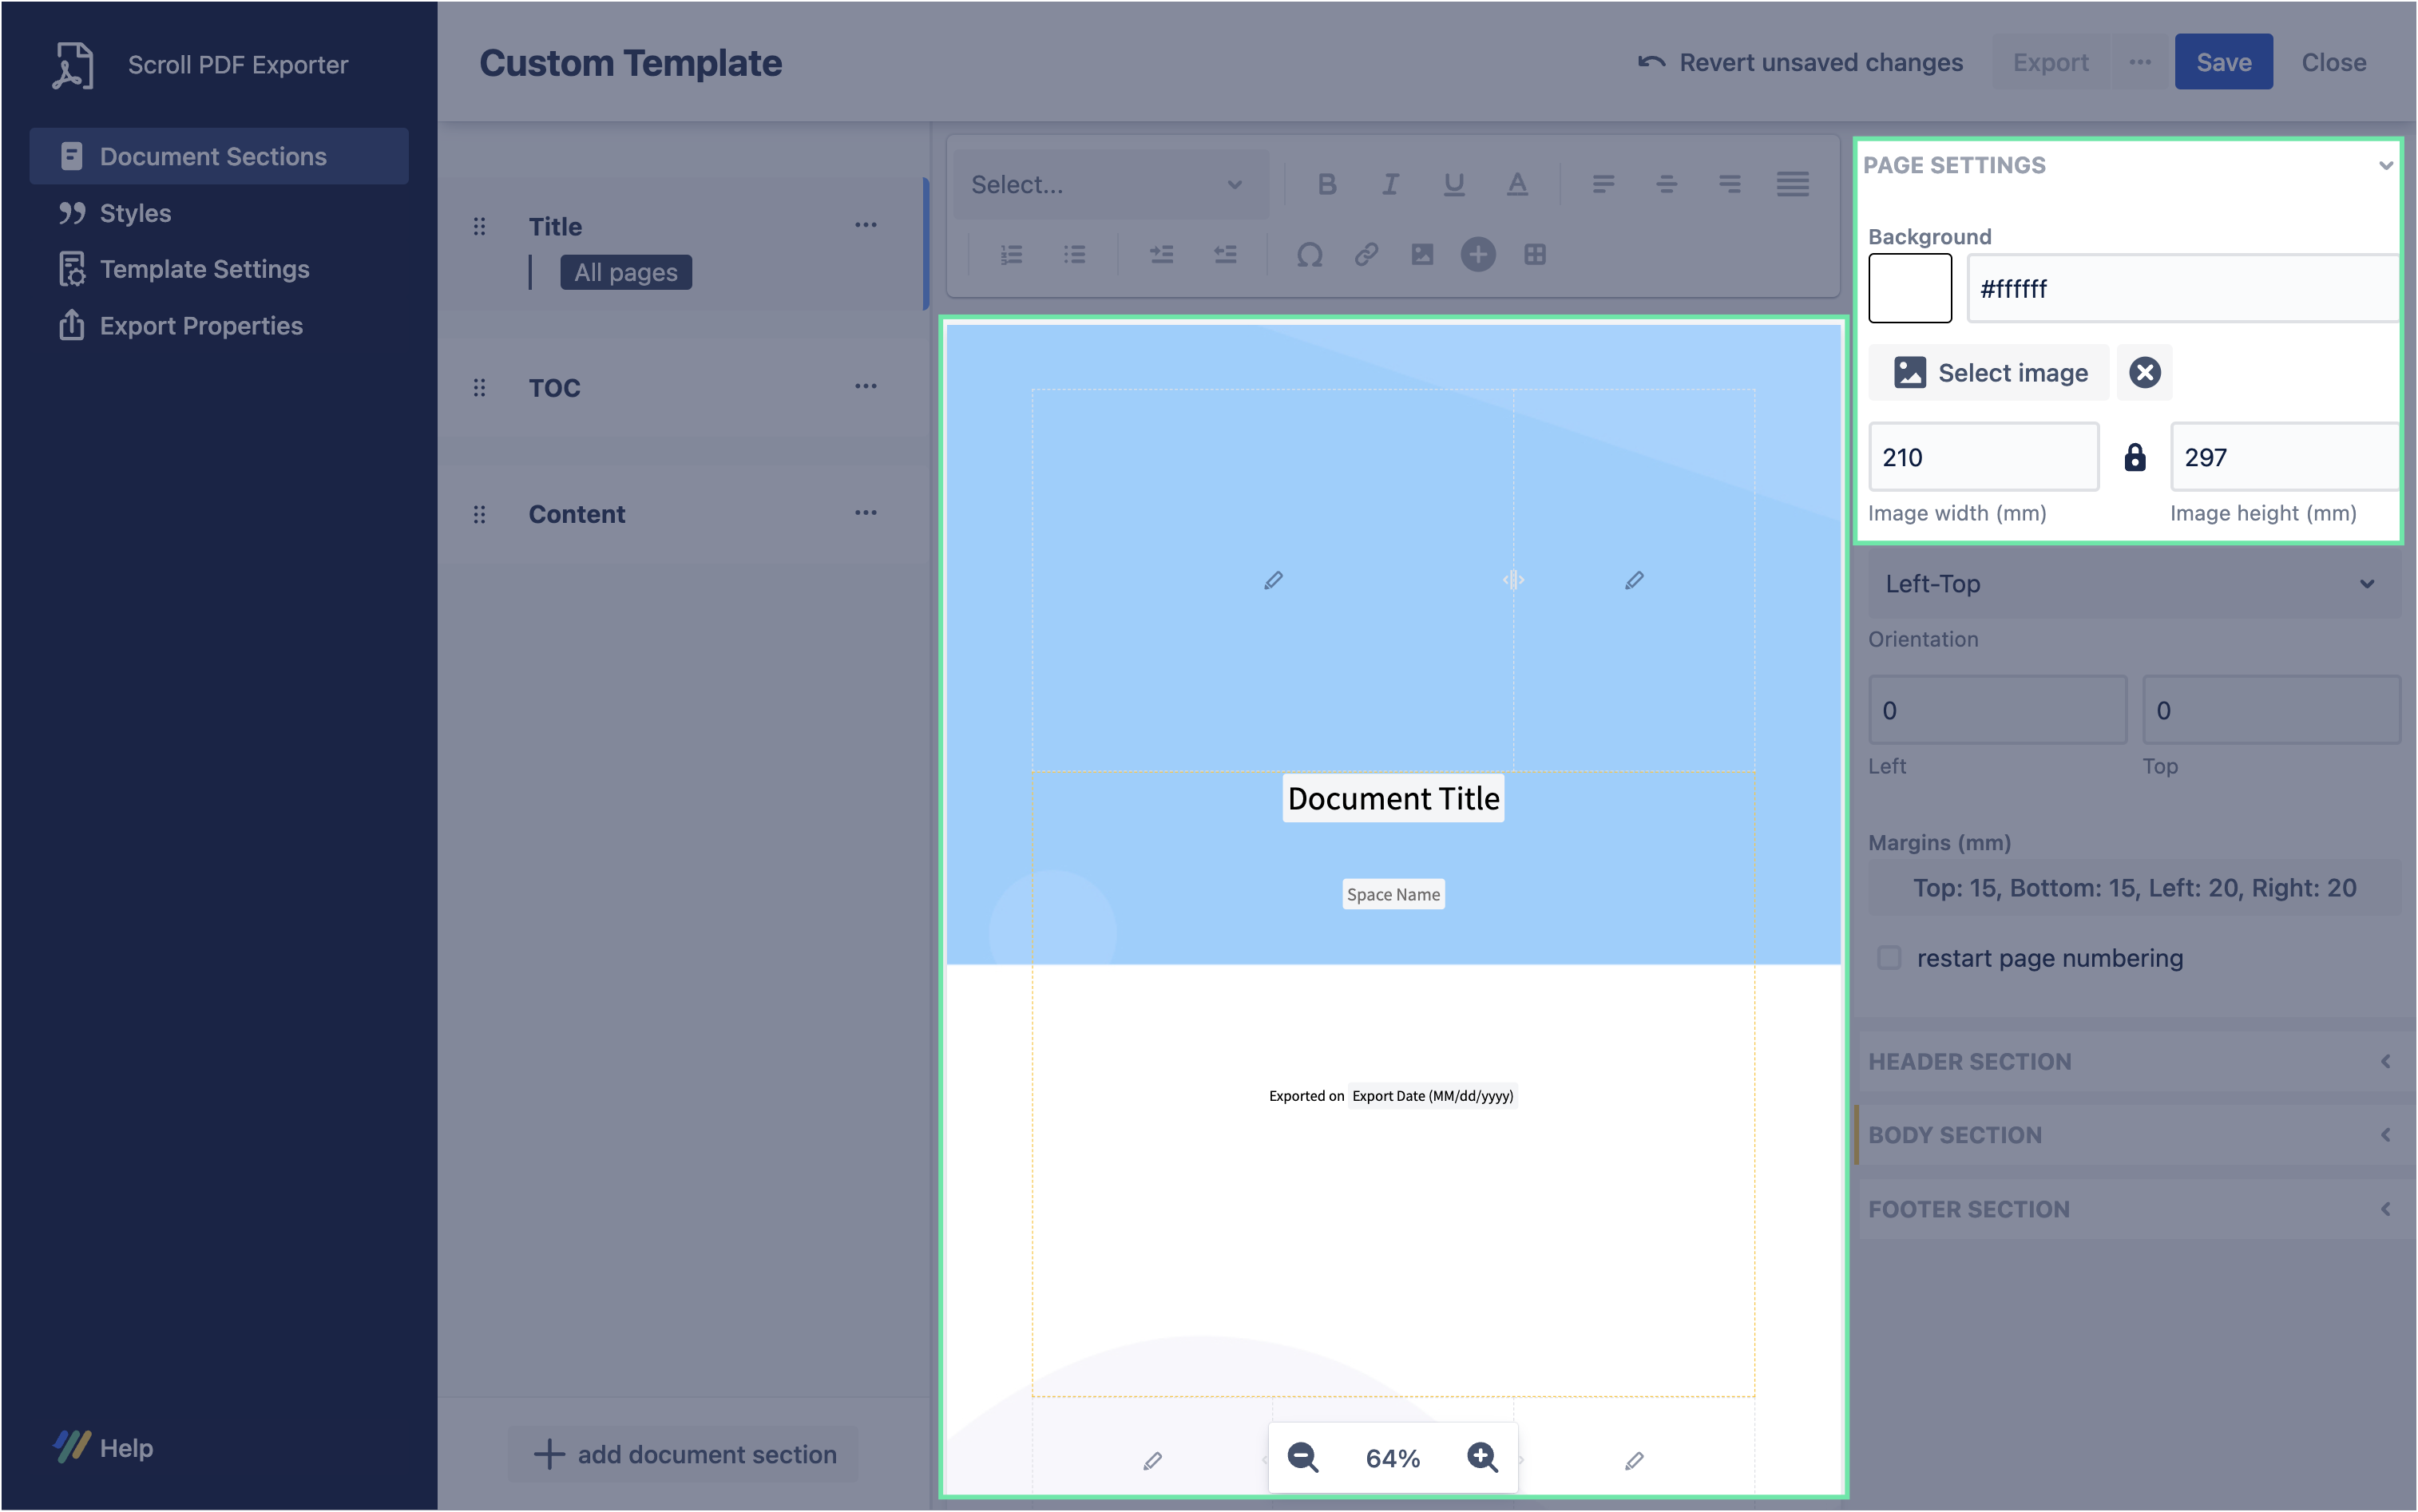
Add a background image

  • In the Document Sections, click Title

  • In the Page Settings panel, click Select Image

  • In the pop-up that appears, upload your image, then click Ok

ℹ️ Tip: It is recommended to use an image of dimension 210 mm X 297 mm.

(question) The image doesn’t fit? Use the Image width and Image height fields to adjust the dimension of your image.

2

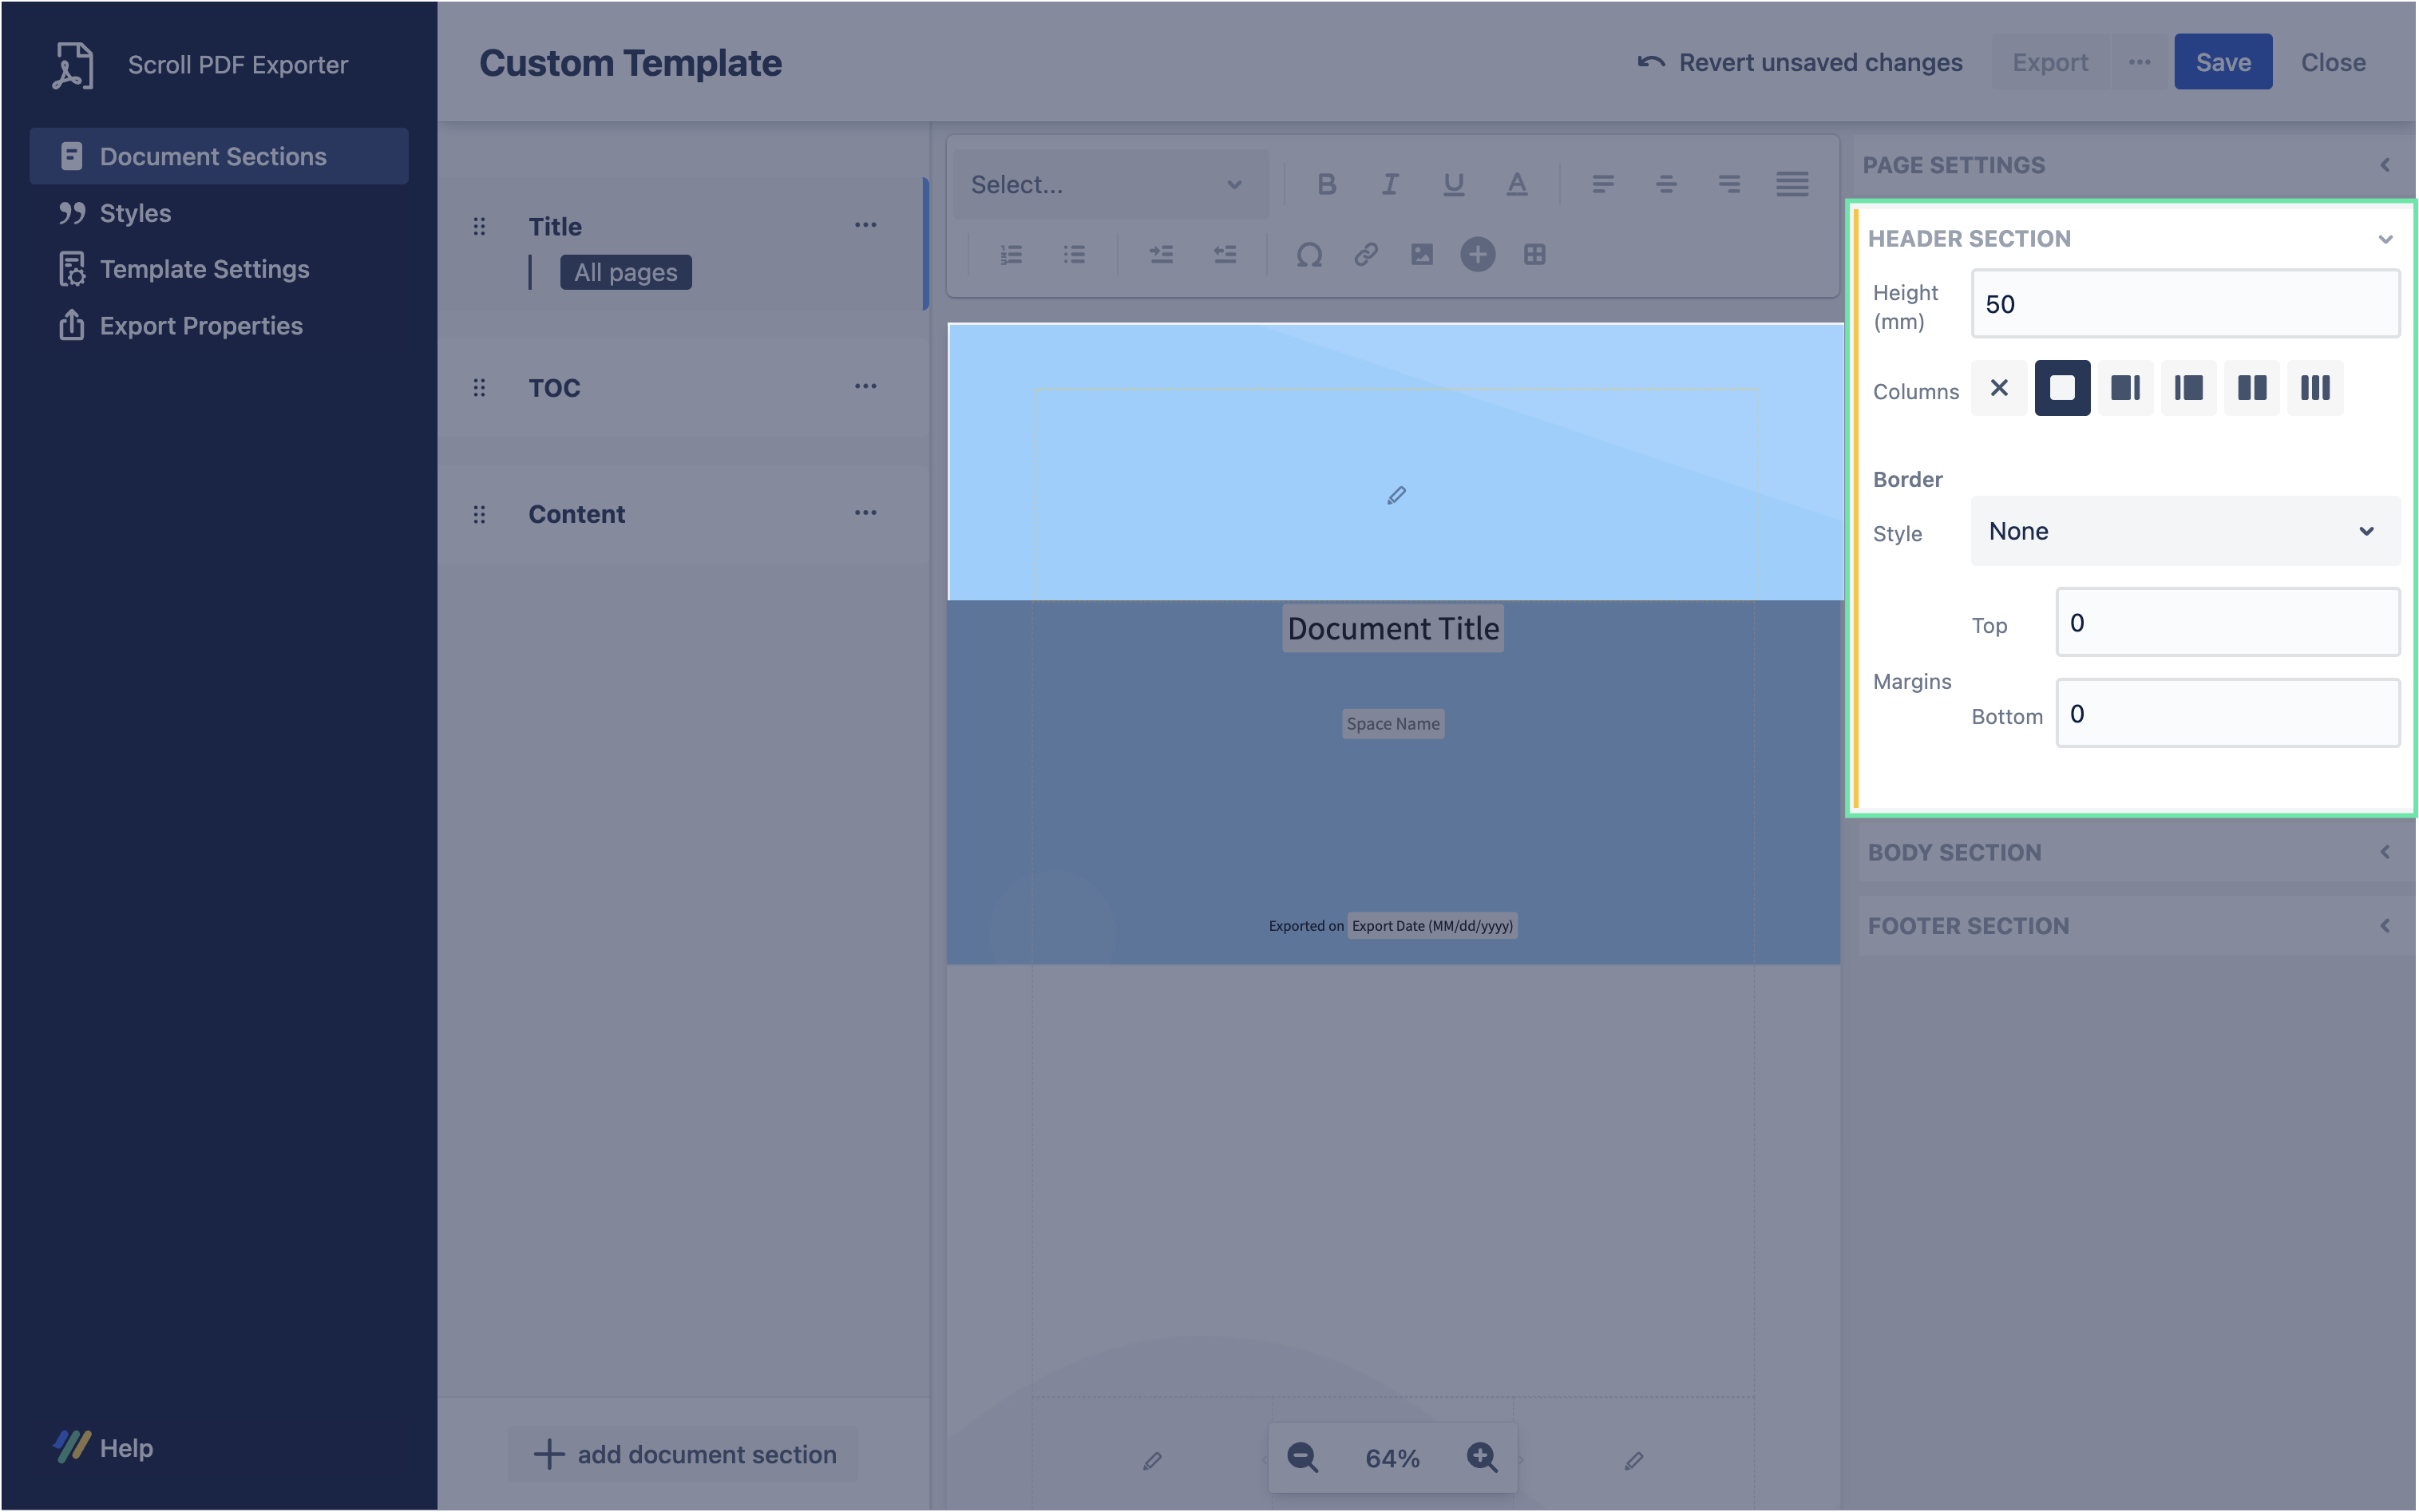
Update the header layout

  • Expand the Header Section and change the following fields -

    • Height: 50mm

    • Columns: One column

3

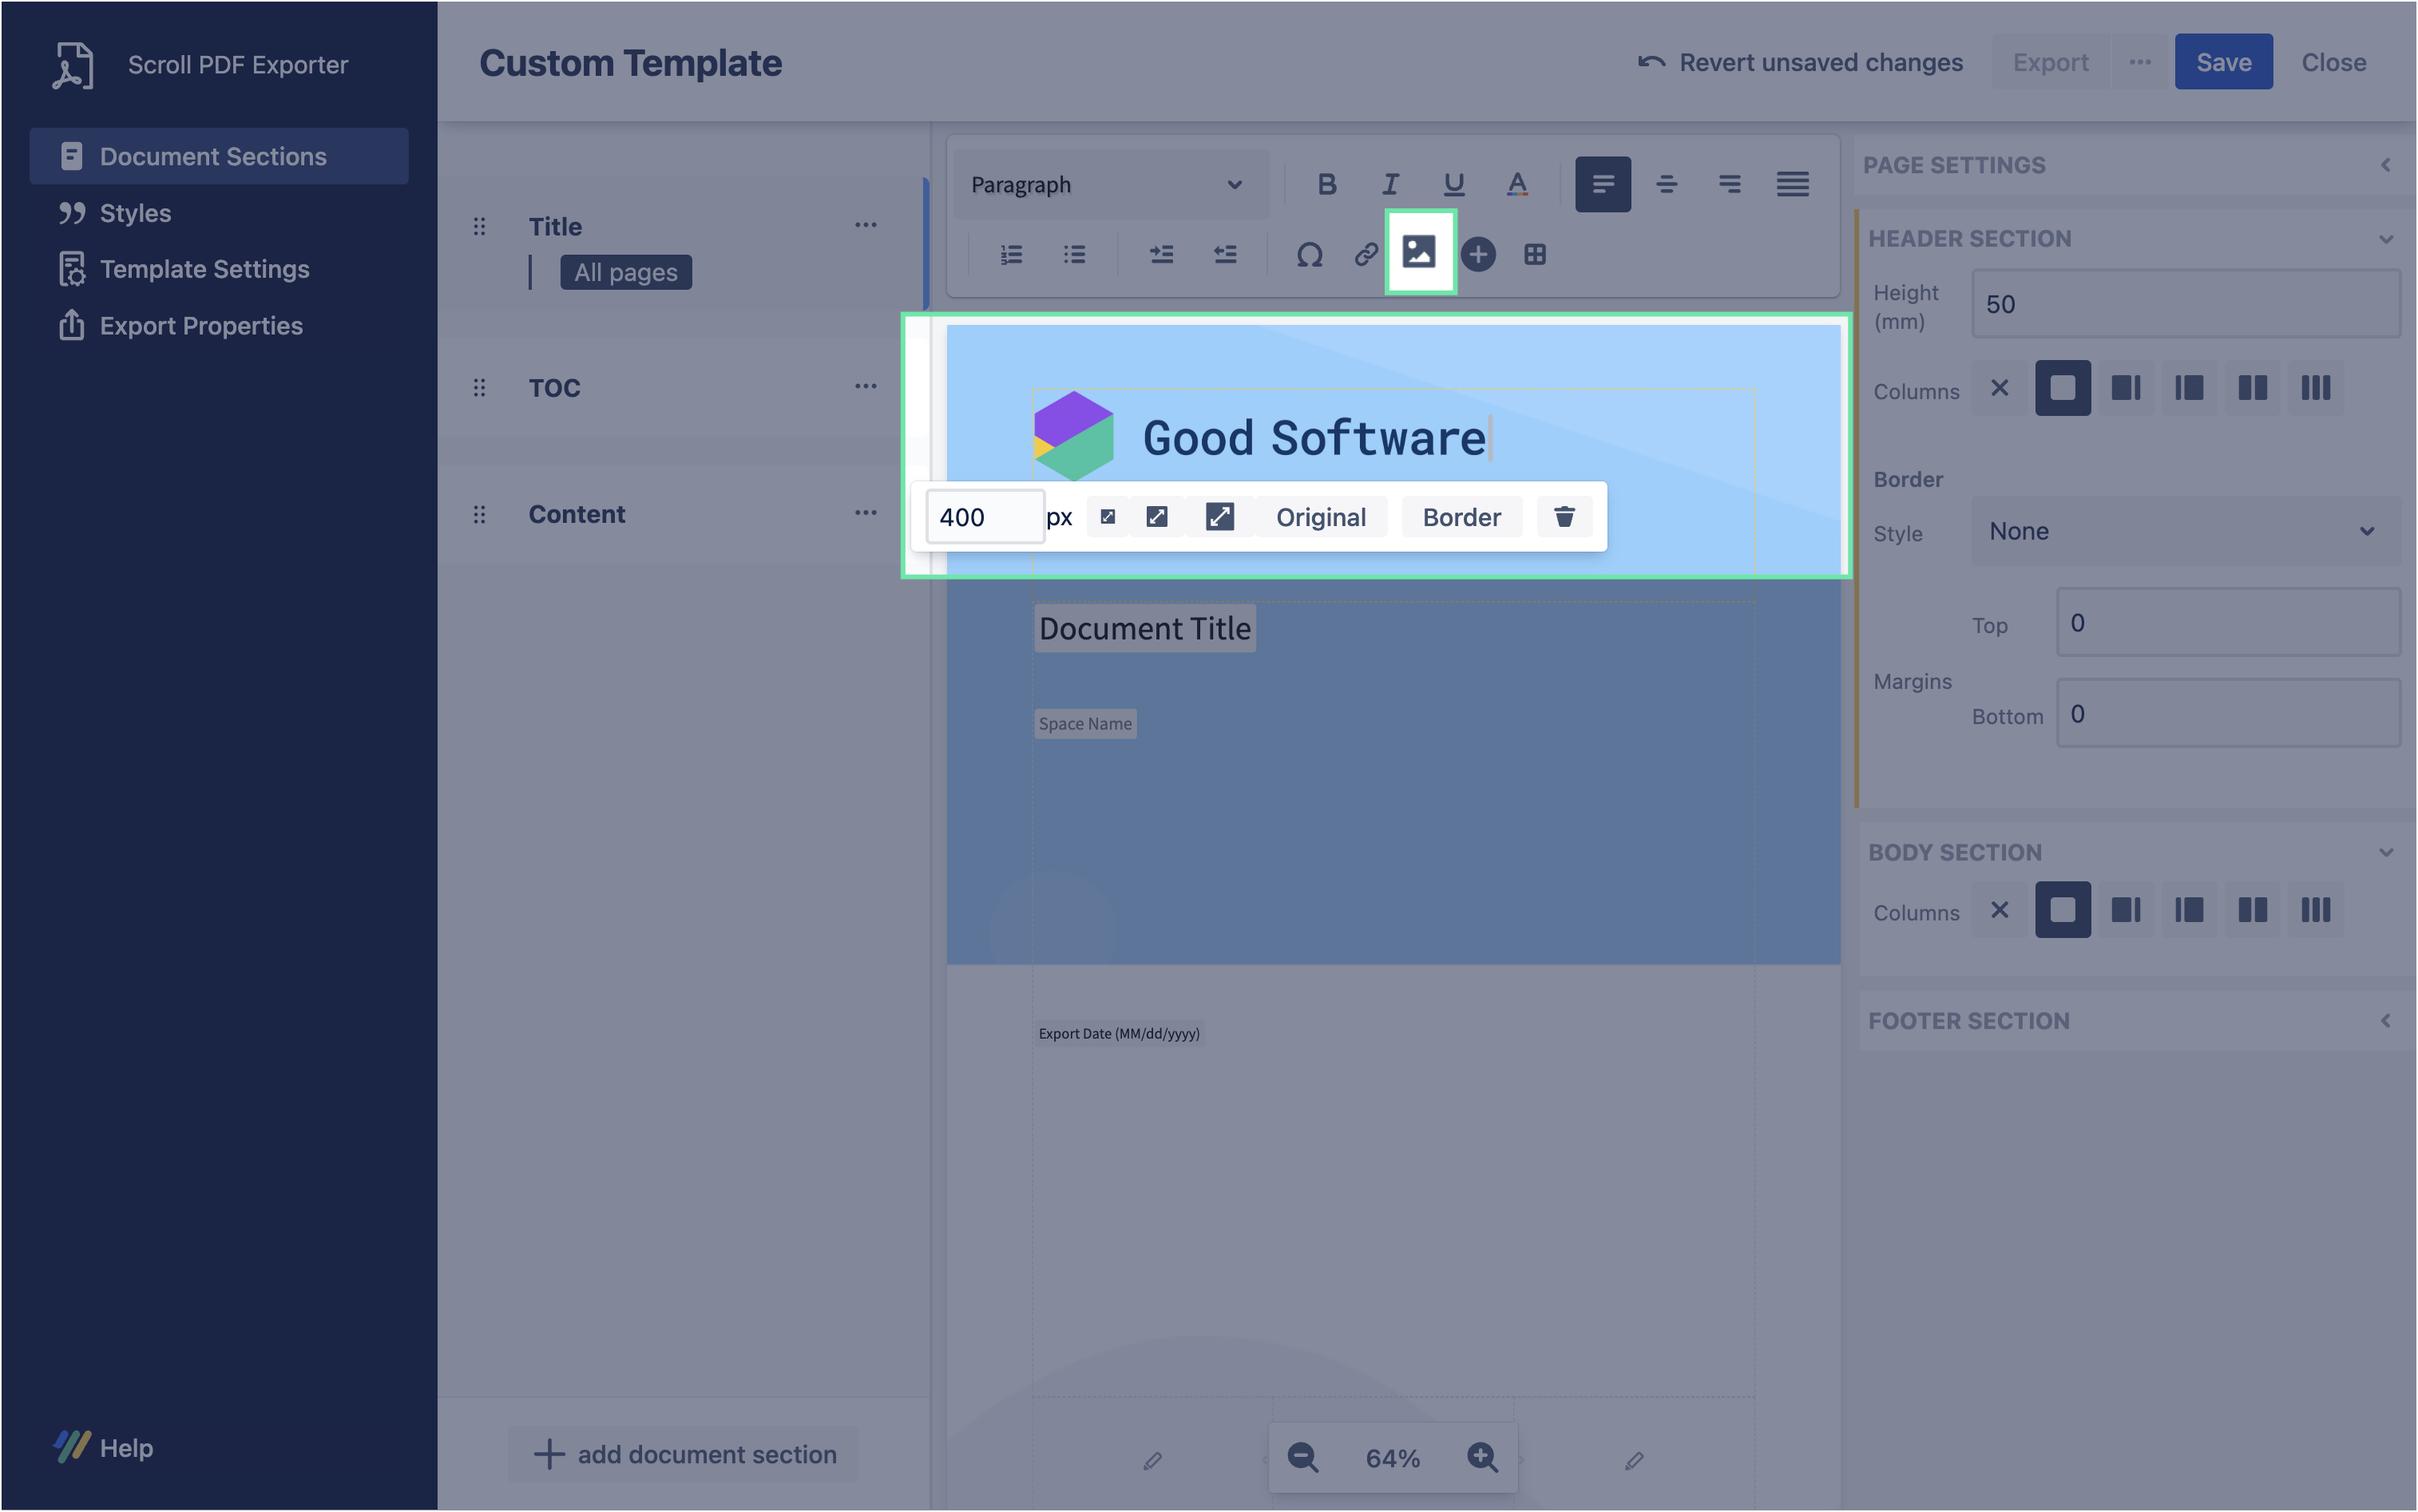
Add you company logo to header

  • To add the company logo, click on the pencil icon in the header section.

  • Then, click on the Add Image button in the top action bar.

  • In the pop-up that appears, add your company logo.

  • Once the image is uploaded, click Ok

(question) The image doesn’t fit? Click on the image and then using the contextual menu adjust its size to fit your requirement.

4

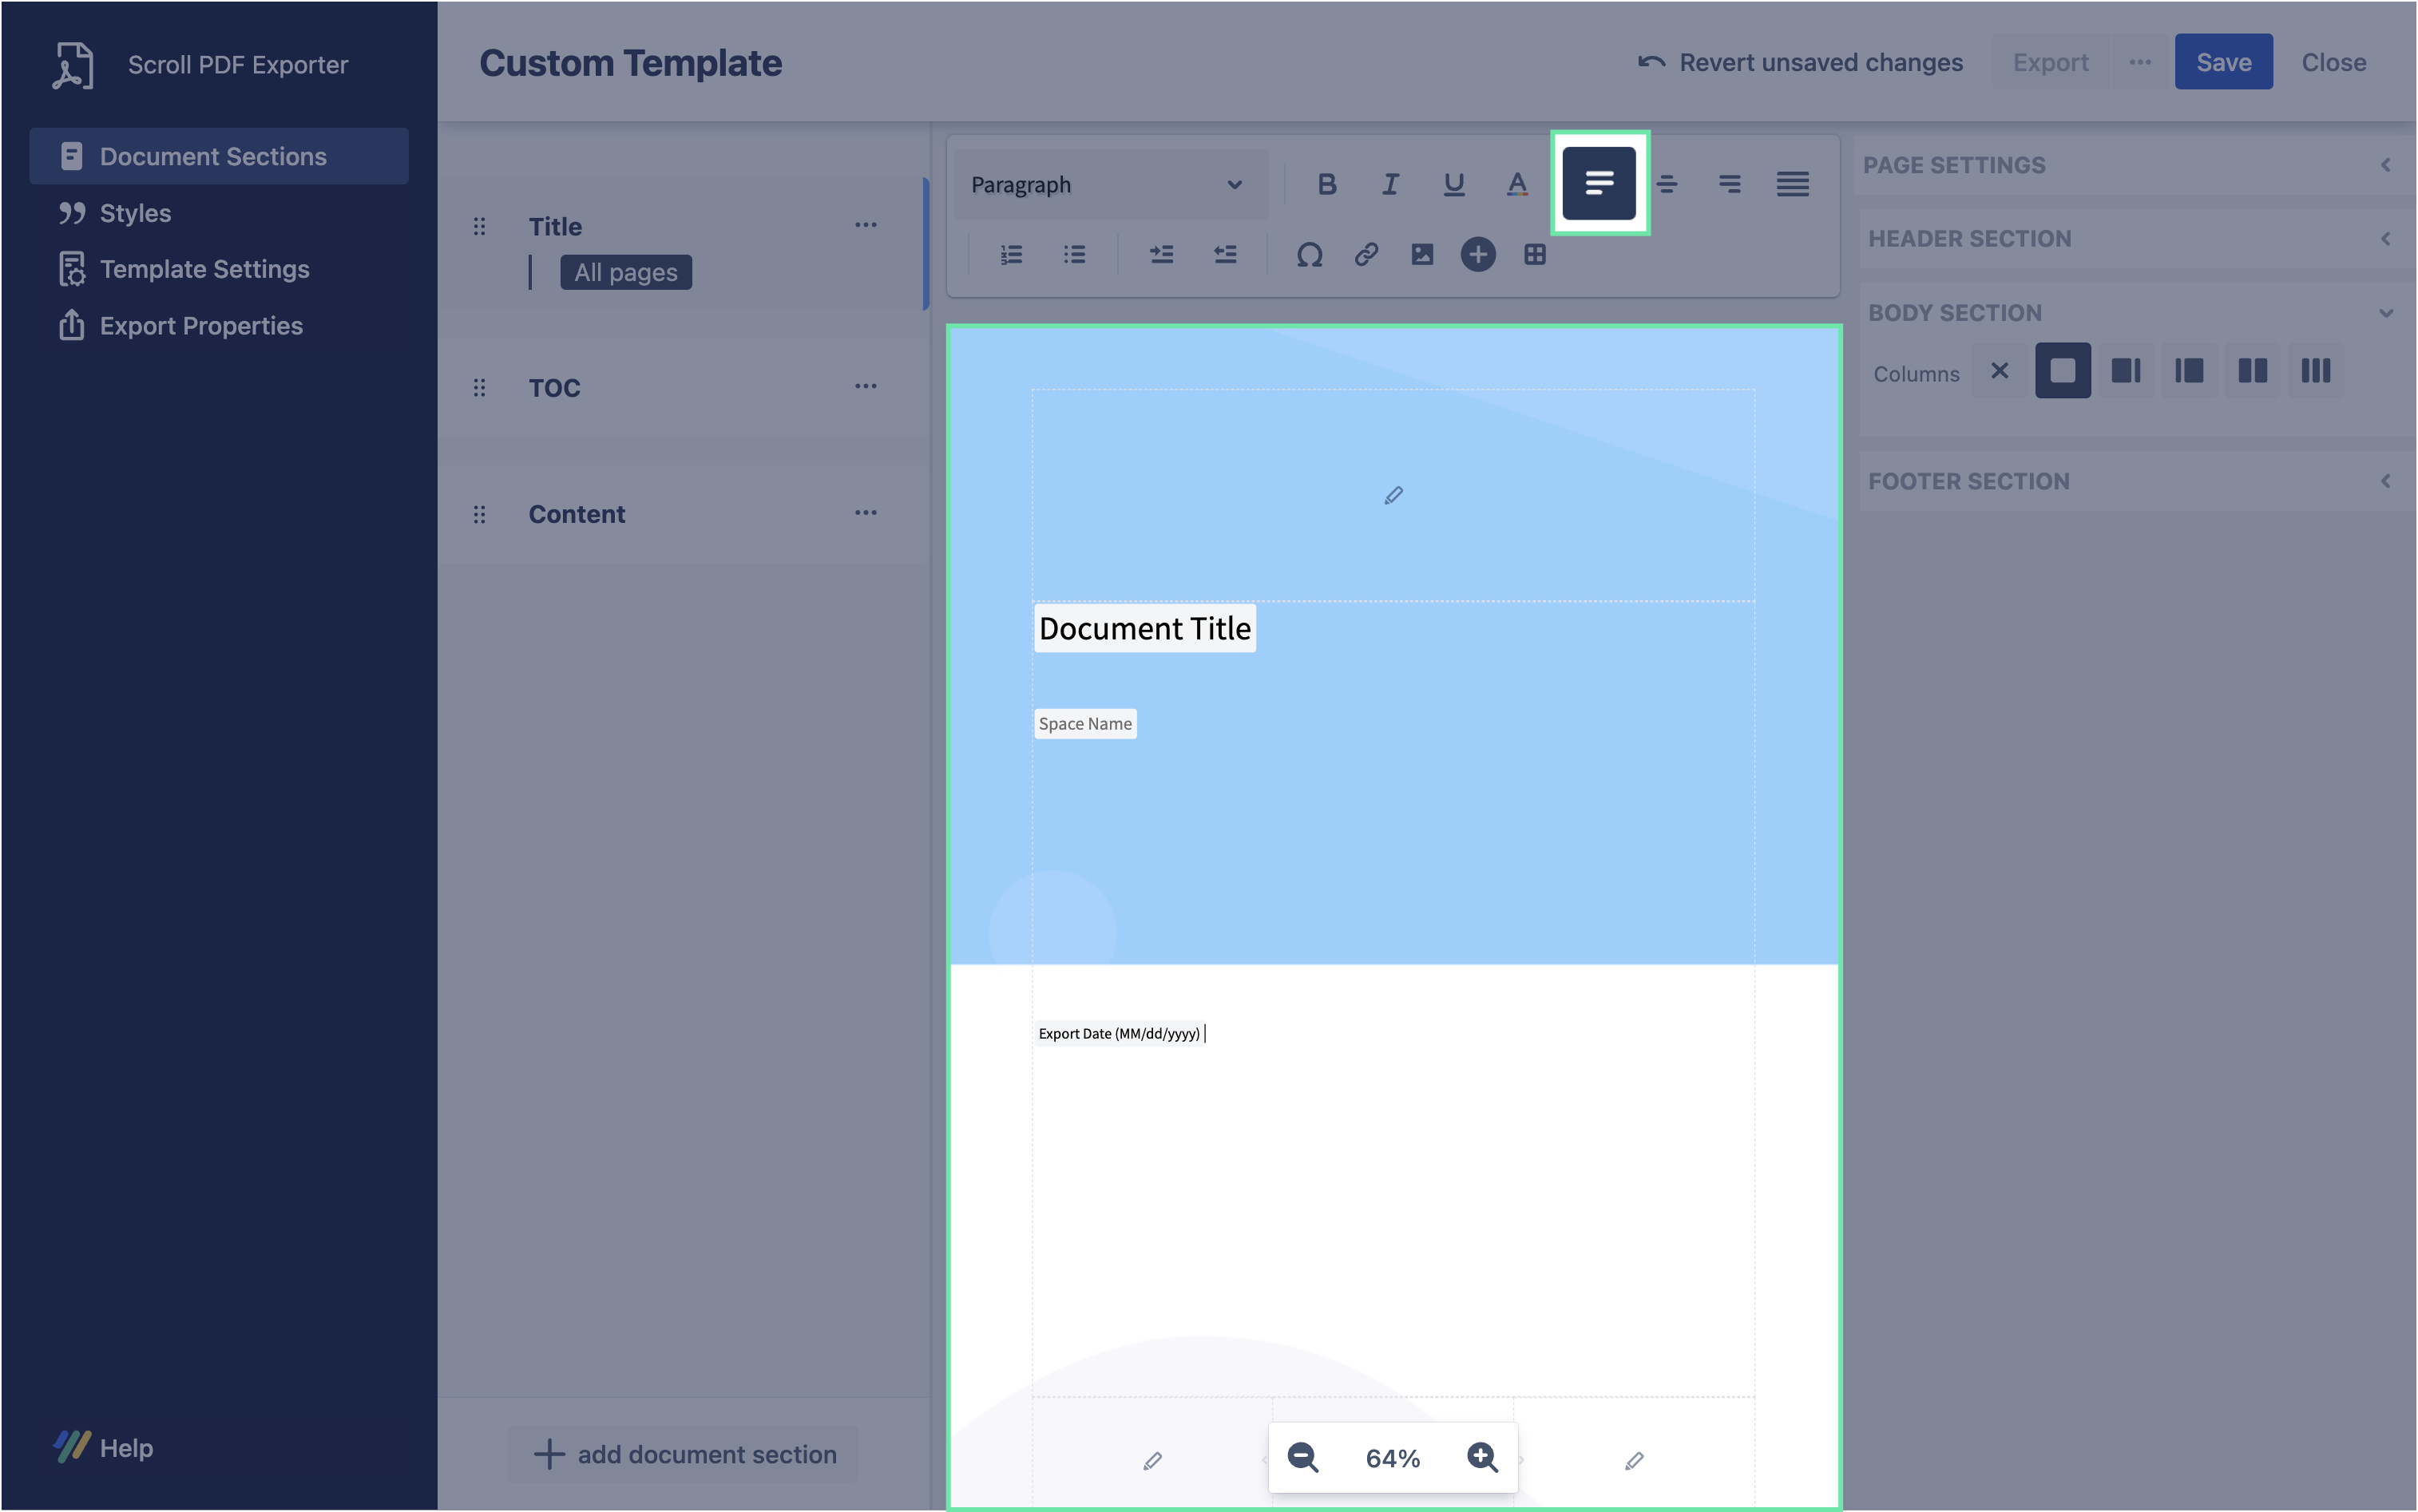
Change the alignment of text

  • In order to change the alignment of any item on the page, simply click on the item first followed by clicking the align-left button.

  • Align the Document Title, Space Name, and the Export Date to the left.

  • (Optionally) Delete the Exported on text and align the Export Date as shown in the screenshot.

5

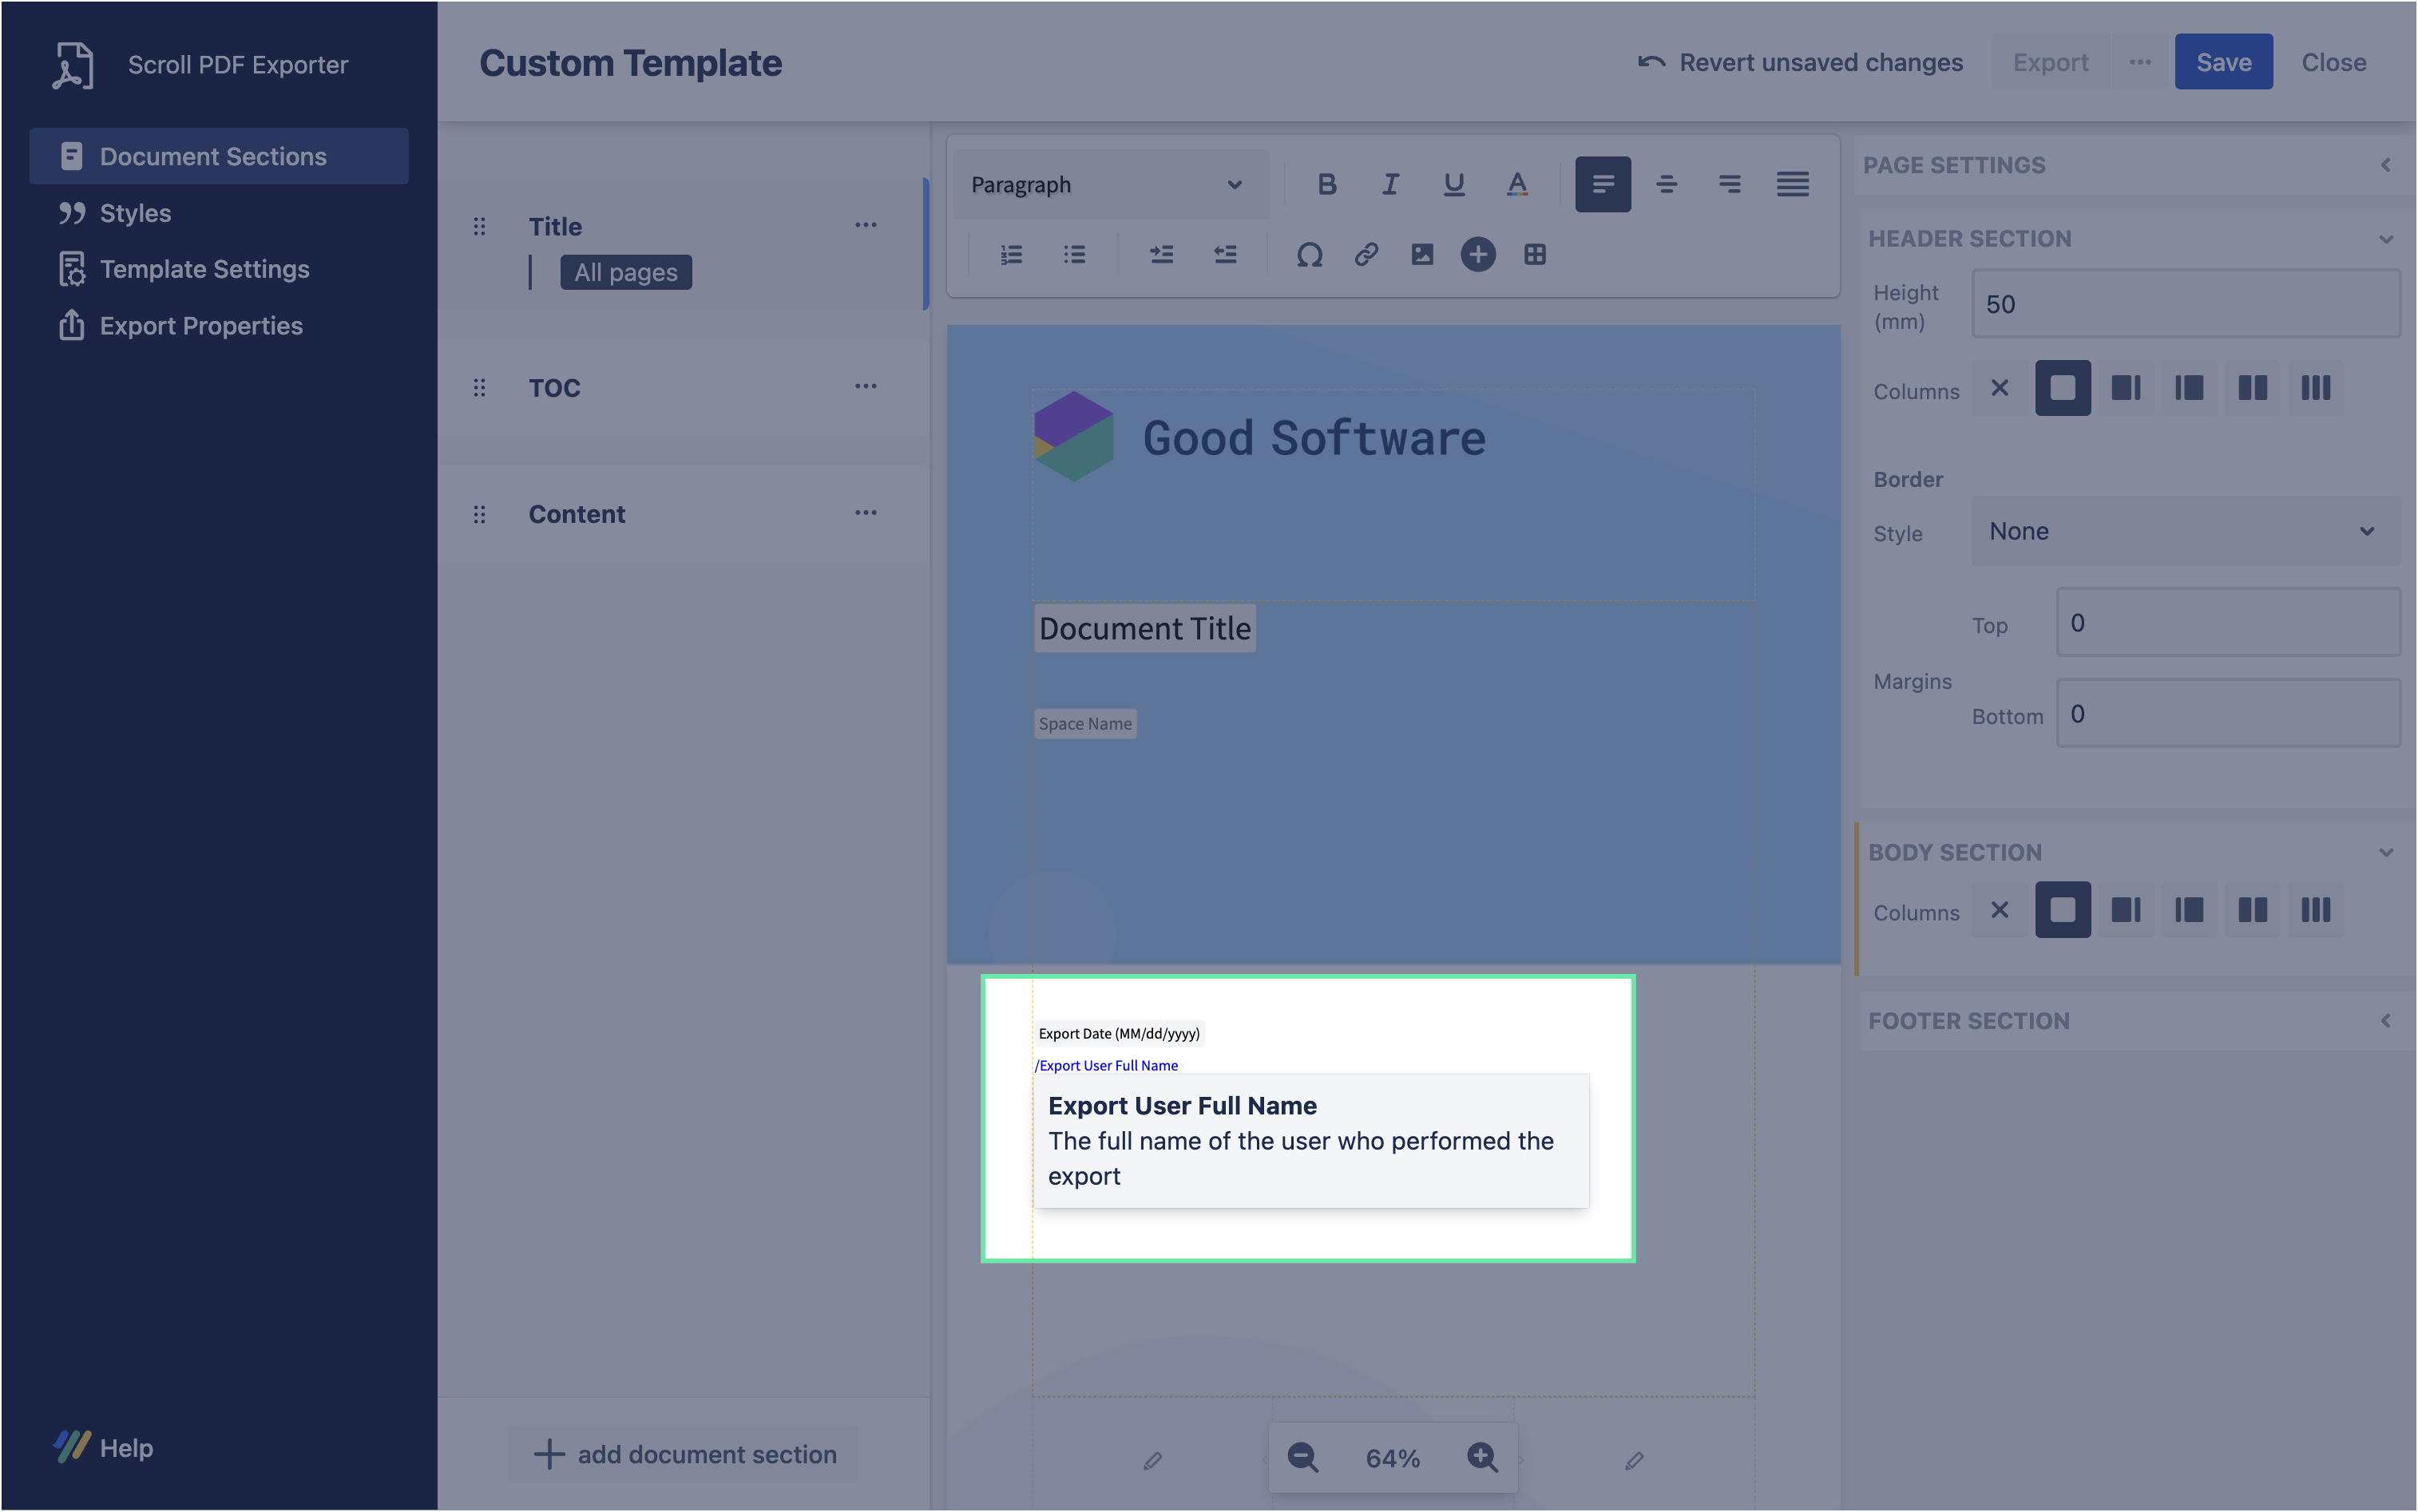
Add a dynamic placeholder

Placeholders are dynamic elements in your template that reference metadata in Confluence, and insert them into the PDF file during export.

  • Type ‘/' (slash) or '{’ to search and add a placeholder to the template.

  • Add the Export User Full Name placeholder below the export date placeholder.

ℹ️ Info: You can explore the full list of available placeholders by clicking the (plus) icon in the toolbar.

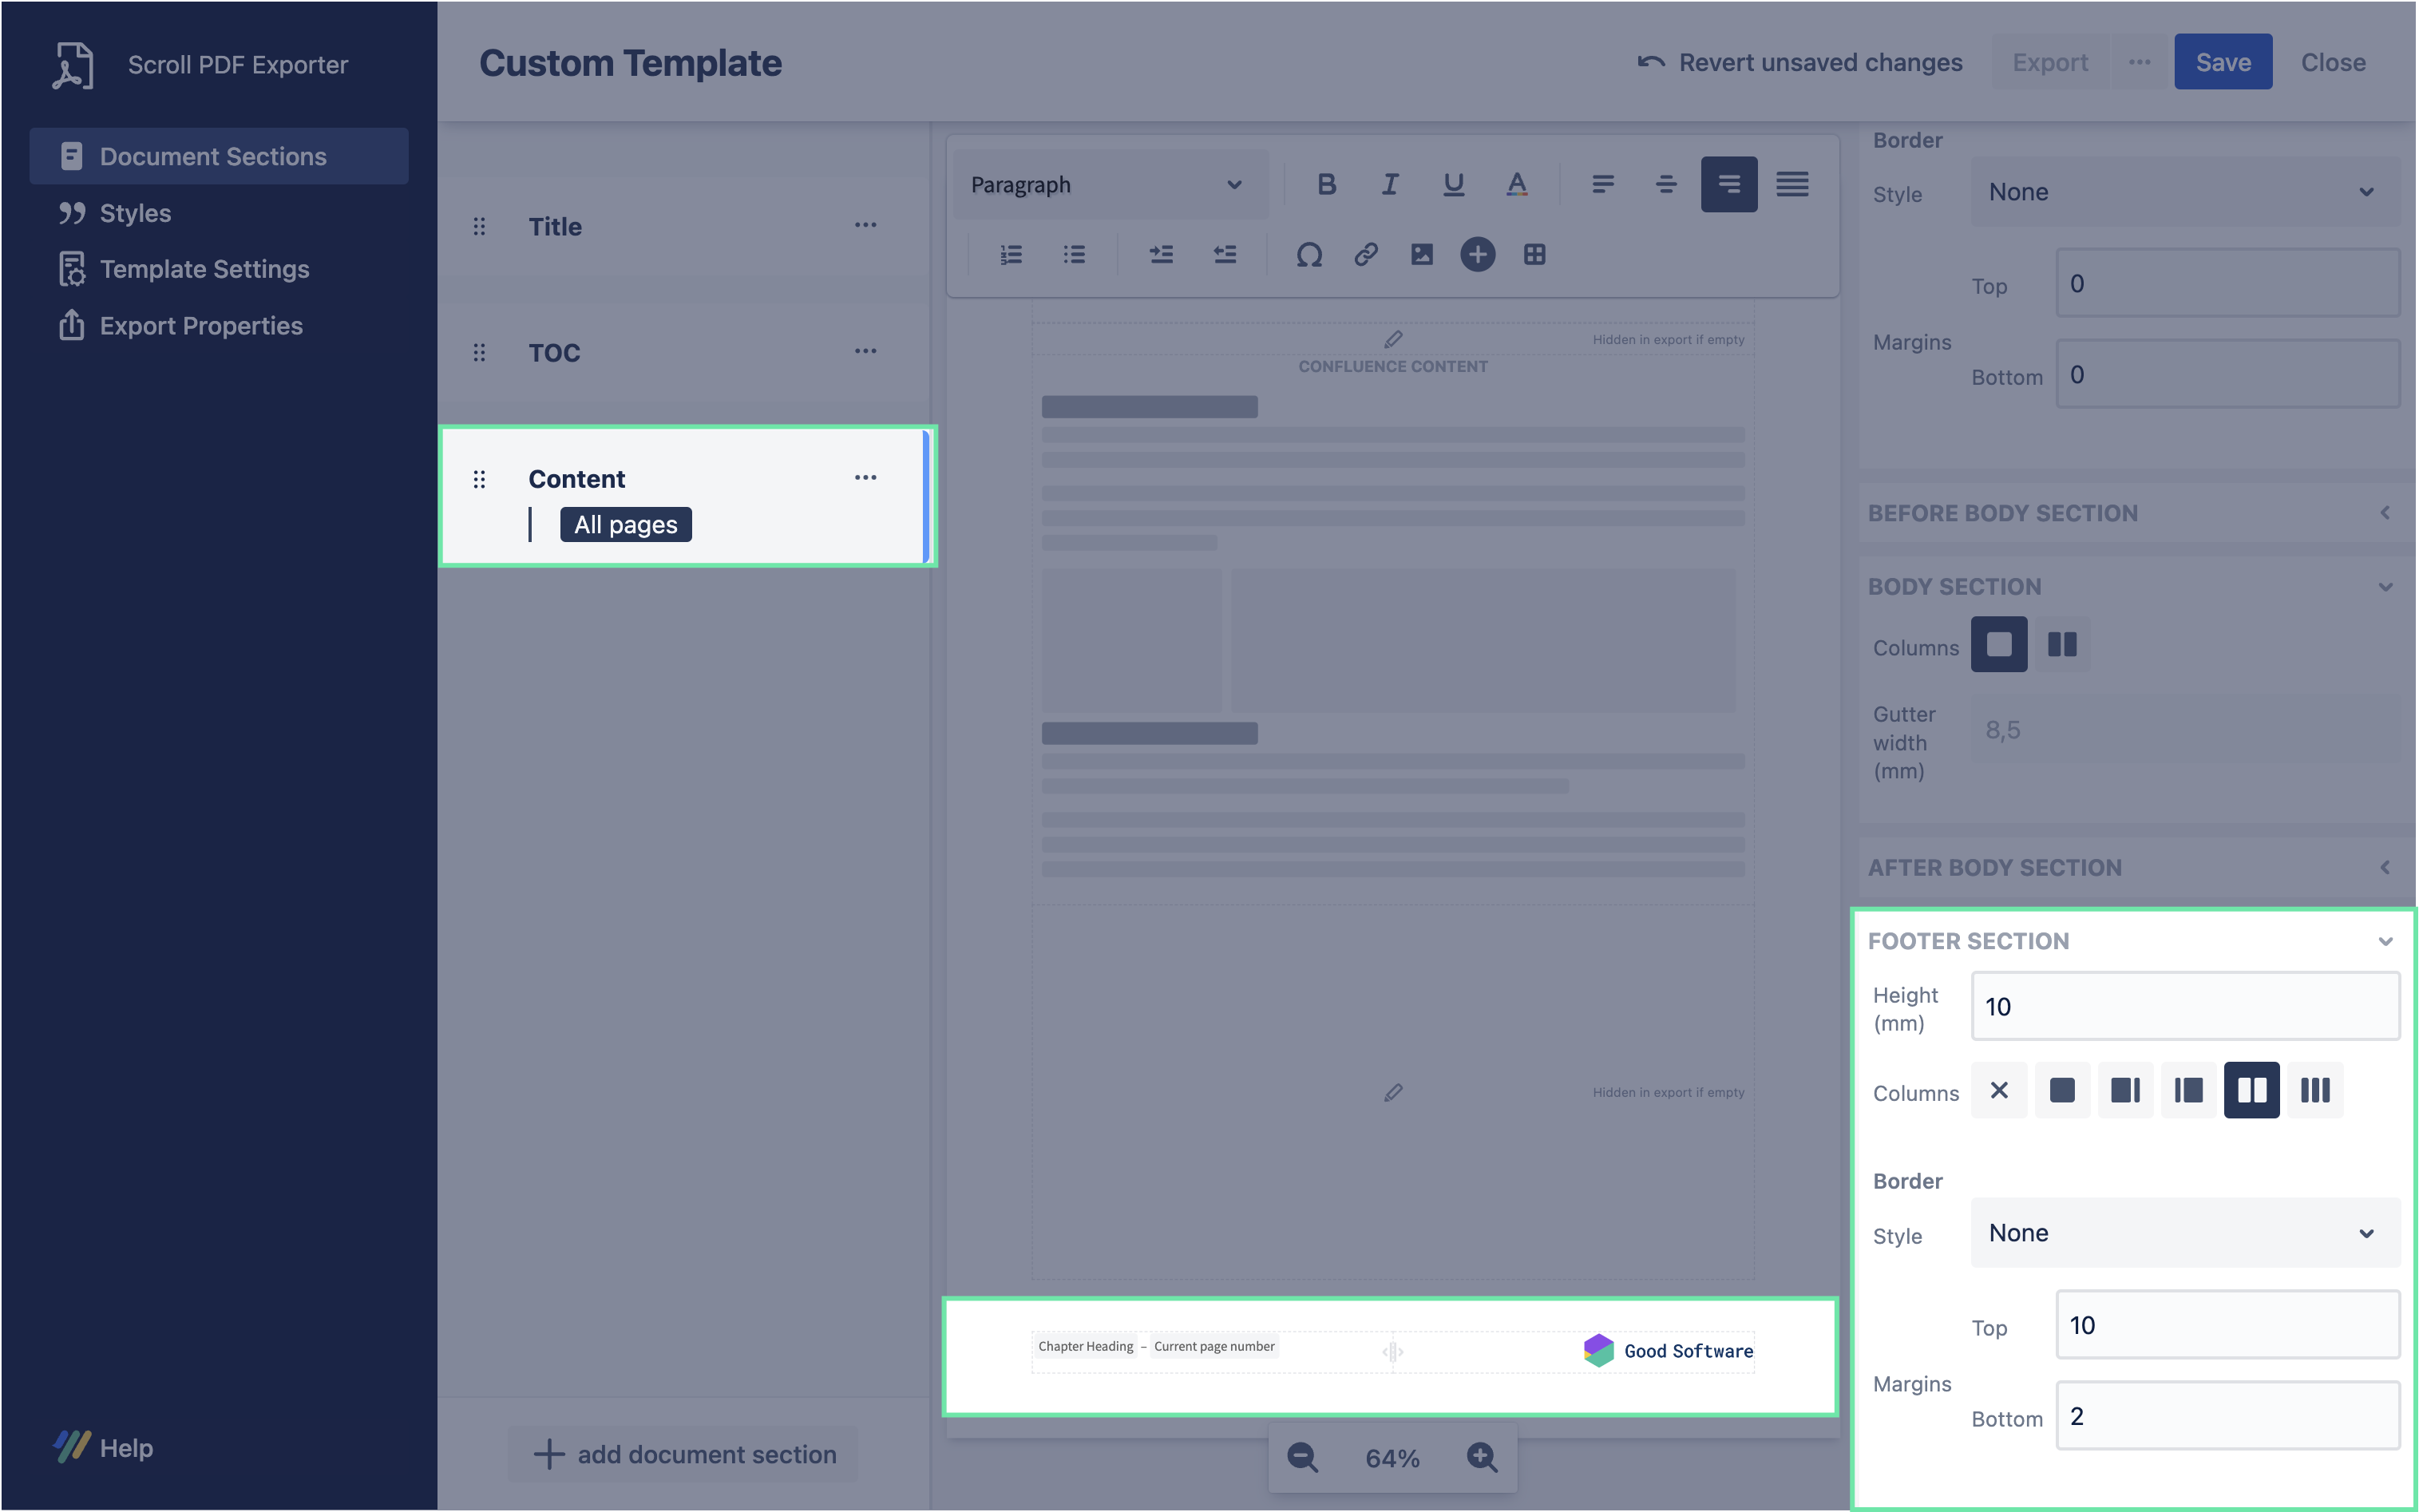
Customize the content footer

1

Update the footer layout

  • In the Document Sections, click on the Content section

  • In the Content section, click to expand the Footer Section and change the following fields -

    • Height: 10mm

    • Columns: Two columns

  • Optionally, left align the ‘Chapter Heading - Current page number’ placeholder

ℹ️ Info: The content from your documentation pages will be placed in the Content section during the export process.

2

Add company logo to the footer

  • To add the company logo to the right column of the footer, follow the same steps as you did when adding the header image.

Update various text styles
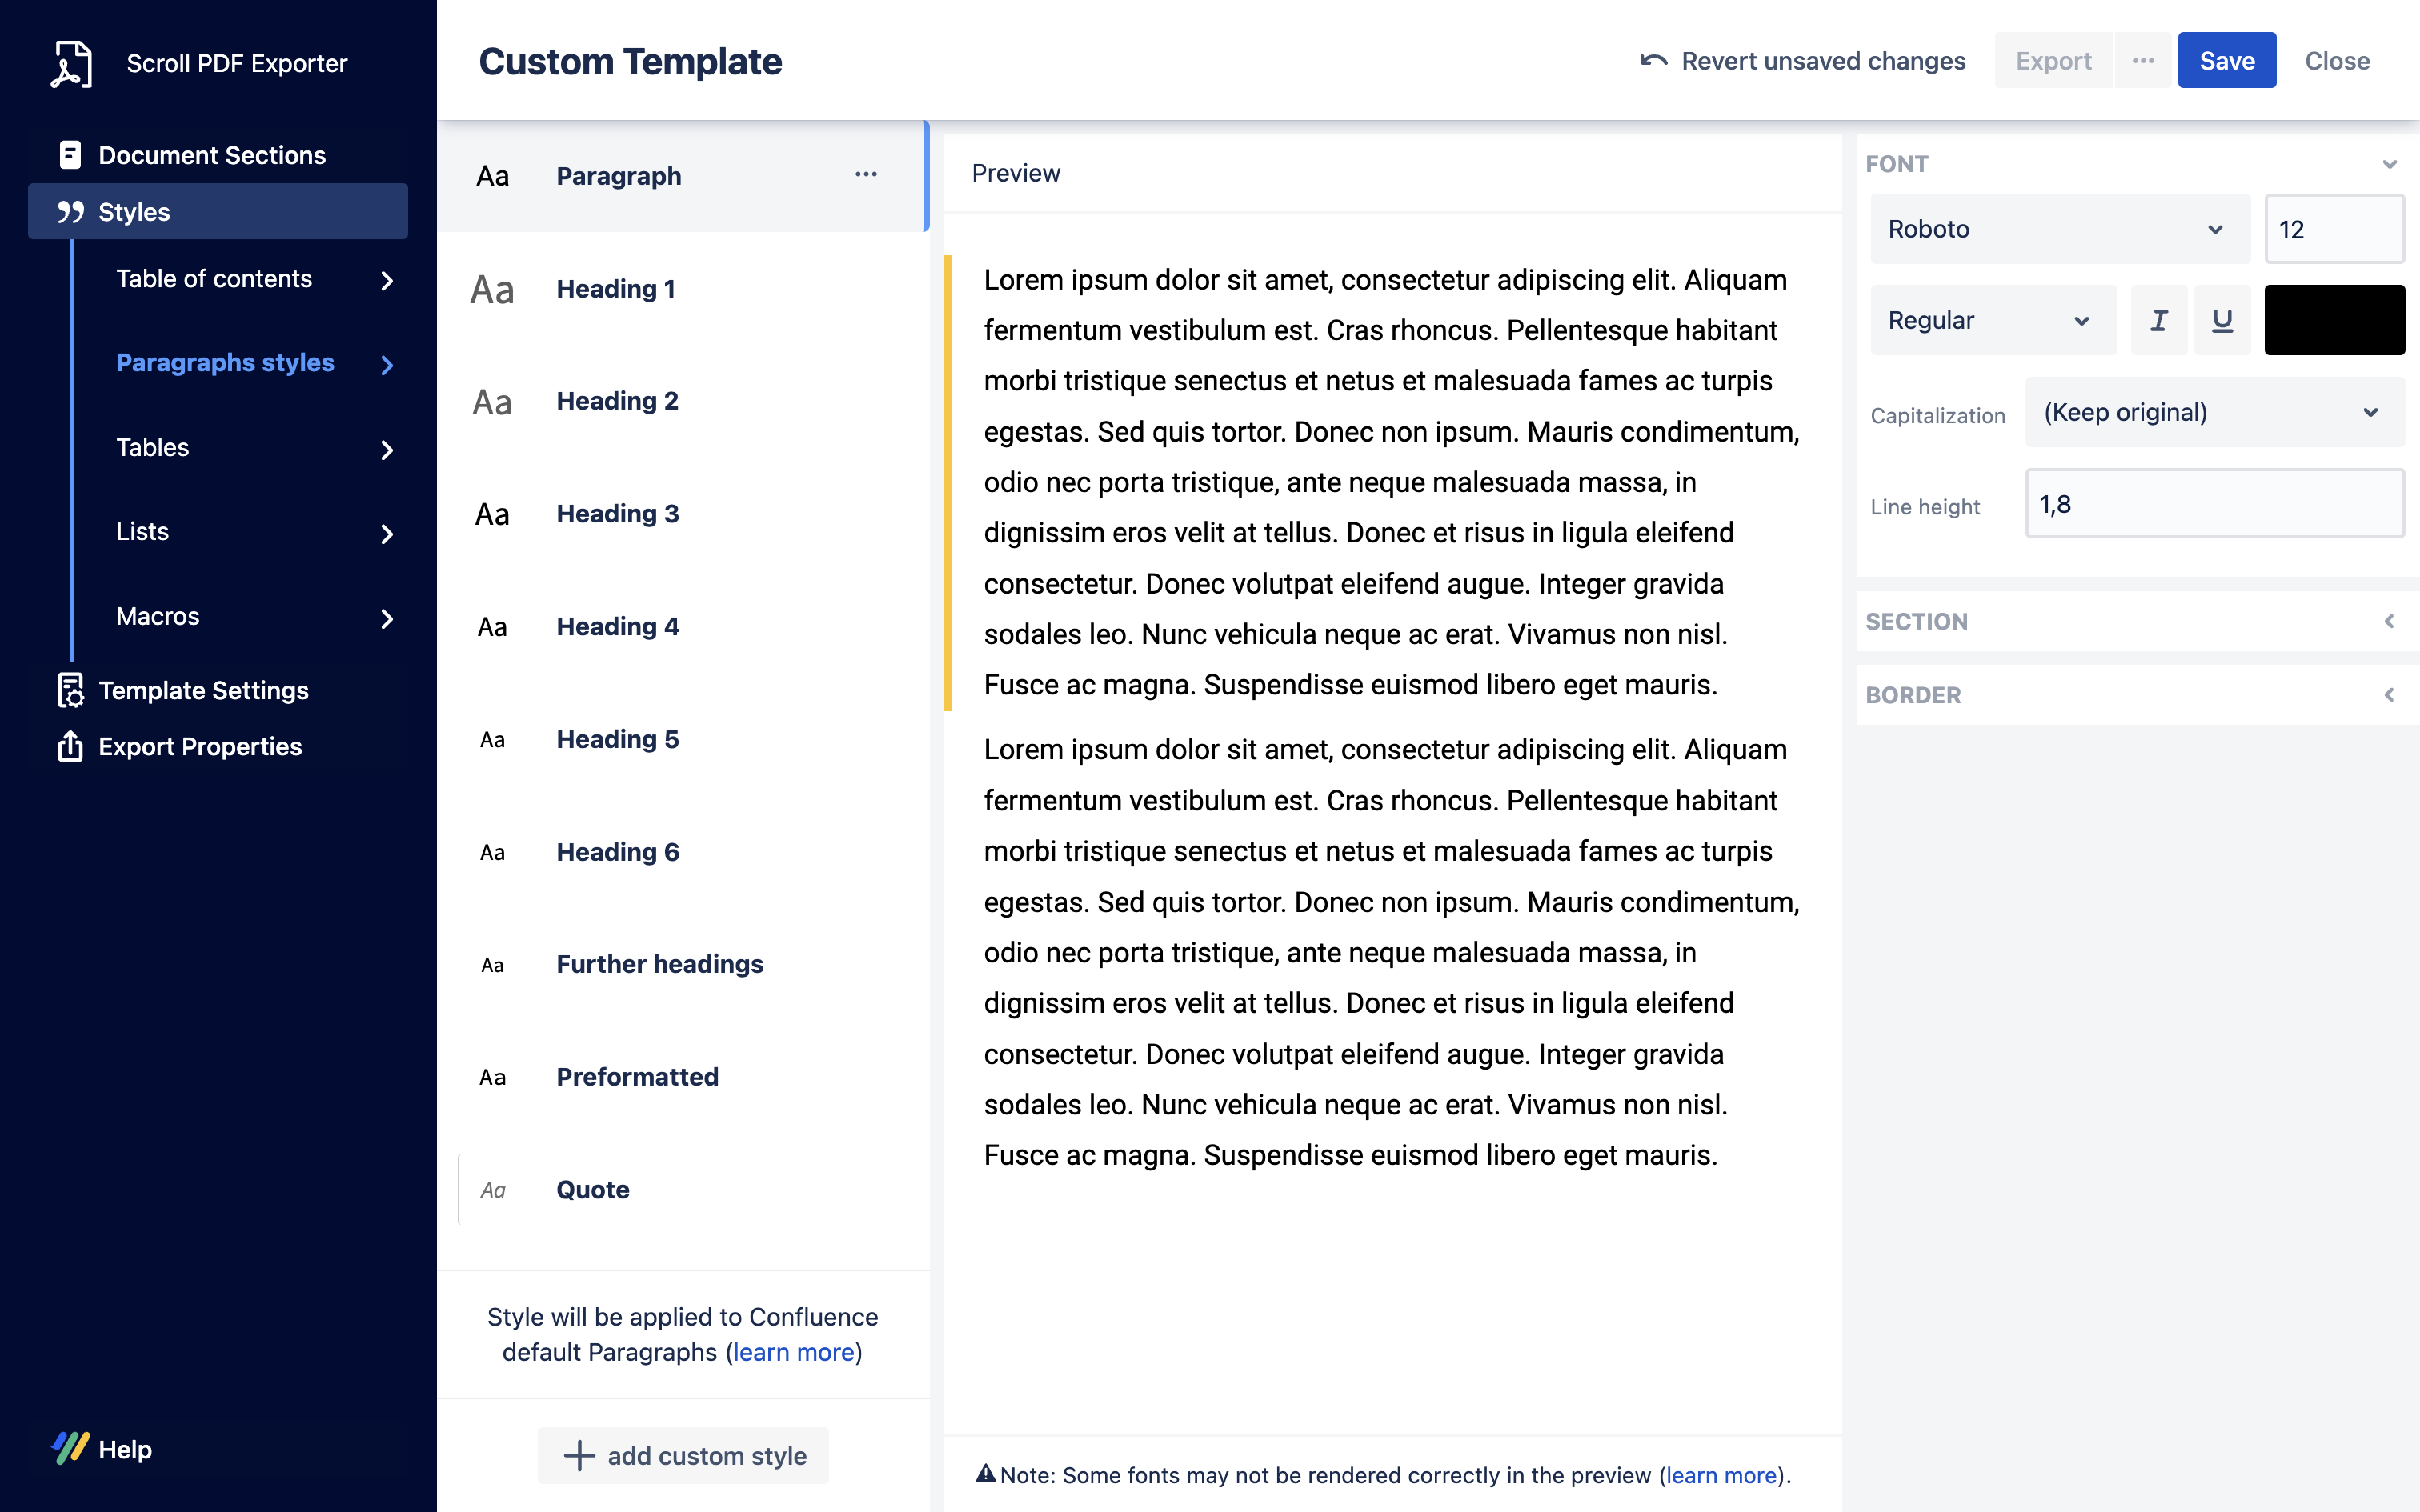
1

Update paragraph style
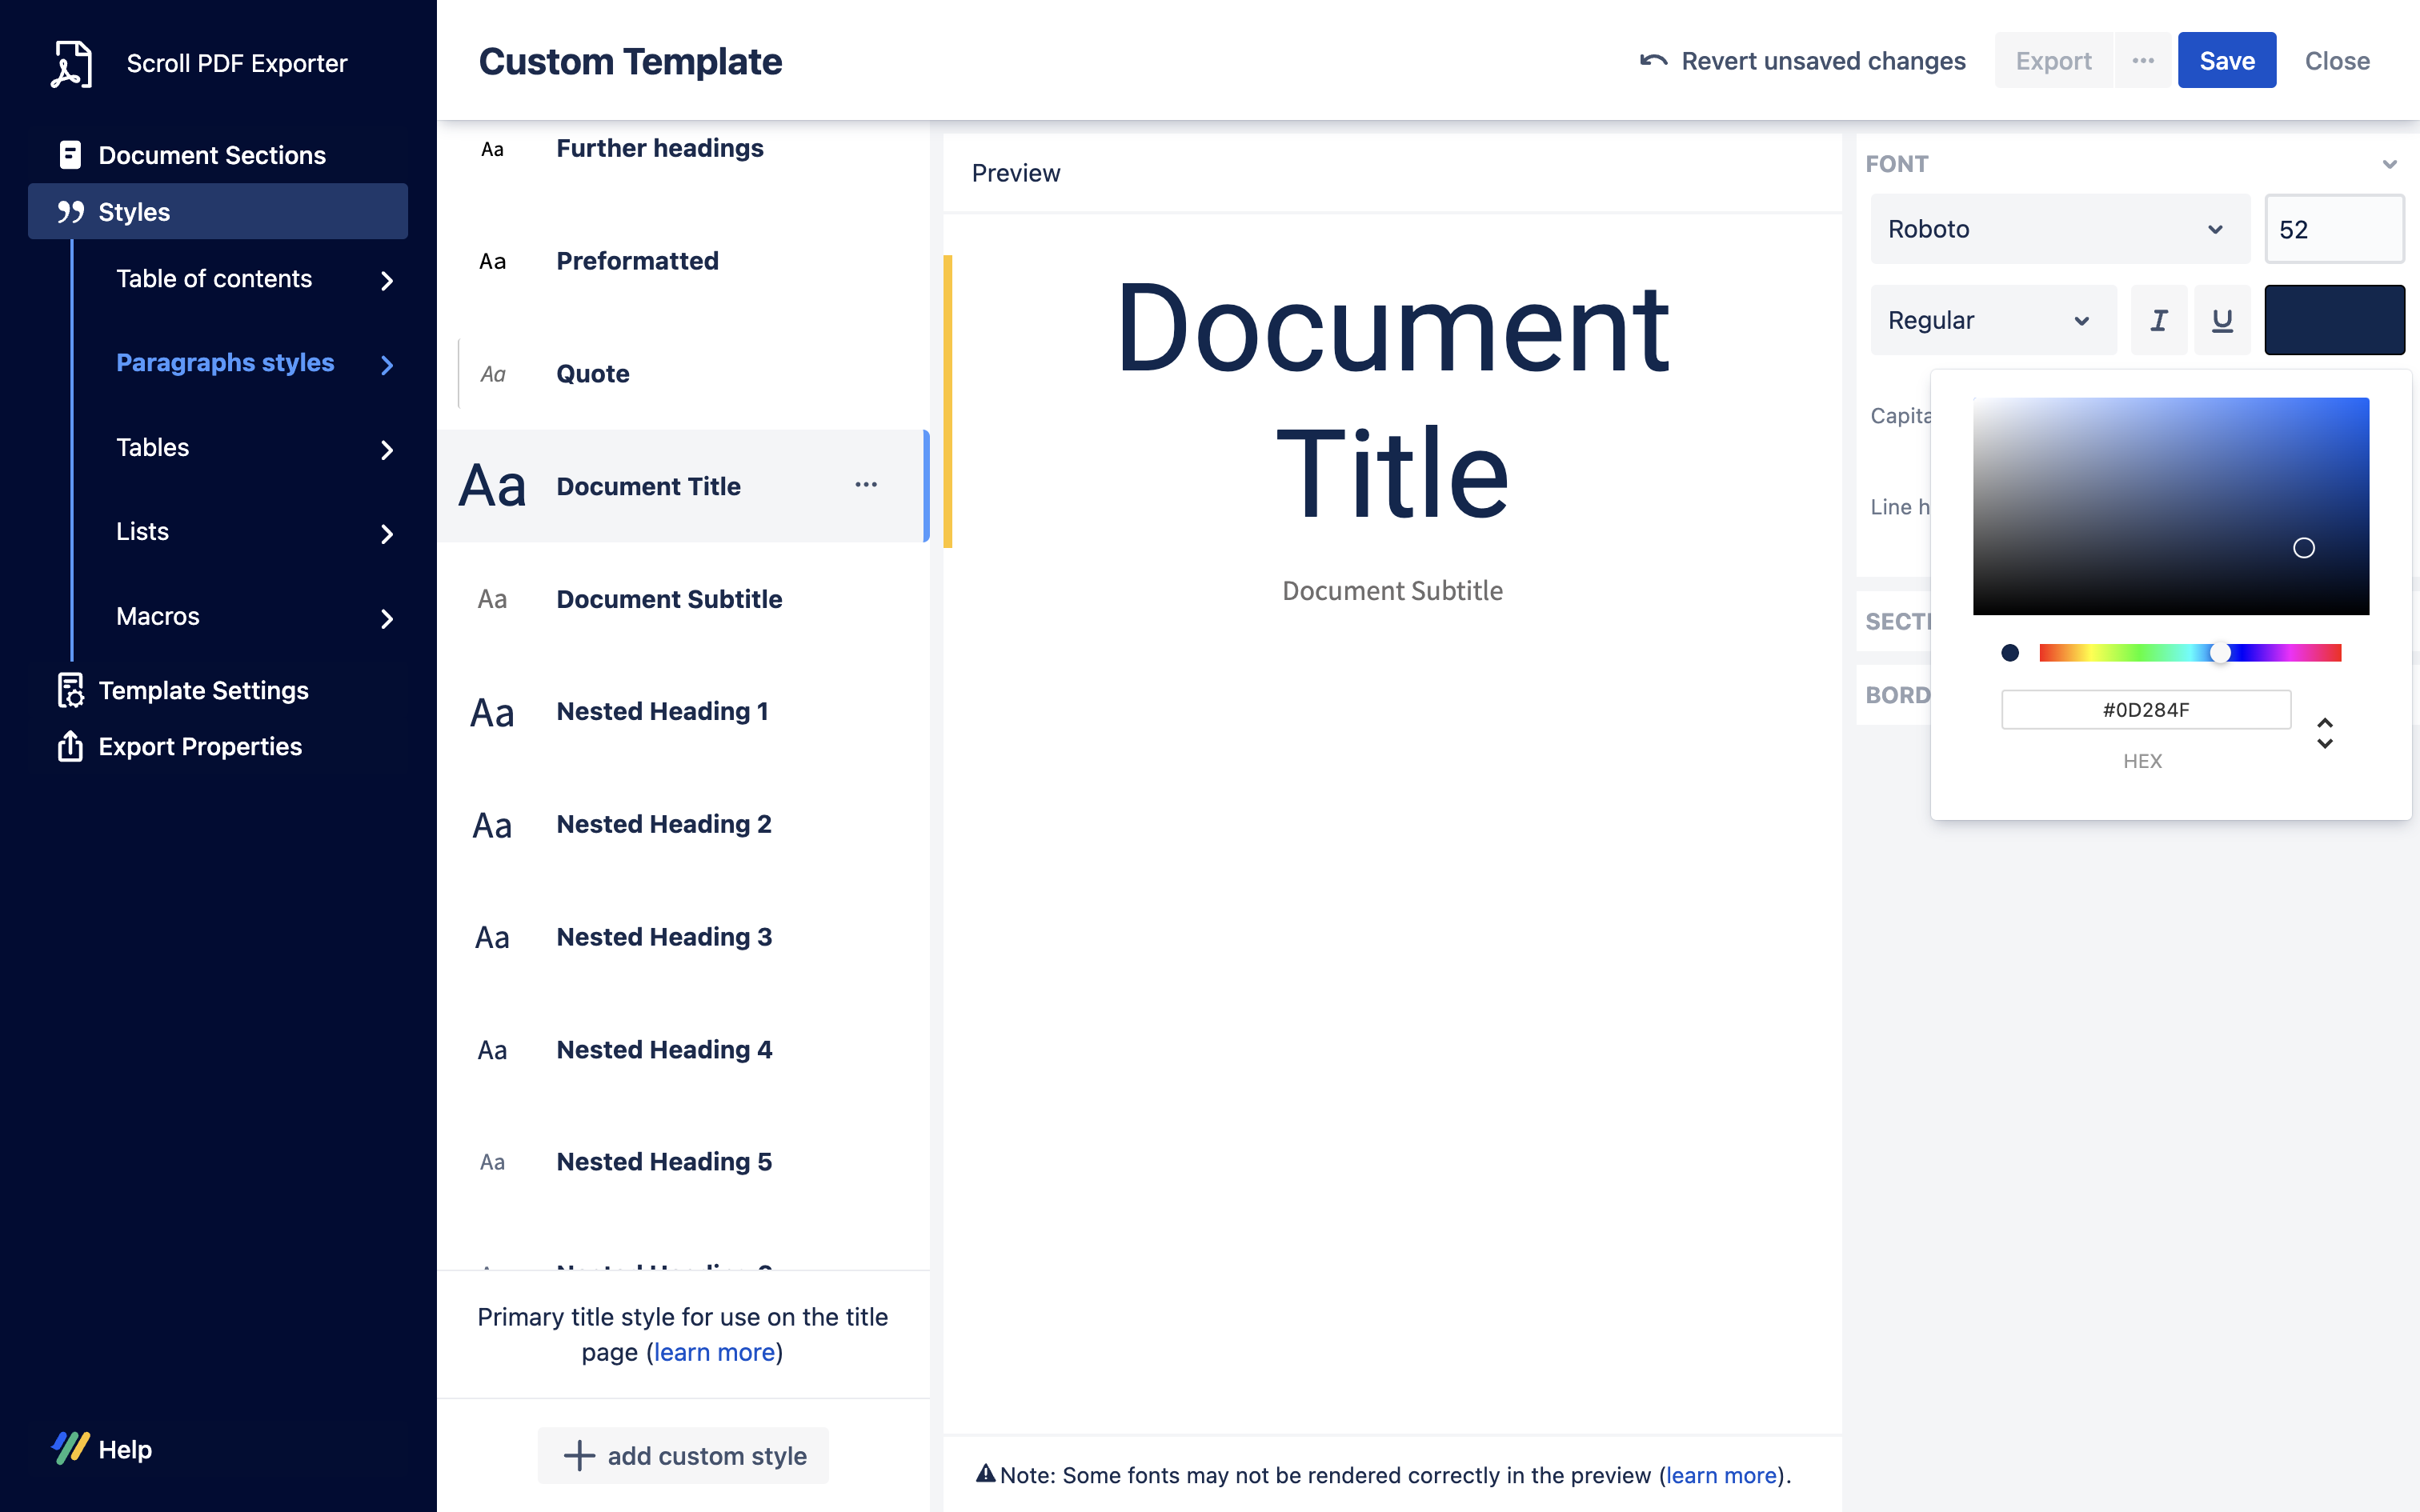
  • In the Styles Section, click Paragraph styles and then select Paragraph

  • In the FONT panel apply the following settings -

    • Font name: Roboto

    • Font size: 12

    • Font weight: Regular

    • Line height: 1,8

(question) Want to use your own fonts? You can do so by selecting CUSTOM FONTS → Manage fonts inside the font name drop-down.

2

Update Document Title style

  • While still in the Paragraph styles section, scroll down to locate and click on Document Title

  • In the FONT panel apply the following settings -

    • Font name: Roboto

    • Font size: 52

    • Font weight: Regular

    • Font color: #0D284F

ℹ️ Info: Changing this style affects the document title we added to the title page earlier.

Update Export Properties

1

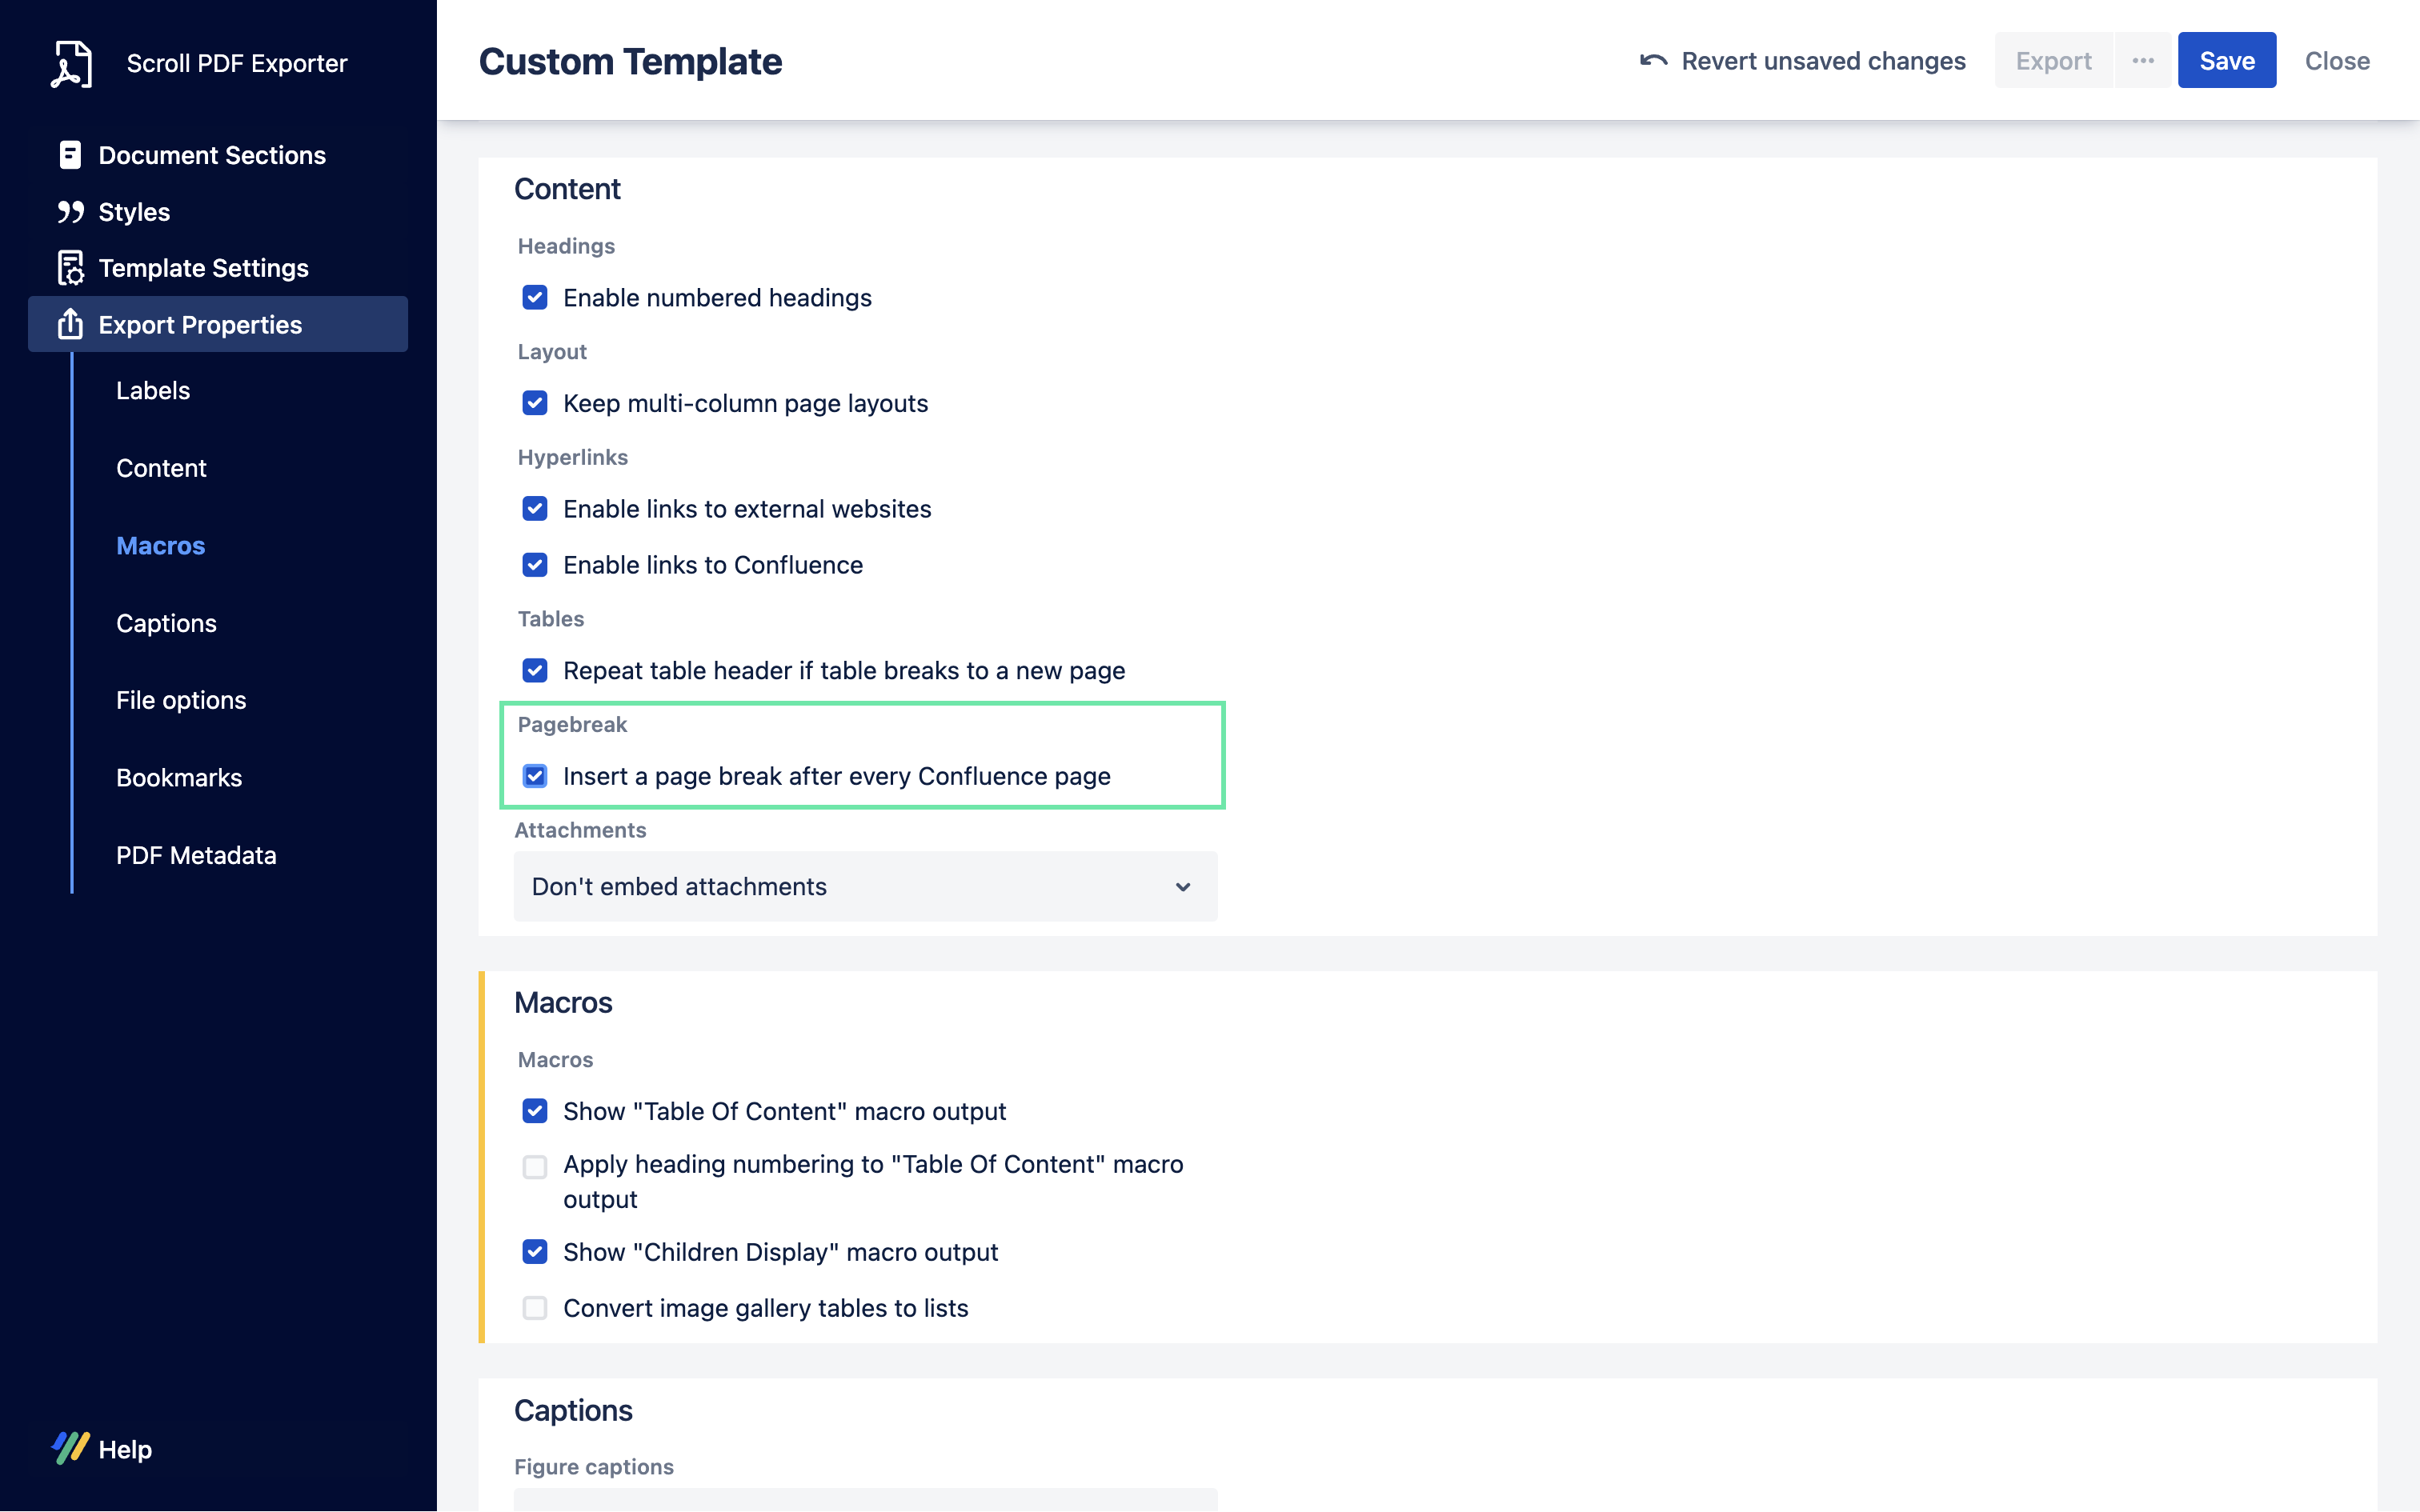
Configure page breaks

While this step is completely optional, in this example, we want to make sure that there is a page break in the exported PDF after every Confluence page in our documentation.

  • In the Export Properties section, click Macros

  • Then, select the checkbox under ContentPagebreak that says - ‘Insert a page break after every Confluence page’

(question) Want more control over page breaks? You can use the Scroll Page Break Macro that is available when you install Scroll Exporter Extensions app.

Test your custom template

1

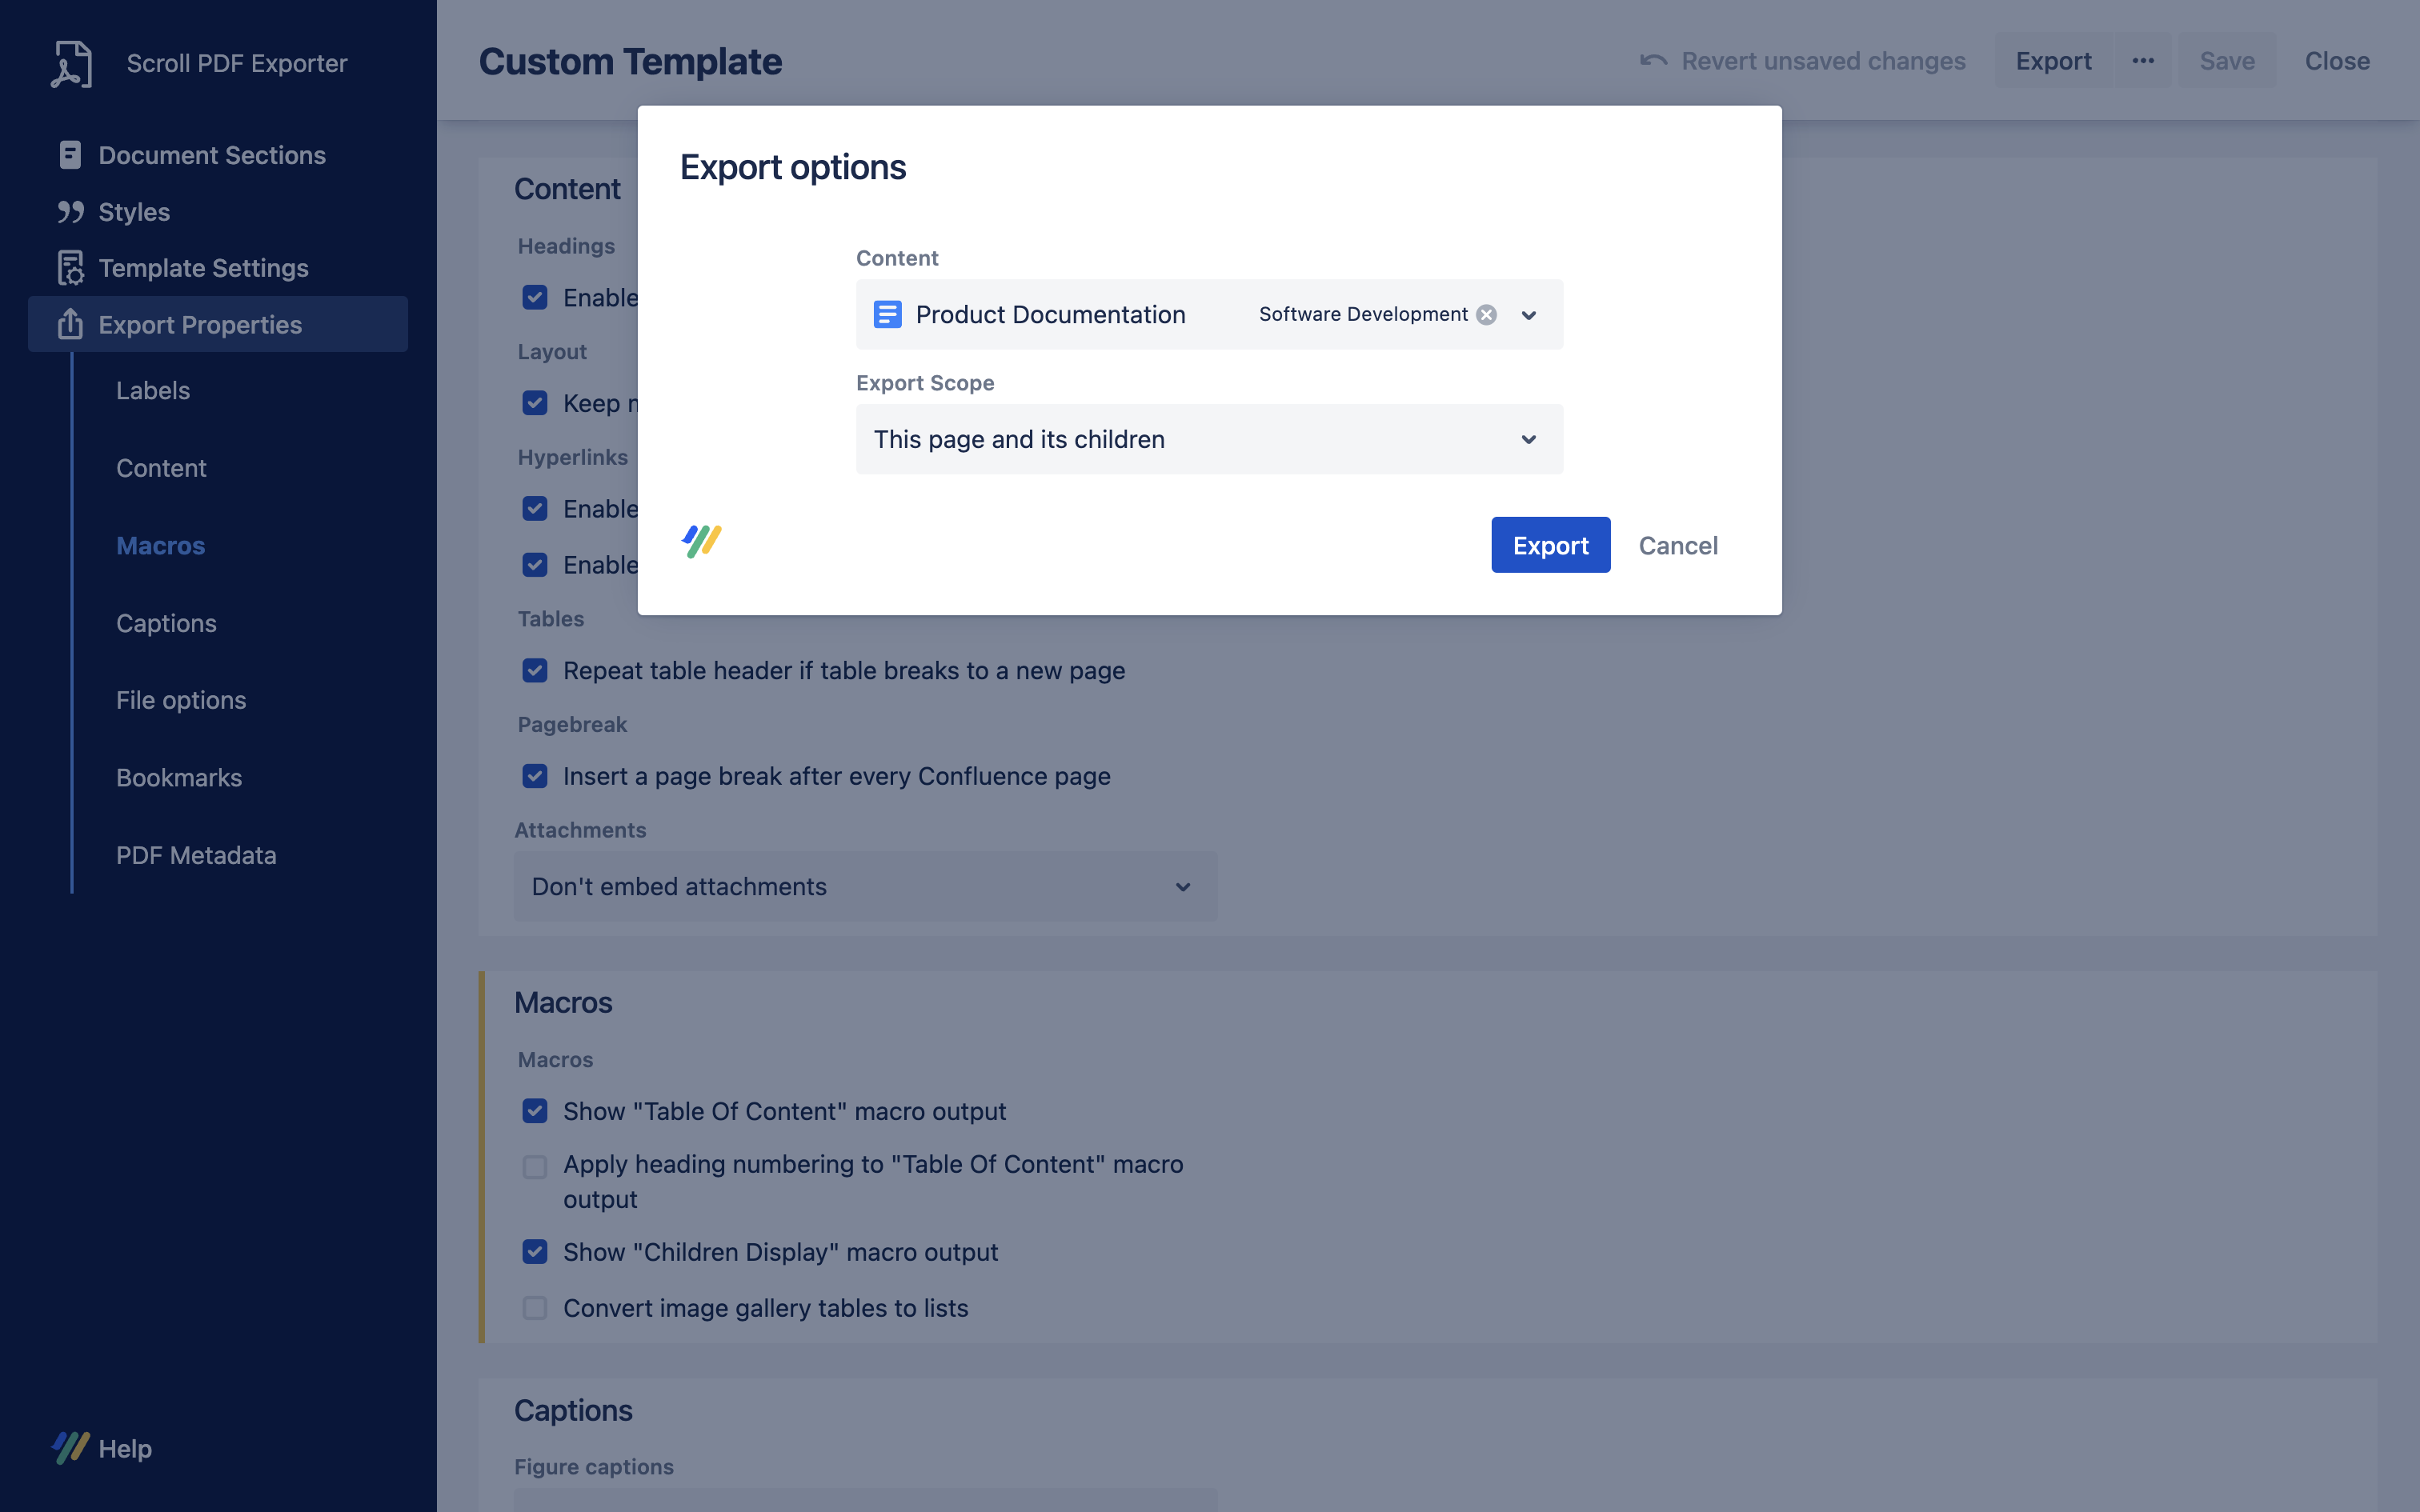
Create a test export

You are now ready to test out your brand new custom template.

  • Click Export on the top right section of the Template Editor

  • In the pop-up that appears, in the CONTENT filed, search for and select your documentation. In our example we will select Product Documentation

  • For the Export Scope, select This page and it’s children

  • Then, click Export

2

Congratulations! 🎉

You have now successfully created your very own PDF template with Scroll.

You can now start using it to export all your documentation as highlighted in Scroll Exporters: Export Documentation to PDF, Word, or HTML


Next steps

Learn more from our Guides, Tutorials, Reference articles, or

JavaScript errors detected

Please note, these errors can depend on your browser setup.

If this problem persists, please contact our support.