Scroll Content Quality enables you to create custom rules for maintaining content quality standards across different use cases. For each activated space, you can enable rulesets. This article will give you an overview of how these rulesets work and how you can customize them.
Ruleset Editor
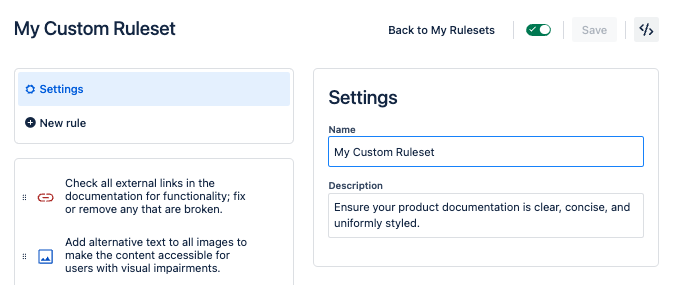
In an activated space, select Scroll Content Quality in your sidebar. In the My Rulesets tab that displays, either select from an existing ruleset by clicking on the tile on the bottom part of the screen, or press the New ruleset button.
Ruleset Settings
For each ruleset, you will need to provide a name and a description.
Click New Rule and select a rule type to add it to your ruleset. The rule settings will then display on the right-hand side of the screen so you can start configuration.
Rule Settings
Every rule has a standard set of settings (numbers 1 through 4 below), along with rule-specific configuration options.
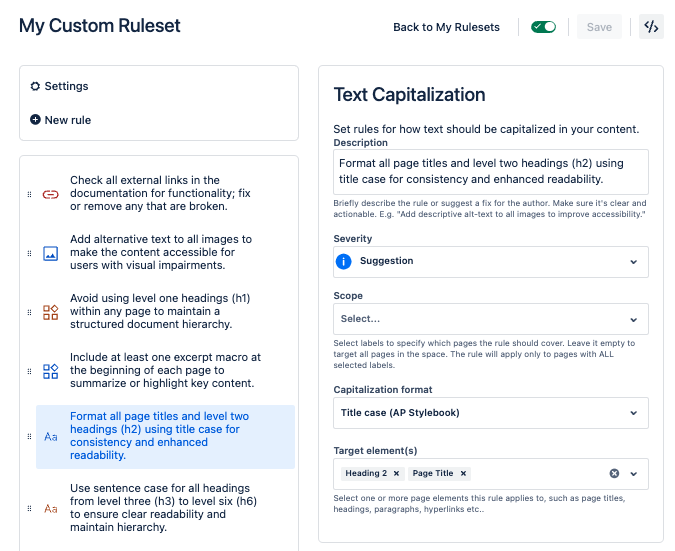
1: Rule type
Specifies the core function of your rule. Each rule type has a unique name and icon type. You can create multiple rules of the same rule type in a single ruleset. At the moment, Scroll Content Quality supports these rule types:
|
Rule Category |
Rule Type |
Description |
|---|---|---|
|
Text |
Text Capitalization |
Set rules for how text should be capitalized in your content. |
|
|
Text Replacement |
Locate specific words and suggest alternatives. |
|
Links |
Broken External Links |
Verify that external links in your content are still accessible. |
|
Images |
Image Alt Text |
Ensure all images have descriptive text for accessibility. |
|
Macros |
Allow/Block Macros |
Control which macros are allowed or restricted on your pages. |
|
Page Structure |
Allow/Block Page Elements |
Manage which elements can or can’t be used on your pages. |
|
|
Heading Level Sequence |
Ensure correct sequence of heading levels. |
2: Instruction
Defines the overall intention of the rule in a few words.
The rule instruction is used as the title for each problem in your page report. Try to be as concise and clear as possible so your teammates are able understand the problem at first glance.
3: Severity
This setting marks the level of severity and how quality issues of this rule should be handled. There are three levels that can be set for each rule:
![]()
Warning: The quality issue will most likely have a negative impact on the page's content quality. Fix is highly recommended. For example: the page uses heading levels inconsistently, which violates your internal style guide and doesn’t look very nice.
Suggestion: The quality issue is context-dependent and may not fall into simply “right” or “wrong”. Fix is optional. For example: the page contains language that may be exclusionary or insensitive, depending on the context.
4: Scope
By default this field is left empty and your rule will apply to every page in your space. You can limit the scope of an individual rule so that it only applies to pages with certain labels. Start typing the label name into the box to see a list of possible matches.
-
If you add more than one label to this box, only pages with ALL of the selected labels will be checked by this rule
-
Only labels that already exist in the space will show up as suggestions. If you need to create a new label, you can do so according to these directions from Atlassian.
5: Configuration options
The configuration options depend on the rule type. Some rule types you can only turn on and off, while others can be scoped and configured for multiple use cases. For example, the “Broken External Links” rule is a simple on/off, whereas the “Text Replacement” rule has options for case-sensitive search, exact word match, choosing which page elements the rule applies to, and the list of search terms and their more appropriate replacements. You can learn how to configure each rule type along with some examples and tips in the rule-specific pages below:
Save Settings
Click Save to apply the changes to your ruleset. Be aware that each page needs to be checked again after doing so.
Advanced Editing Mode
While viewing any rule, use the </> button to switch into Advanced Editing Mode. Instead of the UI, you’ll see a text editor that displays the settings of your rule using YAML syntax. Any changes you make in this mode will be reflected when switching back to the standard view. You can read more about how to use Advanced Editing Mode in our full article .