Depending on the type of Confluence deployment you are using it remains possible to generate an XML export, which once sent to our support team, we can use this content to help troubleshoot certain issues.
You can follow the relevant steps outlined in this documentation to generate the export for your Confluence hosting type:
- Creating a XML Export of a Single Page | CreatingaXMLExportofaSinglePage ConfluenceServer/DataCenter
- Creating a XML Export of a Single Page | CreatingaXMLExportofaSinglePage ConfluenceCloud
Confluence Server / Data Center
The following procedure explains how to export a single page to XML on Confluence Server / Data Center installation. The resulting ZIP file contains the content of the page including attachments, and it might help the K15t support team to resolve your issue quicker.
To create the support file, you must log in with either specific Space permissions or Global permissions.
Since the release of Confluence 8.3 the Backup and restore system has undergone a complete overhaul. This means it is no longer possible to generate single page XML exports. Instead, please check out how to generate space XML exports here.
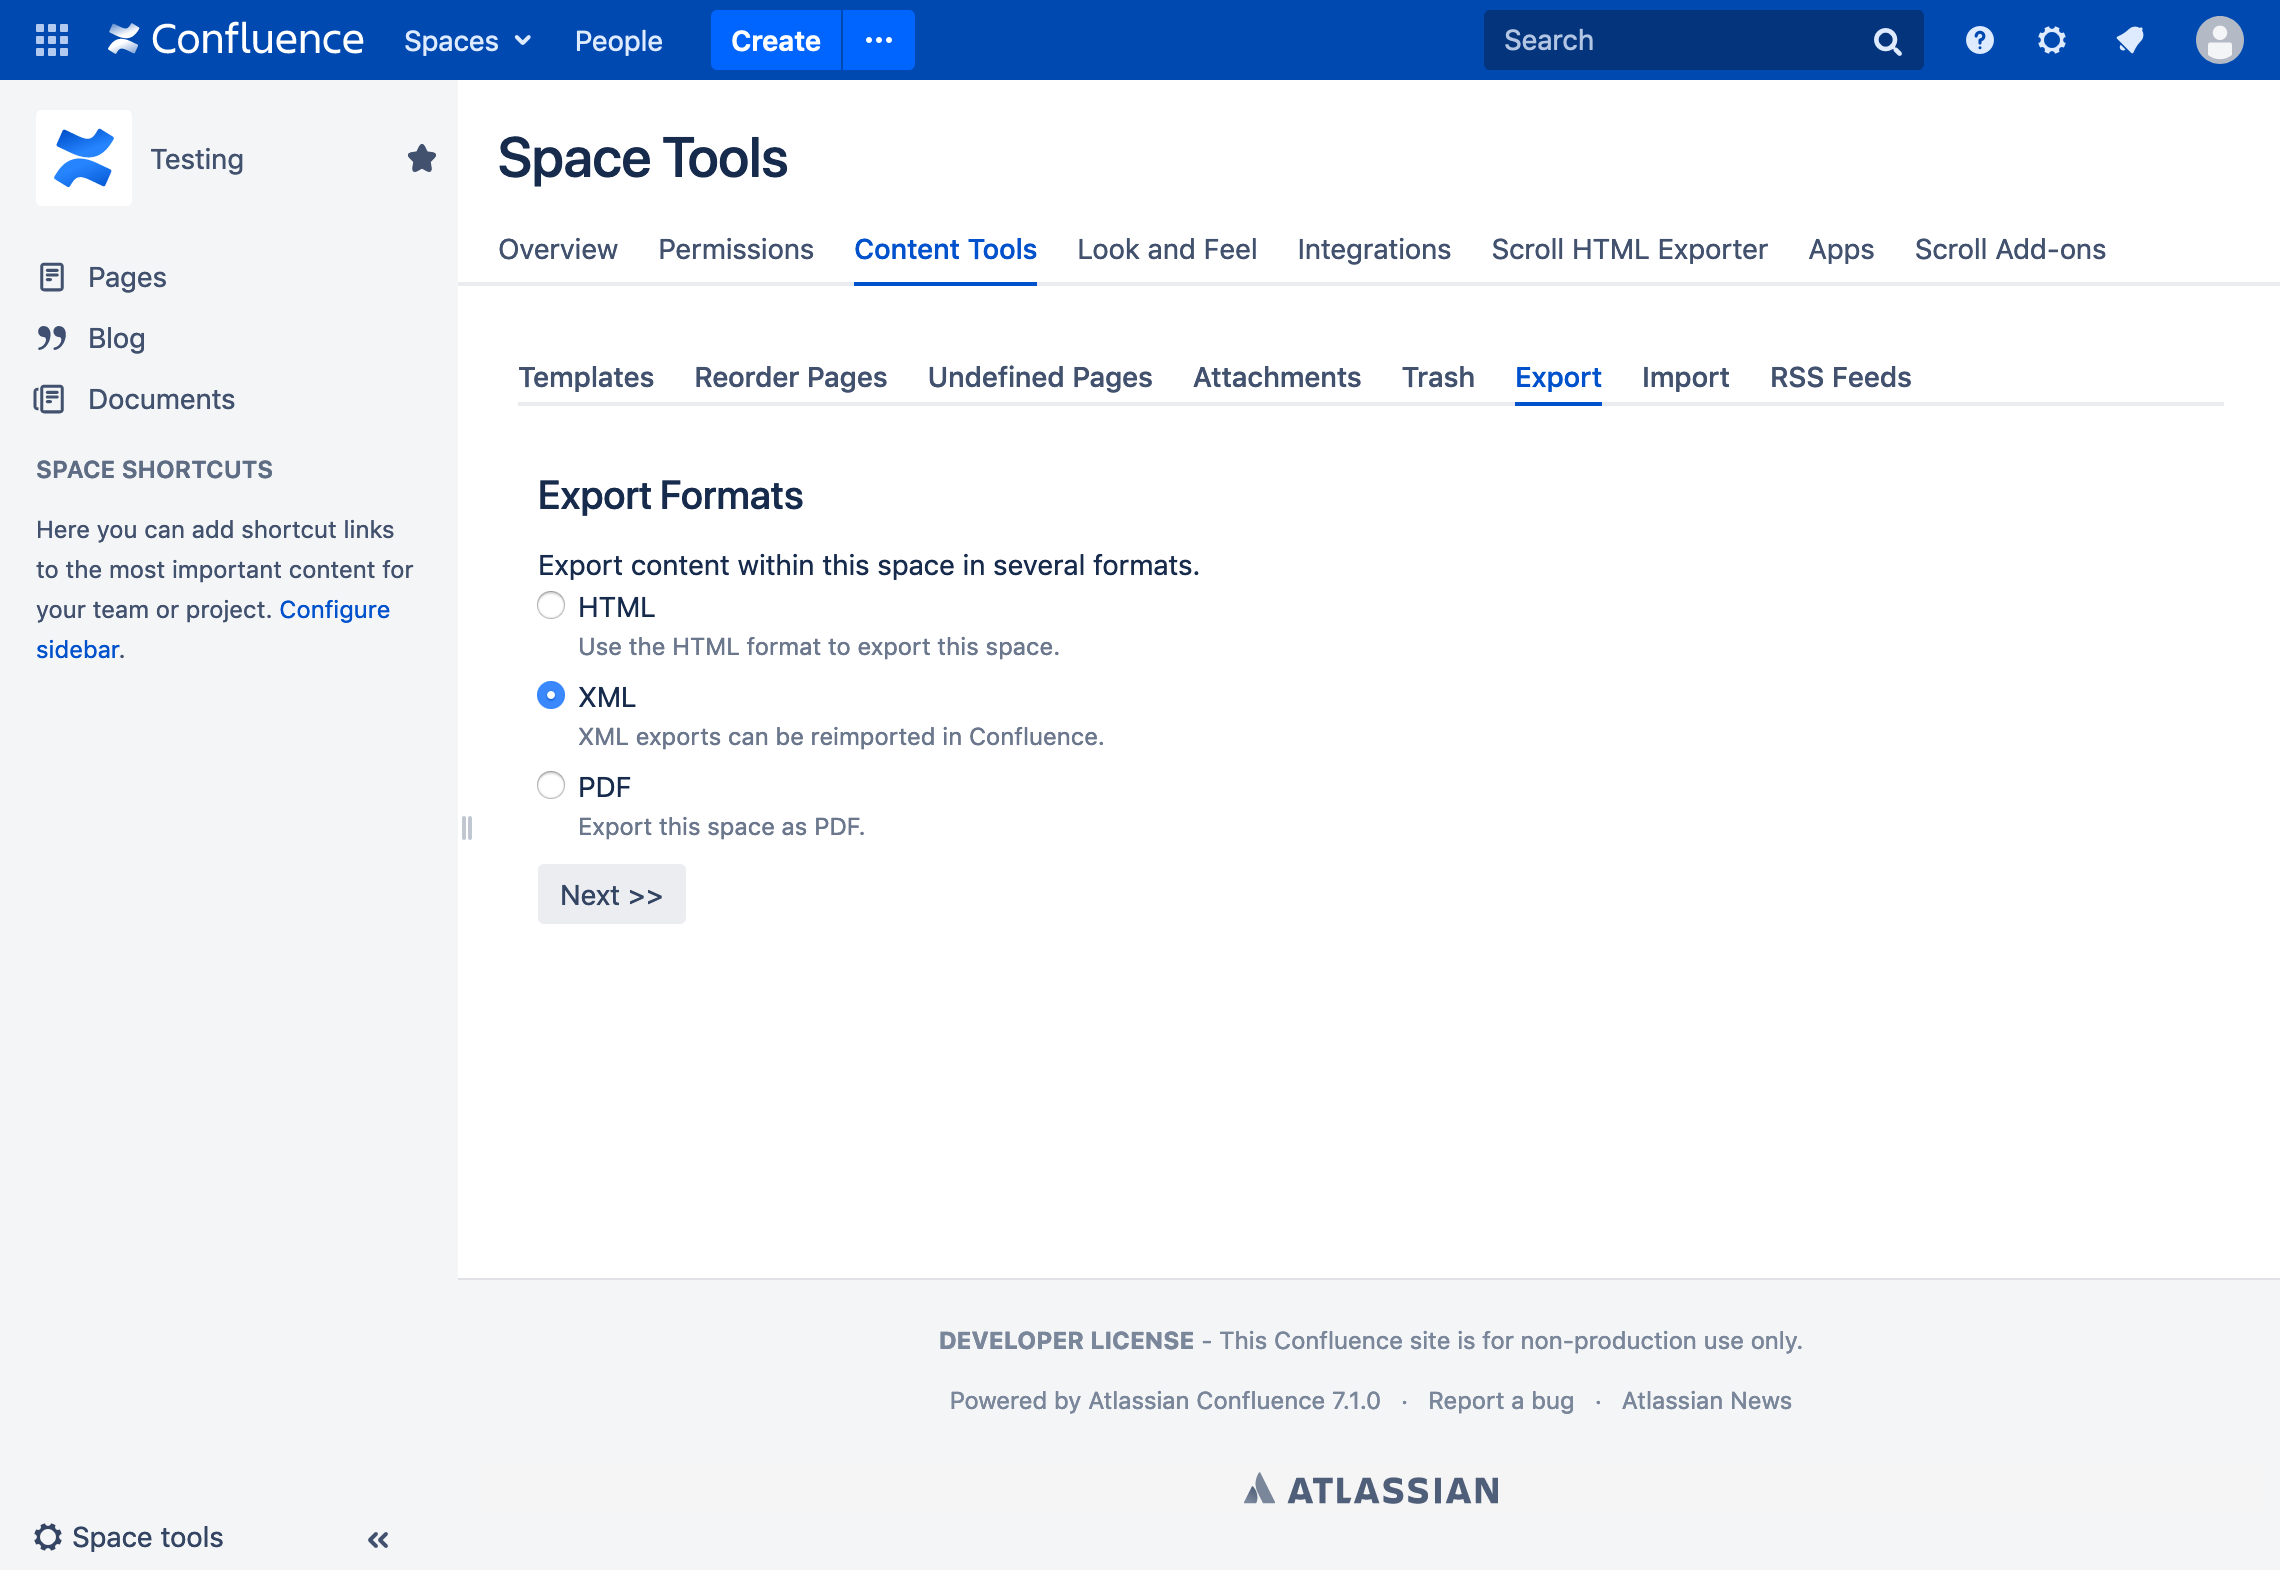
To create an XML Export of a single page:
-
Open a space and click Space Tools > Content Tools
-
Click Export
-
Click XML and Next >>
-
Click Custom Export.
-
Activate Include Comments if you want to include comments made on the page(s) you are exporting.
-
Select the page(s) you want to export.
By default, all the pages are selected. To deselect all, click Deselect All
-
Click Export.
A zipped archive of XML files is created. When the export has finished, Confluence will offer you the option to download the zip file.
Confluence Cloud
The following procedure explains how to export a single page to XML on Confluence Cloud. The resulting ZIP file contains the content of the page including attachments, and it might help the K15t support team to resolve your issue quicker.
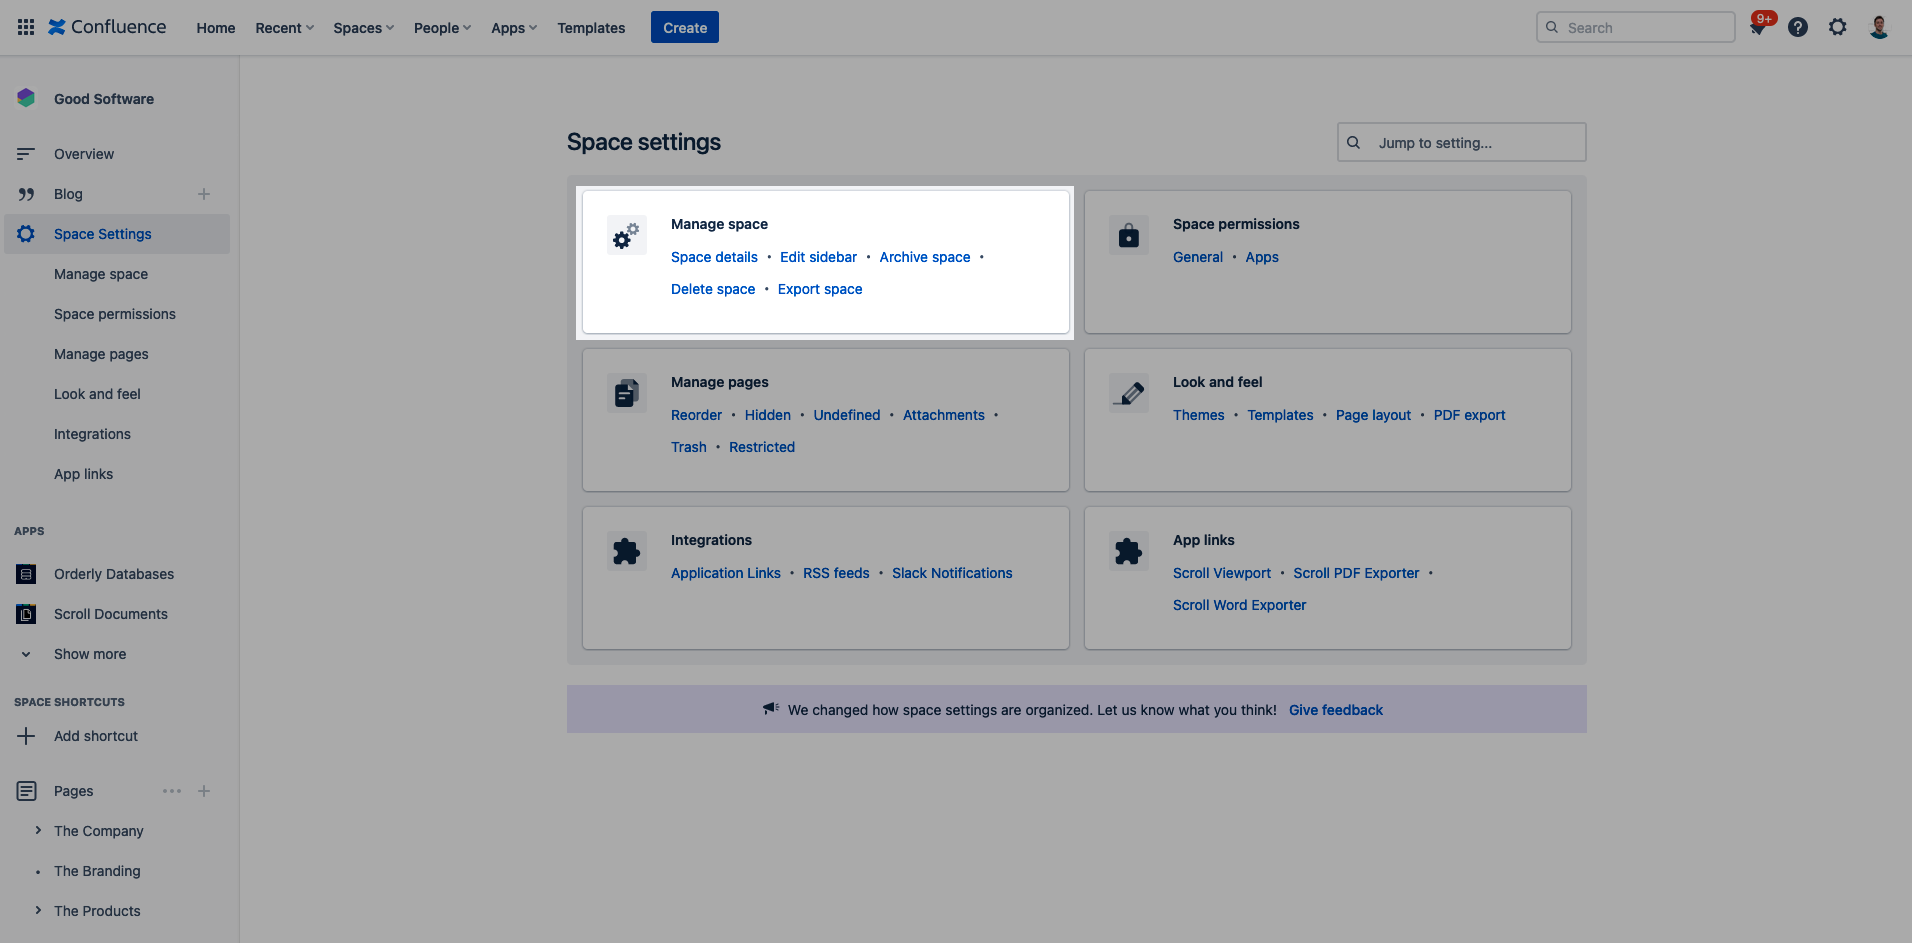
To create an XML Export of a single page:
-
Open a space and click Space Settings > Manage Space
-
Click the Export space link
-
Click XML and then Next >>
-
Click Custom Export
-
Activate Include Comments if you want to include comments made on the page(s) you are exporting.
-
Select the page(s) you want to export.
By default, all the pages are selected. To deselect all, click Deselect All
-
Click Export.
A zipped archive of XML files is created. When the export has finished, Confluence will offer you the option to download the zip file.