This guide explains how you can add a 'like' button to pages, comments and attachments in Scroll Viewport.
Please note that only logged-in users can like content using this button.
Implement a like button
-
Firstly, add this code to your <head> element:
<meta name="username" content="$user.username">
<meta name="context-path" content="$contextPath">
-
Then, place this code next to the content that you want to add a like button to:
<div class="like-container">
    <a data-content-id="$page.id" style="display: none;"></a>
    <span></span>
</div>
In this example, the
data-content-idis '$page.id', meaning that this code will add a like button to the page itself.However, you can also change the
data-content-idvalue to the element id of comments and attachments to give them a like button. -
Now, embed this script in the page:
$(document).ready(function () {
    var username = $('meta[name=username]').attr('content')
    var contextPath = $('meta[name=context-path]').attr('content')
    if (username !== "") {
        var likeElements = $('.like-container')
        likeElements.find('a').show()
        likeElements.find('a').on('click', function(e) {
            e.preventDefault()
            var linkElement = $(e.target)
            if ($(e.target).data('content-id')) {
                pageId = $(e.target).data('content-id')
            }
            $.ajax({
                url: contextPath + '/rest/likes/1.0/content/' + pageId + '/likes',
                type: linkElement.is('.liked') ? 'DELETE' : 'POST',
                contentType: 'application/json'
            }).done(function(data, textStatus, jqXHR) {
                linkElement.toggleClass('liked')
                linkElement.text(linkElement.is('.liked') ? 'Unlike' : 'Like')
            })
            return false
        })
        likeElements.each(function(index, likeElement) {
            var likeElementLink = $(likeElement).find('a')
            var likeElementText = $(likeElement).find('span')
            pageId = likeElementLink.data('content-id') || pageId
            $.get(contextPath + '/rest/likes/1.0/content/' + pageId + '/likes').done(function(data) {
                var isLiked = false
                $.each(data.likes, function(index, like) {
                    if (like.user && like.user.name === username) {
                        isLiked = true
                        return false
                    }
                })
                if (isLiked) {
                    likeElementLink.addClass('liked')
                    likeElementLink.text('Unlike')
                } else {
                    likeElementLink.text('Like')
                }
                likeElementText.text(data.likes.length +' people like this content')
            })
        })
    }
});
Of course, this code is just an example. For instance, you could delete the text in line 41 if you don't want to display the number of likes.
Modifying the code
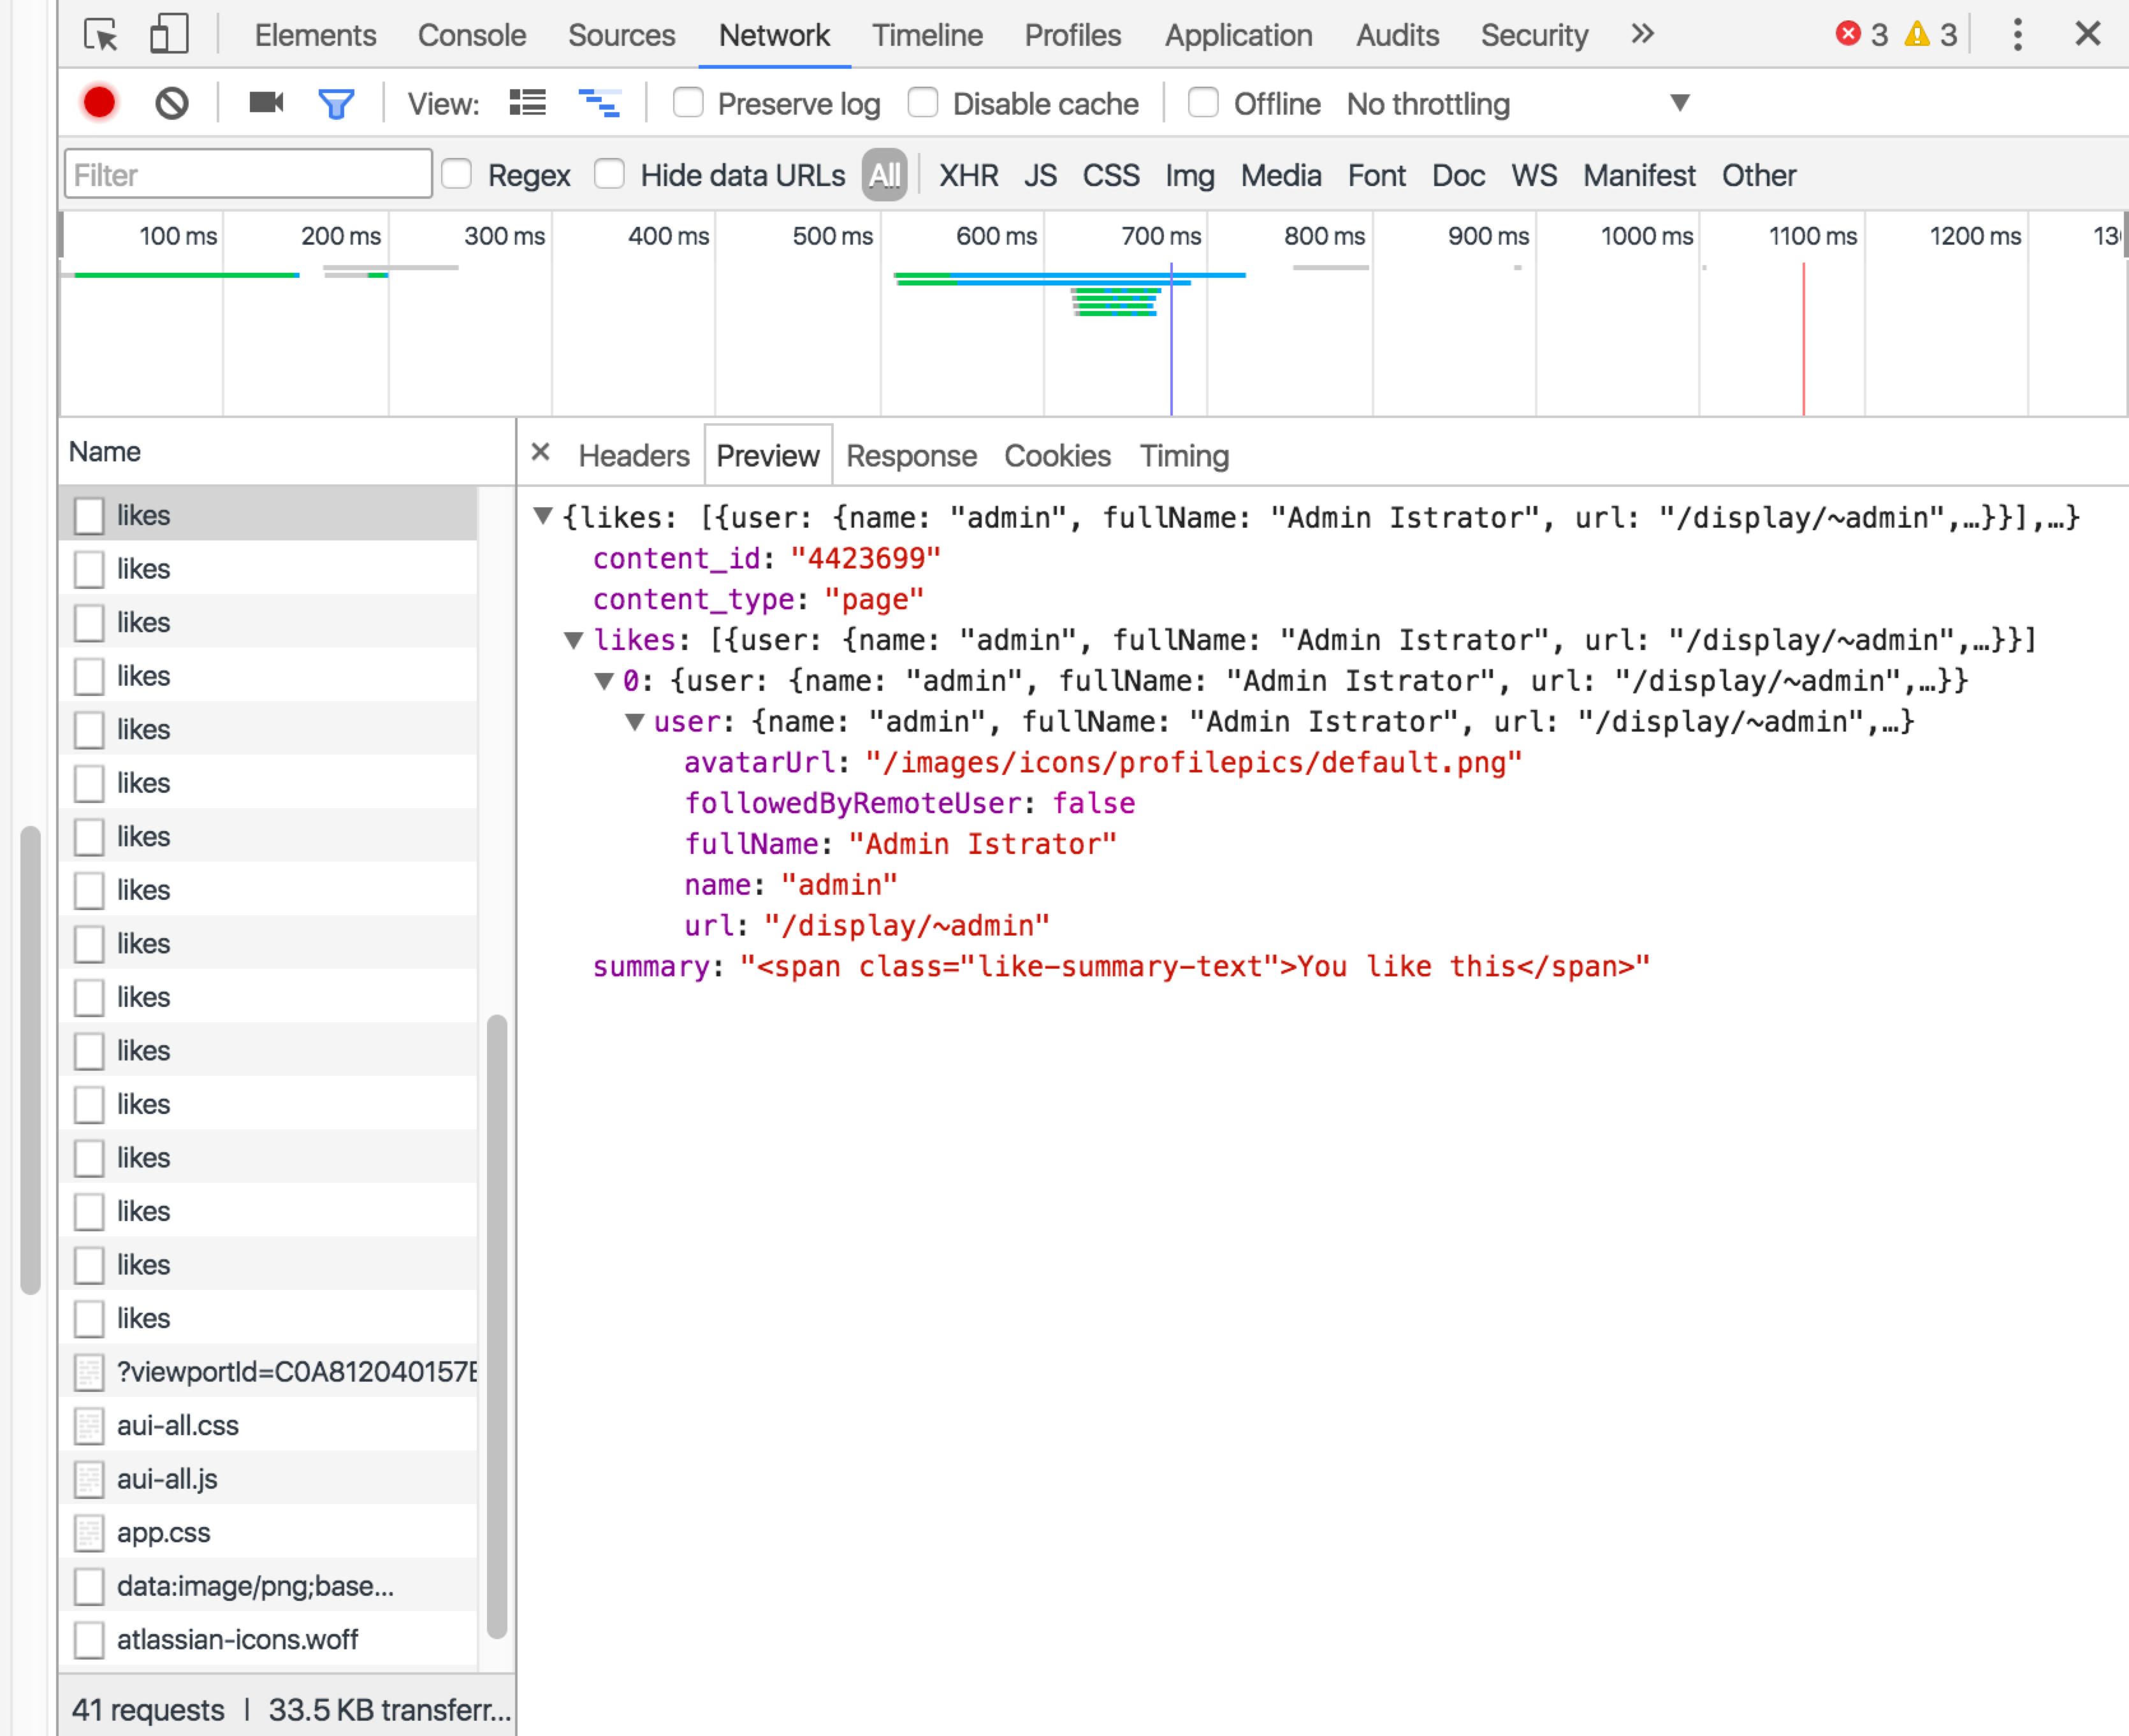
After the buttons are initialized, inspecting their REST API HTTP call will return data that developers can use to expand the code in various ways:

The information reported here includes the following data:
|
Name |
Description |
|---|---|
|
content_id |
the content's unique identifier |
|
content_type |
the type of content (page, comment or attachment) |
|
likes |
expanding this displays a list of all users who have liked this element. The following information fields are displayed:
|
|
summary |
the text that appears after the user clicks the like button |
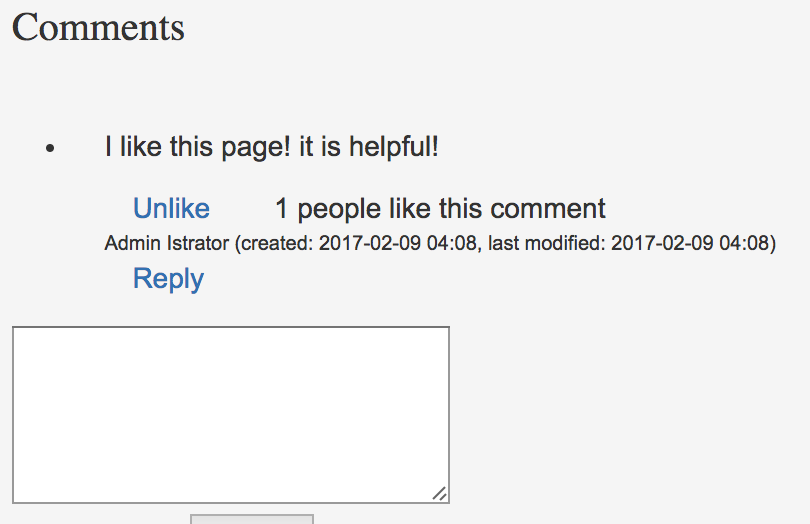
Result
This is what the button (made with unedited code from above, and unstyled) looks when implemented for page comments:

