Connect your own domain to make your site easy to find and keep it true to your brand.
When you create a site, Scroll Sites offers you a number of provided domains which you can select from. While the provided domains help you to quickly get your content published to the web, these domains are clearly Scroll-branded and thus not familiar to your users or recognizably yours.
To create a truly custom and branded experience, you can use your own custom domain(s) for your Scroll site(s).
In Scroll Sites, you add a custom domain at the Scroll Sites' account level first and can then connect the custom domain to the site(s) of your choice.
Before You Begin
Before starting the process of setting up a custom domain, please make sure you meet the following requirements:
-
You already own a custom domain.
-
You have the ability to set up a CNAME records for the custom domain DNS name.
Set up a Custom Domain
To set up a custom domain:
-
From the Confluence sidebar, click Apps > Scroll Sites.
-
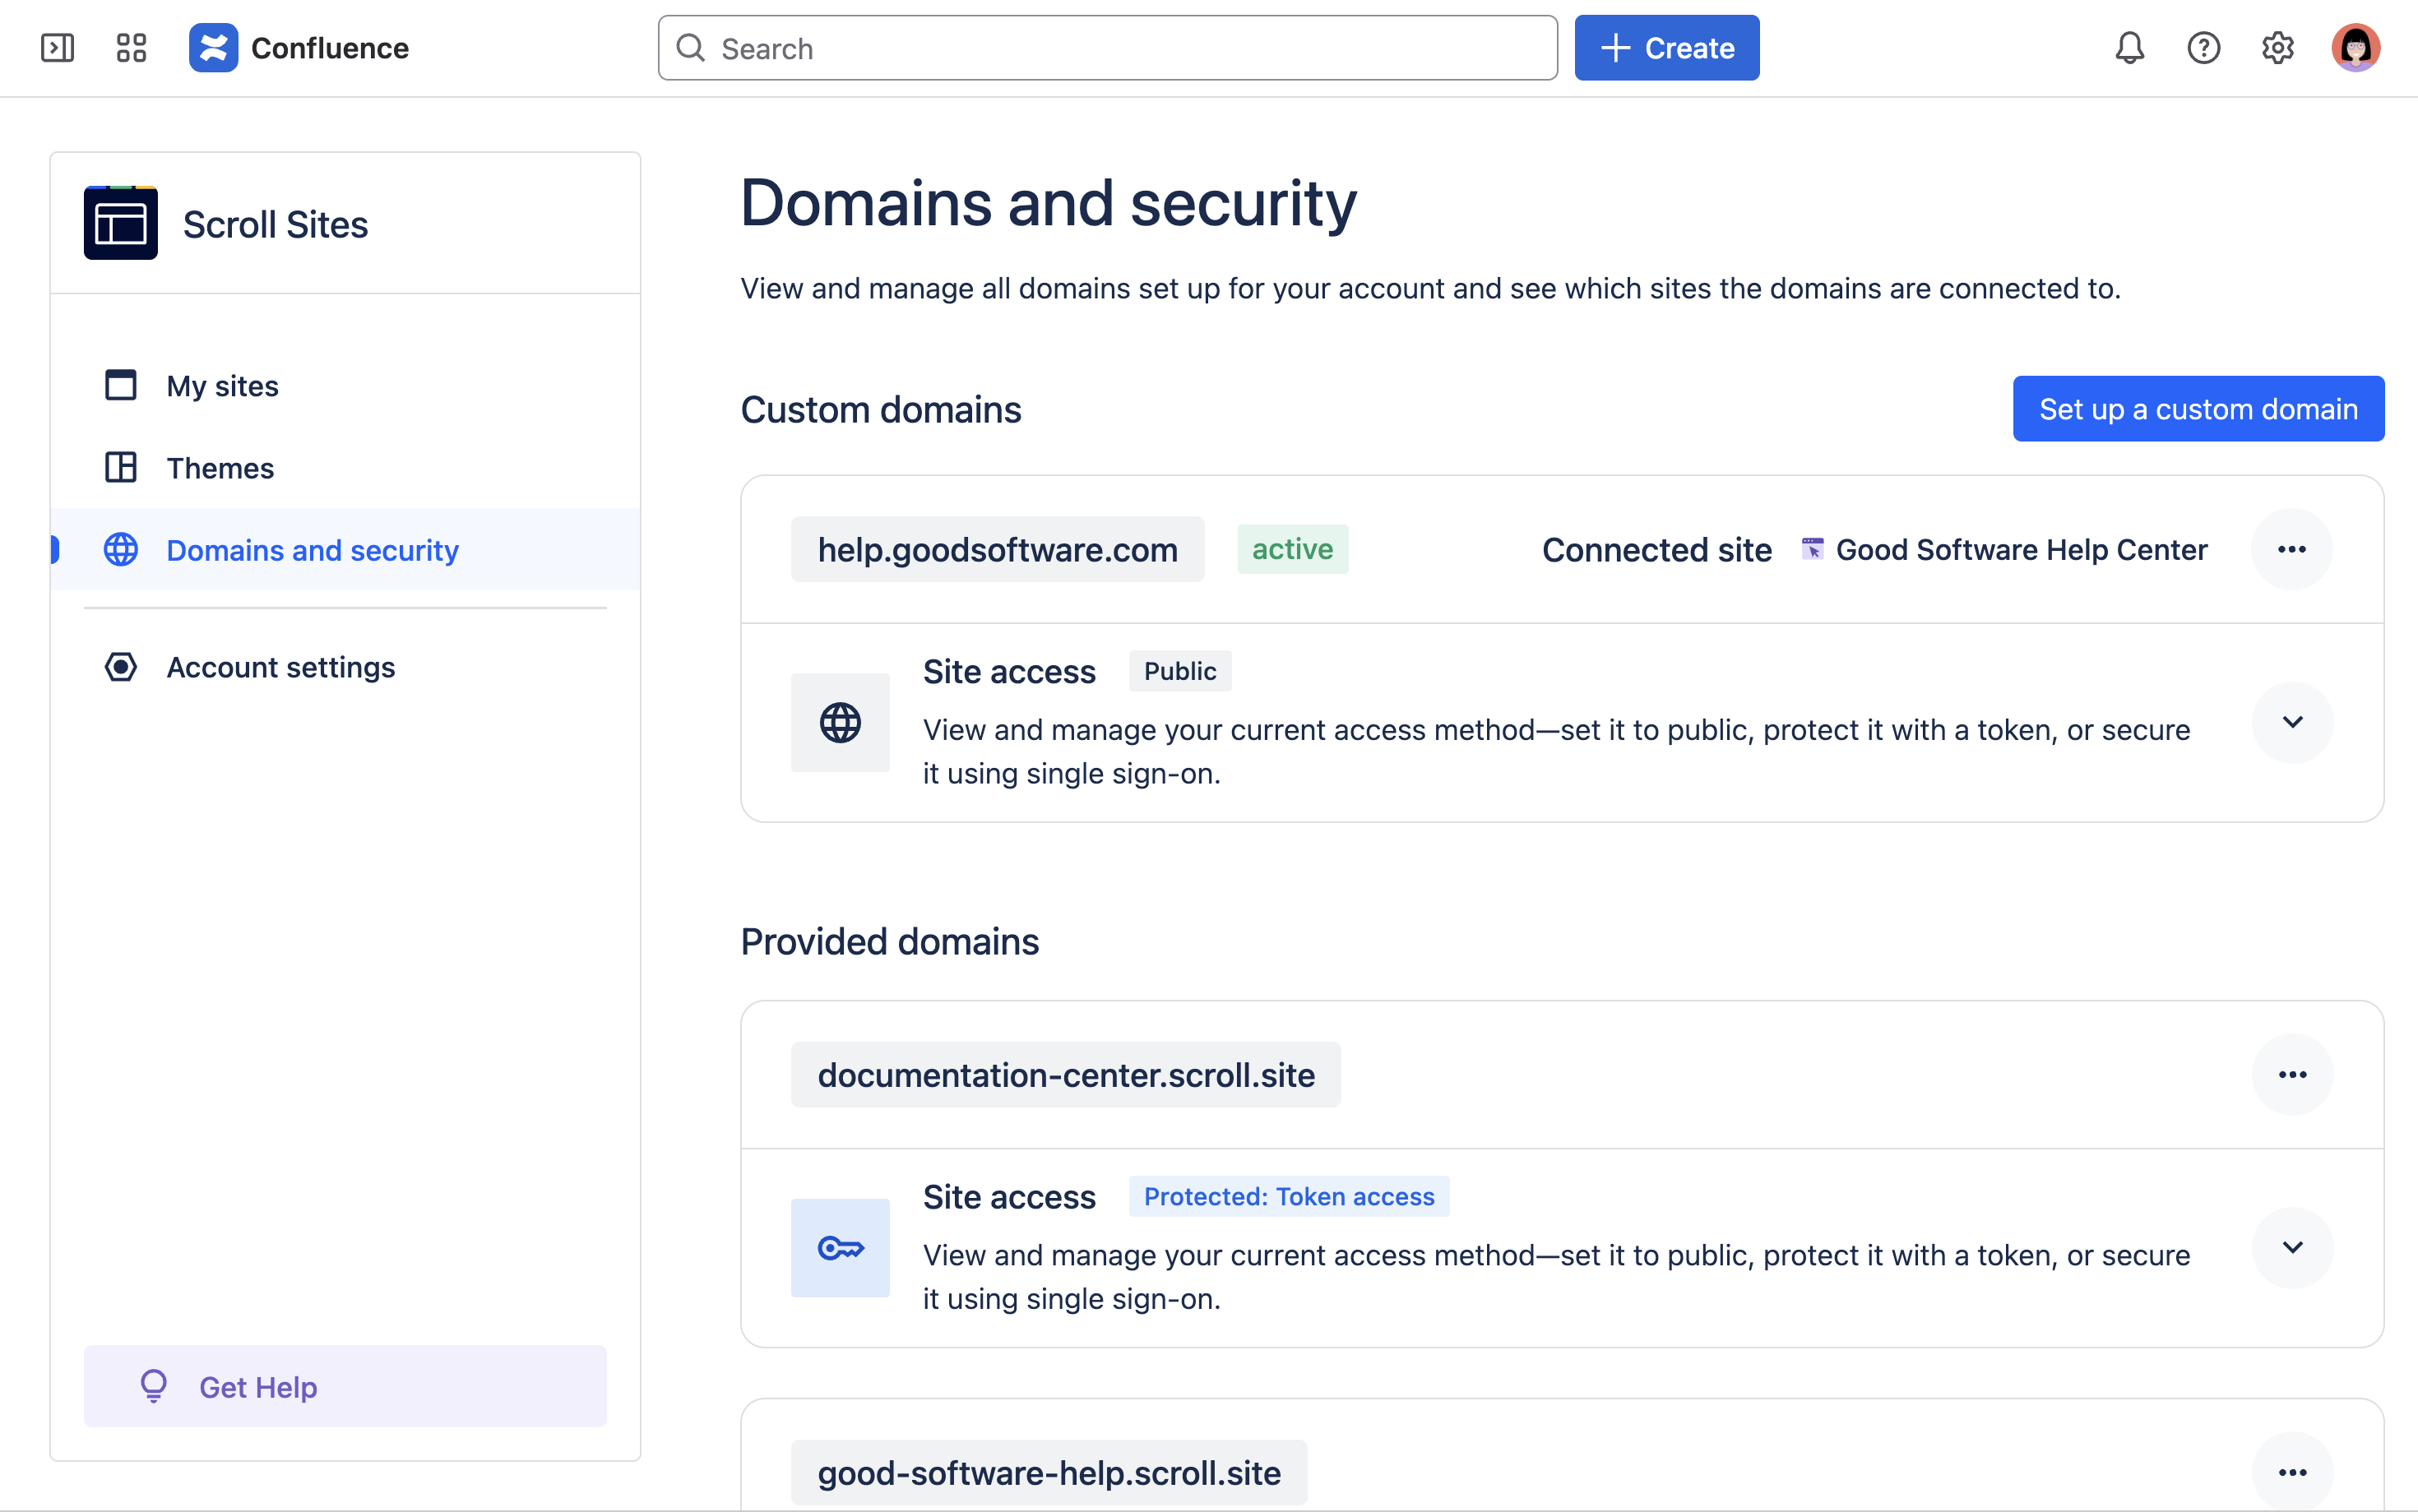
From the Scroll Sites sidebar on the left, click Domains & Security.
-
From the Domains & Security screen, click Set up a custom domain. The custom domain setup wizard opens.
-
From the Enter domain step, in the field URL enter the custom domain you wish to use. You need to use a subdomain format (e.g.
help.k15t.comorwww.k15t.comwill work but e.gk15t.comwon’t work). -
Click Start.
This will start the custom domain setup process.
DNS configuration
In the next step, you need to create CNAME records for your custom domain:
-
From the Configuration step, copy the two provided URL names and the two corresponding values.
-
Open your DNS tool:
-
Create a new CNAME record and add as entries the first two copied values (the URL name + value that appear under Domain validation in Scroll Sites).
-
Create another CNAME record and add as entries the last two copied values (the URL name + value that appear under Certificate validation in Scroll Sites).
-
Review your CAA records and make sure they allow for the AWS Certificate Manager (ACM) to issue a certificate for your domain or subdomain. Read more on Custom Domain Setup Fails .
-
-
Go back to Scroll Sites custom domain setup wizard and click Next.
Please make sure you complete the required tasks as quickly as possible. After 72 hours the process will fail automatically if the CNAME can’t be found.
DNS validation
The Validation step is an automated process and may take several hours to complete. You can close the dialog – and the window if needed – and check back later.
What happens in the background?
During this part of the process, your CNAME record is being searched for to set up the custom domain. If we can’t validate the record within 72 hours, the process will be canceled automatically and will need to be restarted manually.
You can also cancel the process yourself at any time.
Once the validation is successful, your custom domain will be available for you to connect it to one or multiple Scroll sites of your choice.
Please don’t delete the entries from your DNS configuration unless you no longer use the site or custom domain. Deleting the entries could make your site inaccessible under your custom domain.
You can always remove the custom domain, should you ever need to.
Trouble with the setup?
Have you tried to set up a custom domain but haven’t been able to complete the process? Check out why your custom domain setup fails.
Connect a Custom Domain to a Site
Once your custom domain receives the active status in the Domains & Security screen, you can select the custom domain for any new or existing site.
To connect the custom domain to a new site, simply select it in step 6 of the site creation process.
To connect the custom domain to an existing site:
-
From the My Sites screen, click the card that has your site’s name.
-
From the left sidebar, click Site Settings > Site URL.
-
Check the box Connect custom domain
-
From the Site domain drop down, select the custom domain you want to connect to the site.
-
From the Site settings screen, click Publish changes or Save changes in the top right.
Your change will now automatically trigger a new site update (for sites set to live updates) or be applied with your next site update (for sites set to manual updates).
Your site’s URLs then use the selected custom domain.
Users accessing URLs with the previously used domain will be redirected to your new site if the previously used domain was a provided domain.
Manage All Domains
To overview all custom domains that you have set up and that are used in your different Scroll sites, go to Apps > Scroll Sites > Domains & Security.
The first part of the Domains &Security screen, lists all the provided domains that available.
The second part of the Domains &Security screen, lists all the custom domains that you have set up.
From this list and for each domain, you can:
-
view how many sites are connected to the domain
-
view which sites are connected to the domain
-
navigate to edit the site’s URL
-
remove the domain
Additionally, for each custom domain, you can:
-
view the setup status (active, in progress, error)
-
view further details about the setup status or configuration details
You can also set up new custom domains at any time from this screen (click Set up a custom domain in the top right).