You can use the Confluence Cloud Migration Assistant to automatically migrate your export templates from your on-premise Confluence deployment (ie. Server/Data Center) to Confluence Cloud. Global export templates will automatically be migrated when using the Confluence Cloud Migration Assistant. Space export templates will be migrated if the respective space is chosen to be migrated using the Confluence Cloud Migration Assistant.
Check out our troubleshooting section for further details if you experience problems when migrating
Using the Confluence Cloud Migration Assistant
Stage 1: Plan
Before embarking on the journey of migrating content from server or Data Center to cloud, it is recommend that you take a look at Atlassian's own resources - this includes best practice guides, checklists, and documentation for ensuring a successful migration.
-
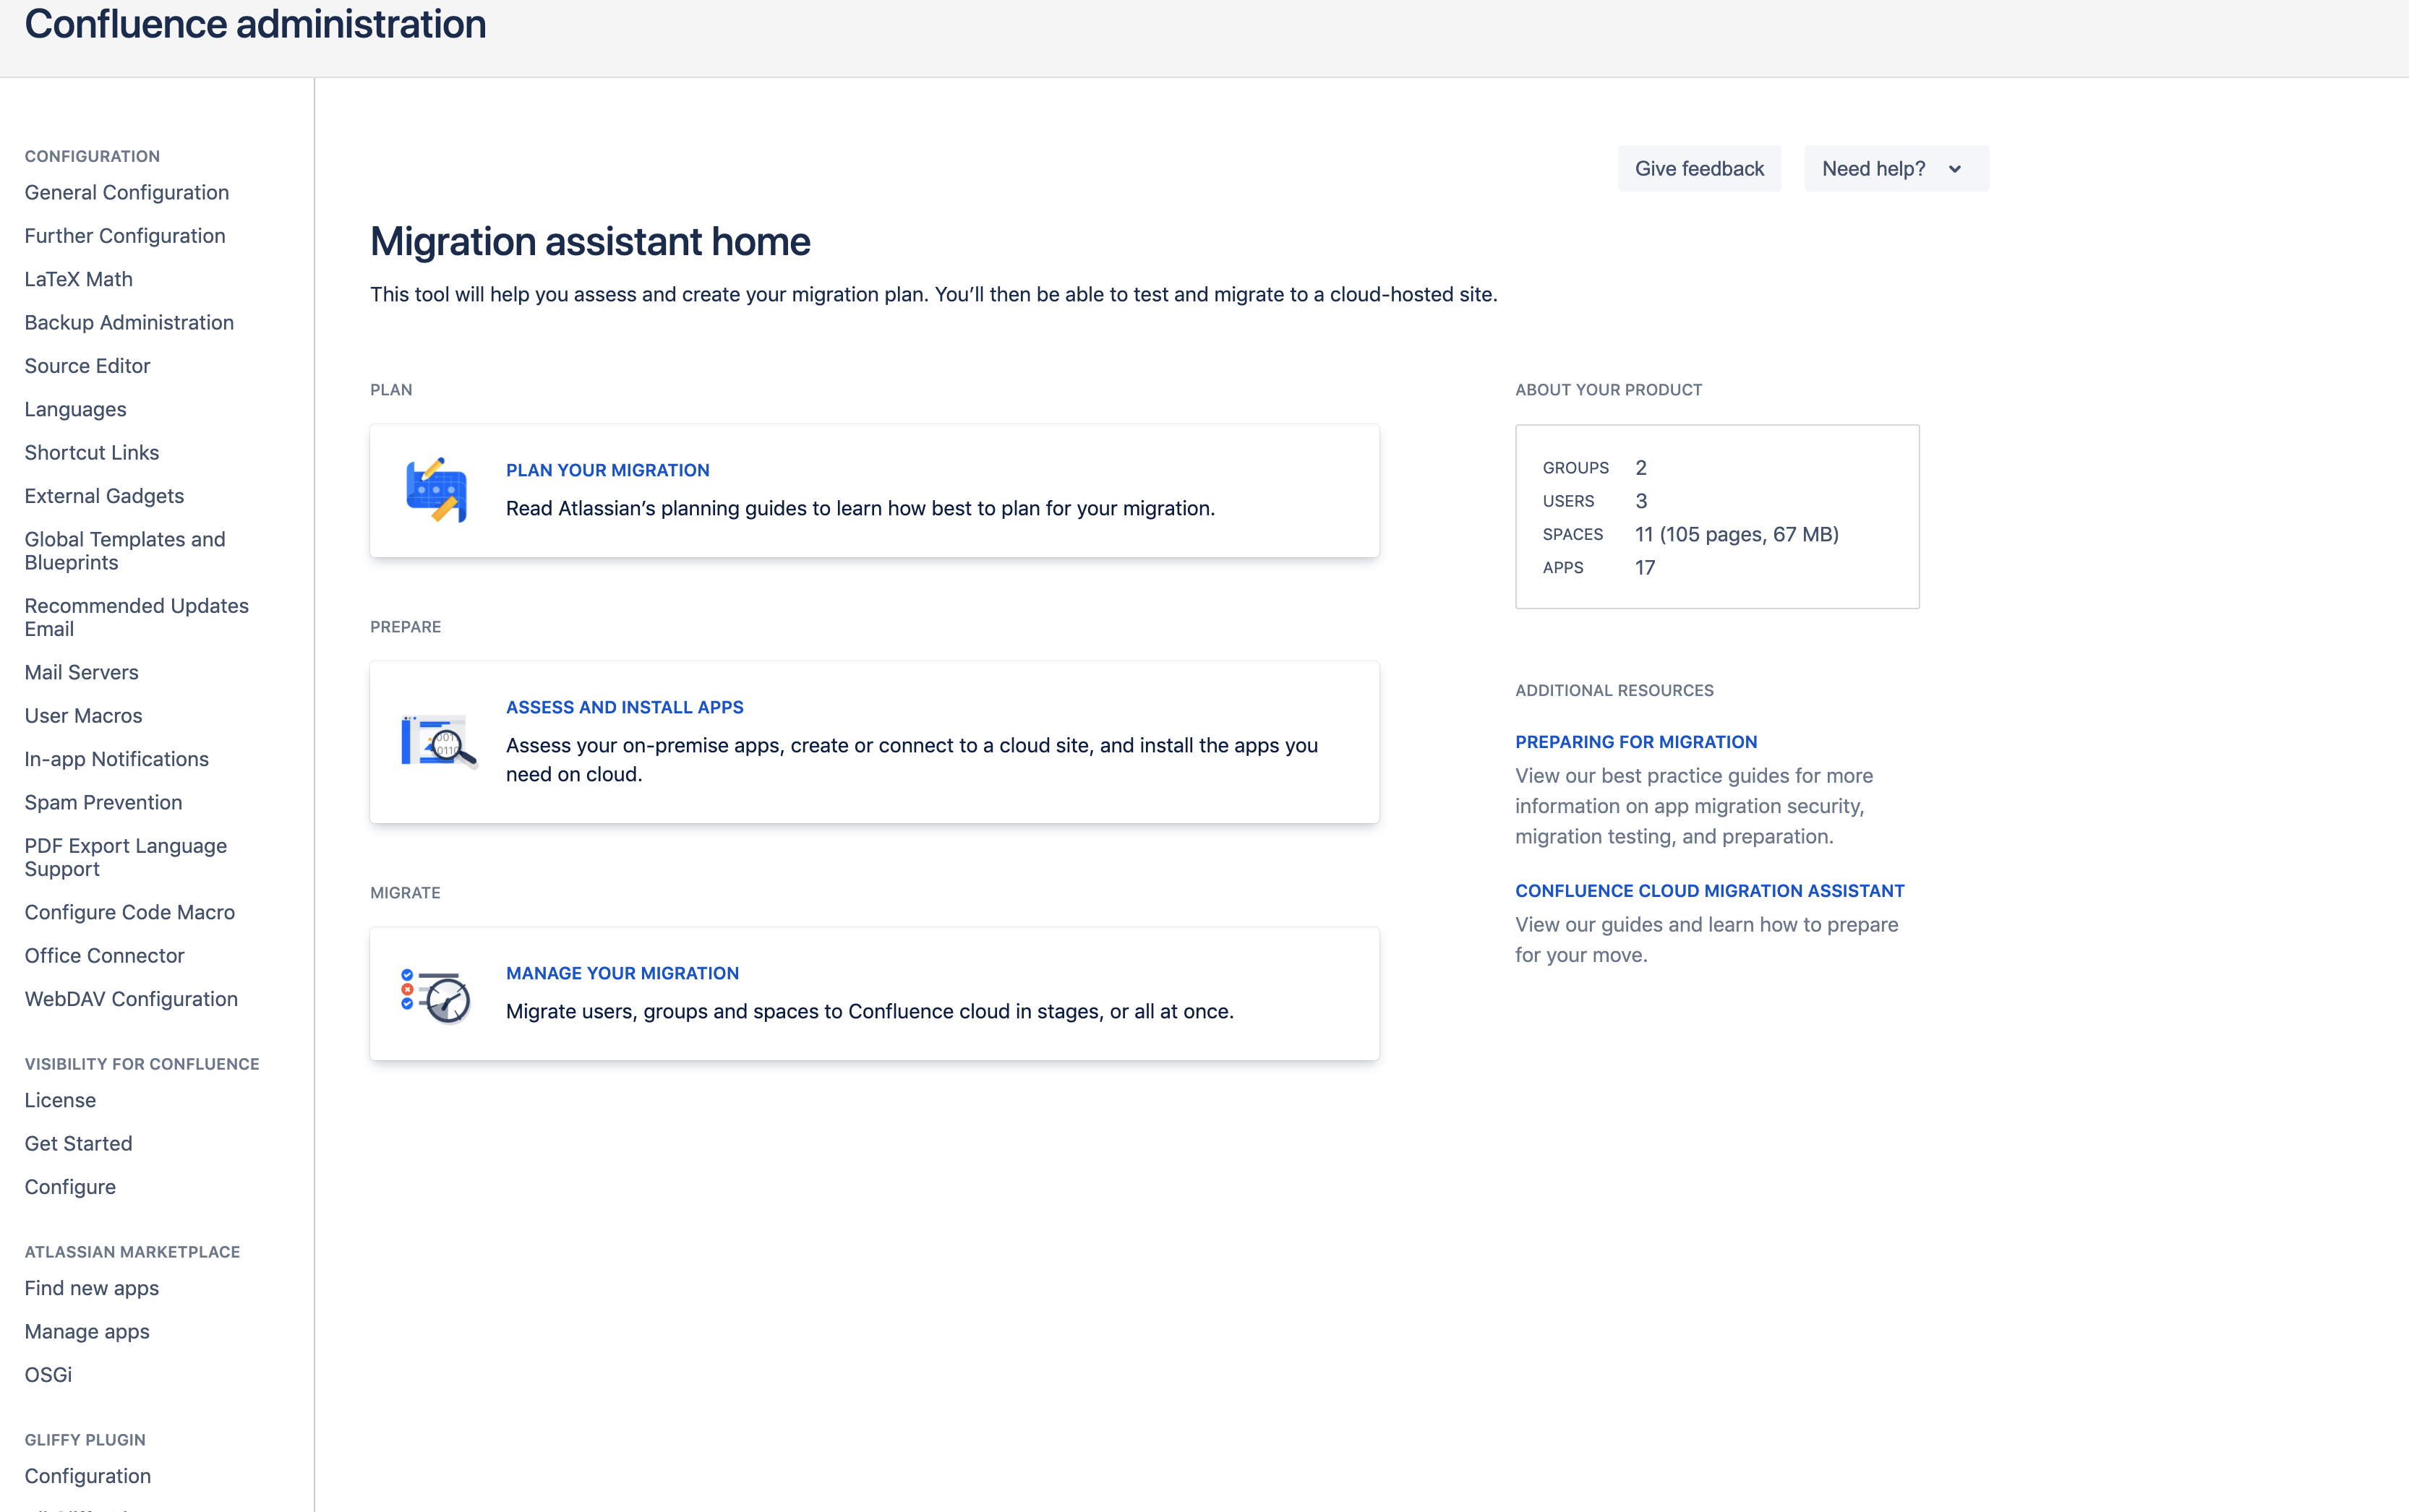
The Confluence Cloud Migration Assistant can be found within the Confluence administration on server and Data Center under the Atlassian Cloud section.
-
Once selected the options to either Plan, Prepare or Migrate will appear:
Stage 2: Assess
Carrying out an assessment of your apps helps you to establish which apps are needed for a migration. The following steps on this page focus on Scroll PDF Exporter but can be carried out for all apps installed on your on-premise instance - please consult Atlassian's documentation for further information.
-
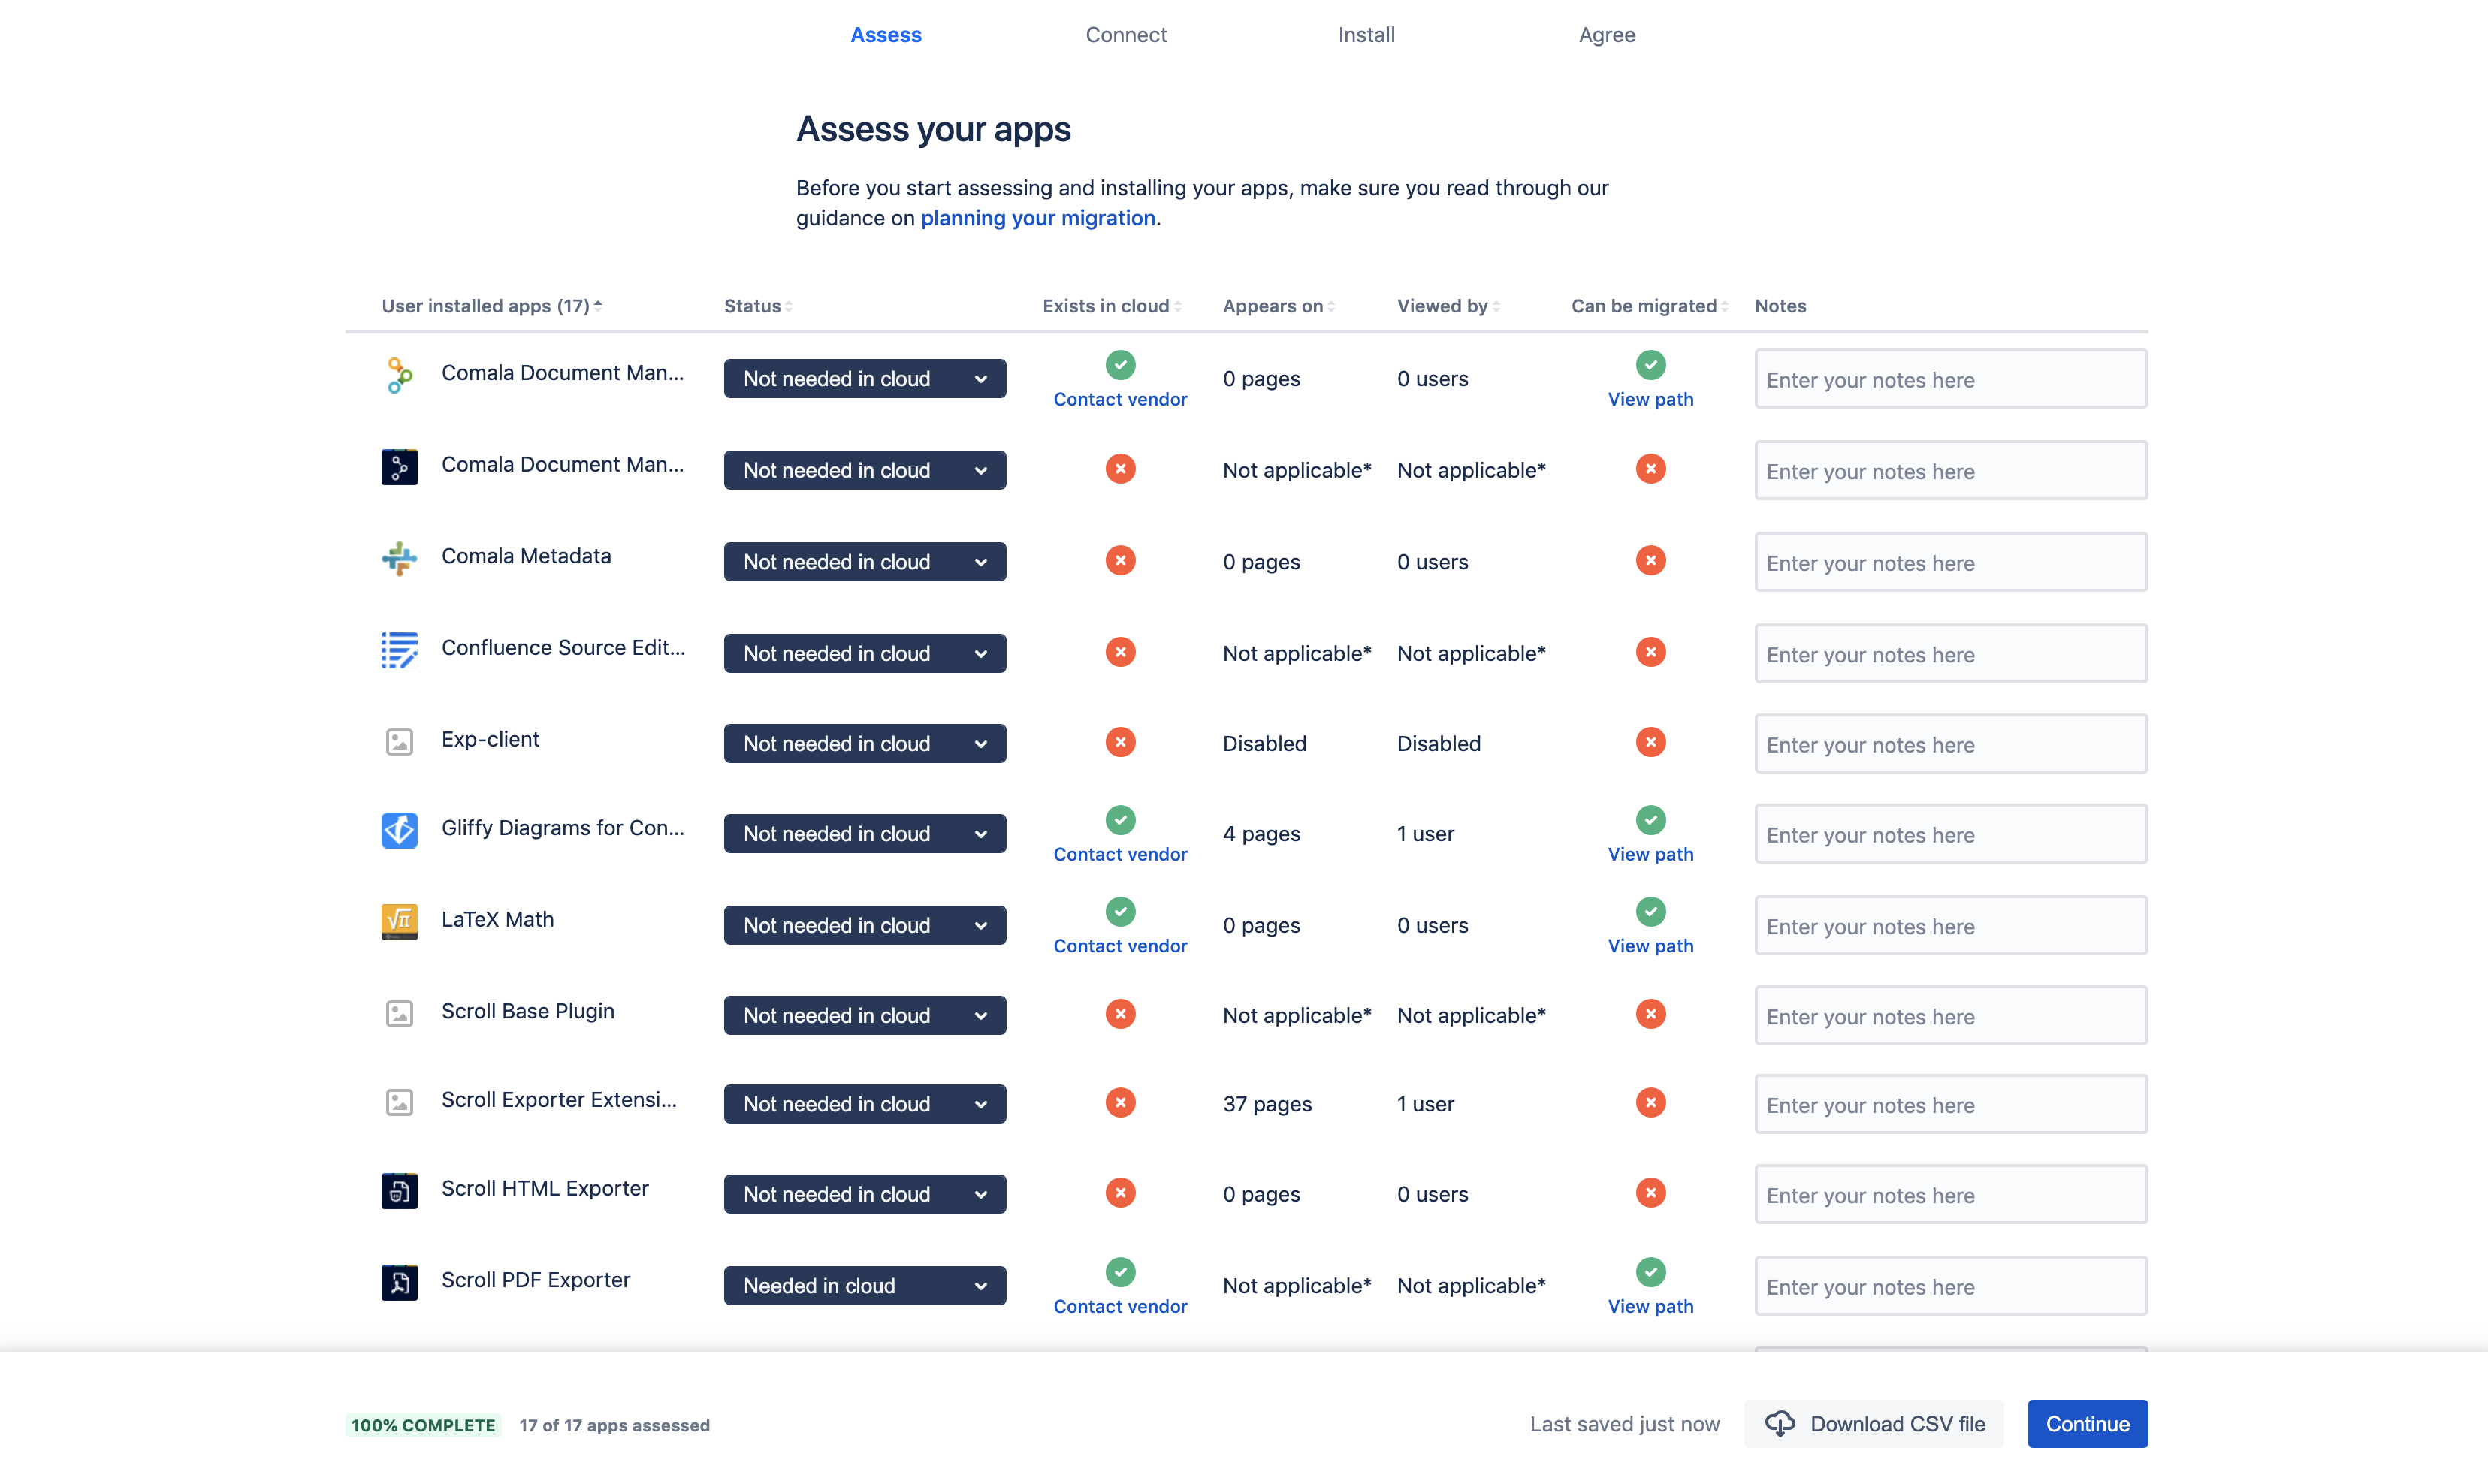
Once you have planned for your migration you can then assess your apps by selecting Assess and Install Apps
-
Within this section you can mark the status of the Scroll PDF Exporter app as Needed in cloud:
-
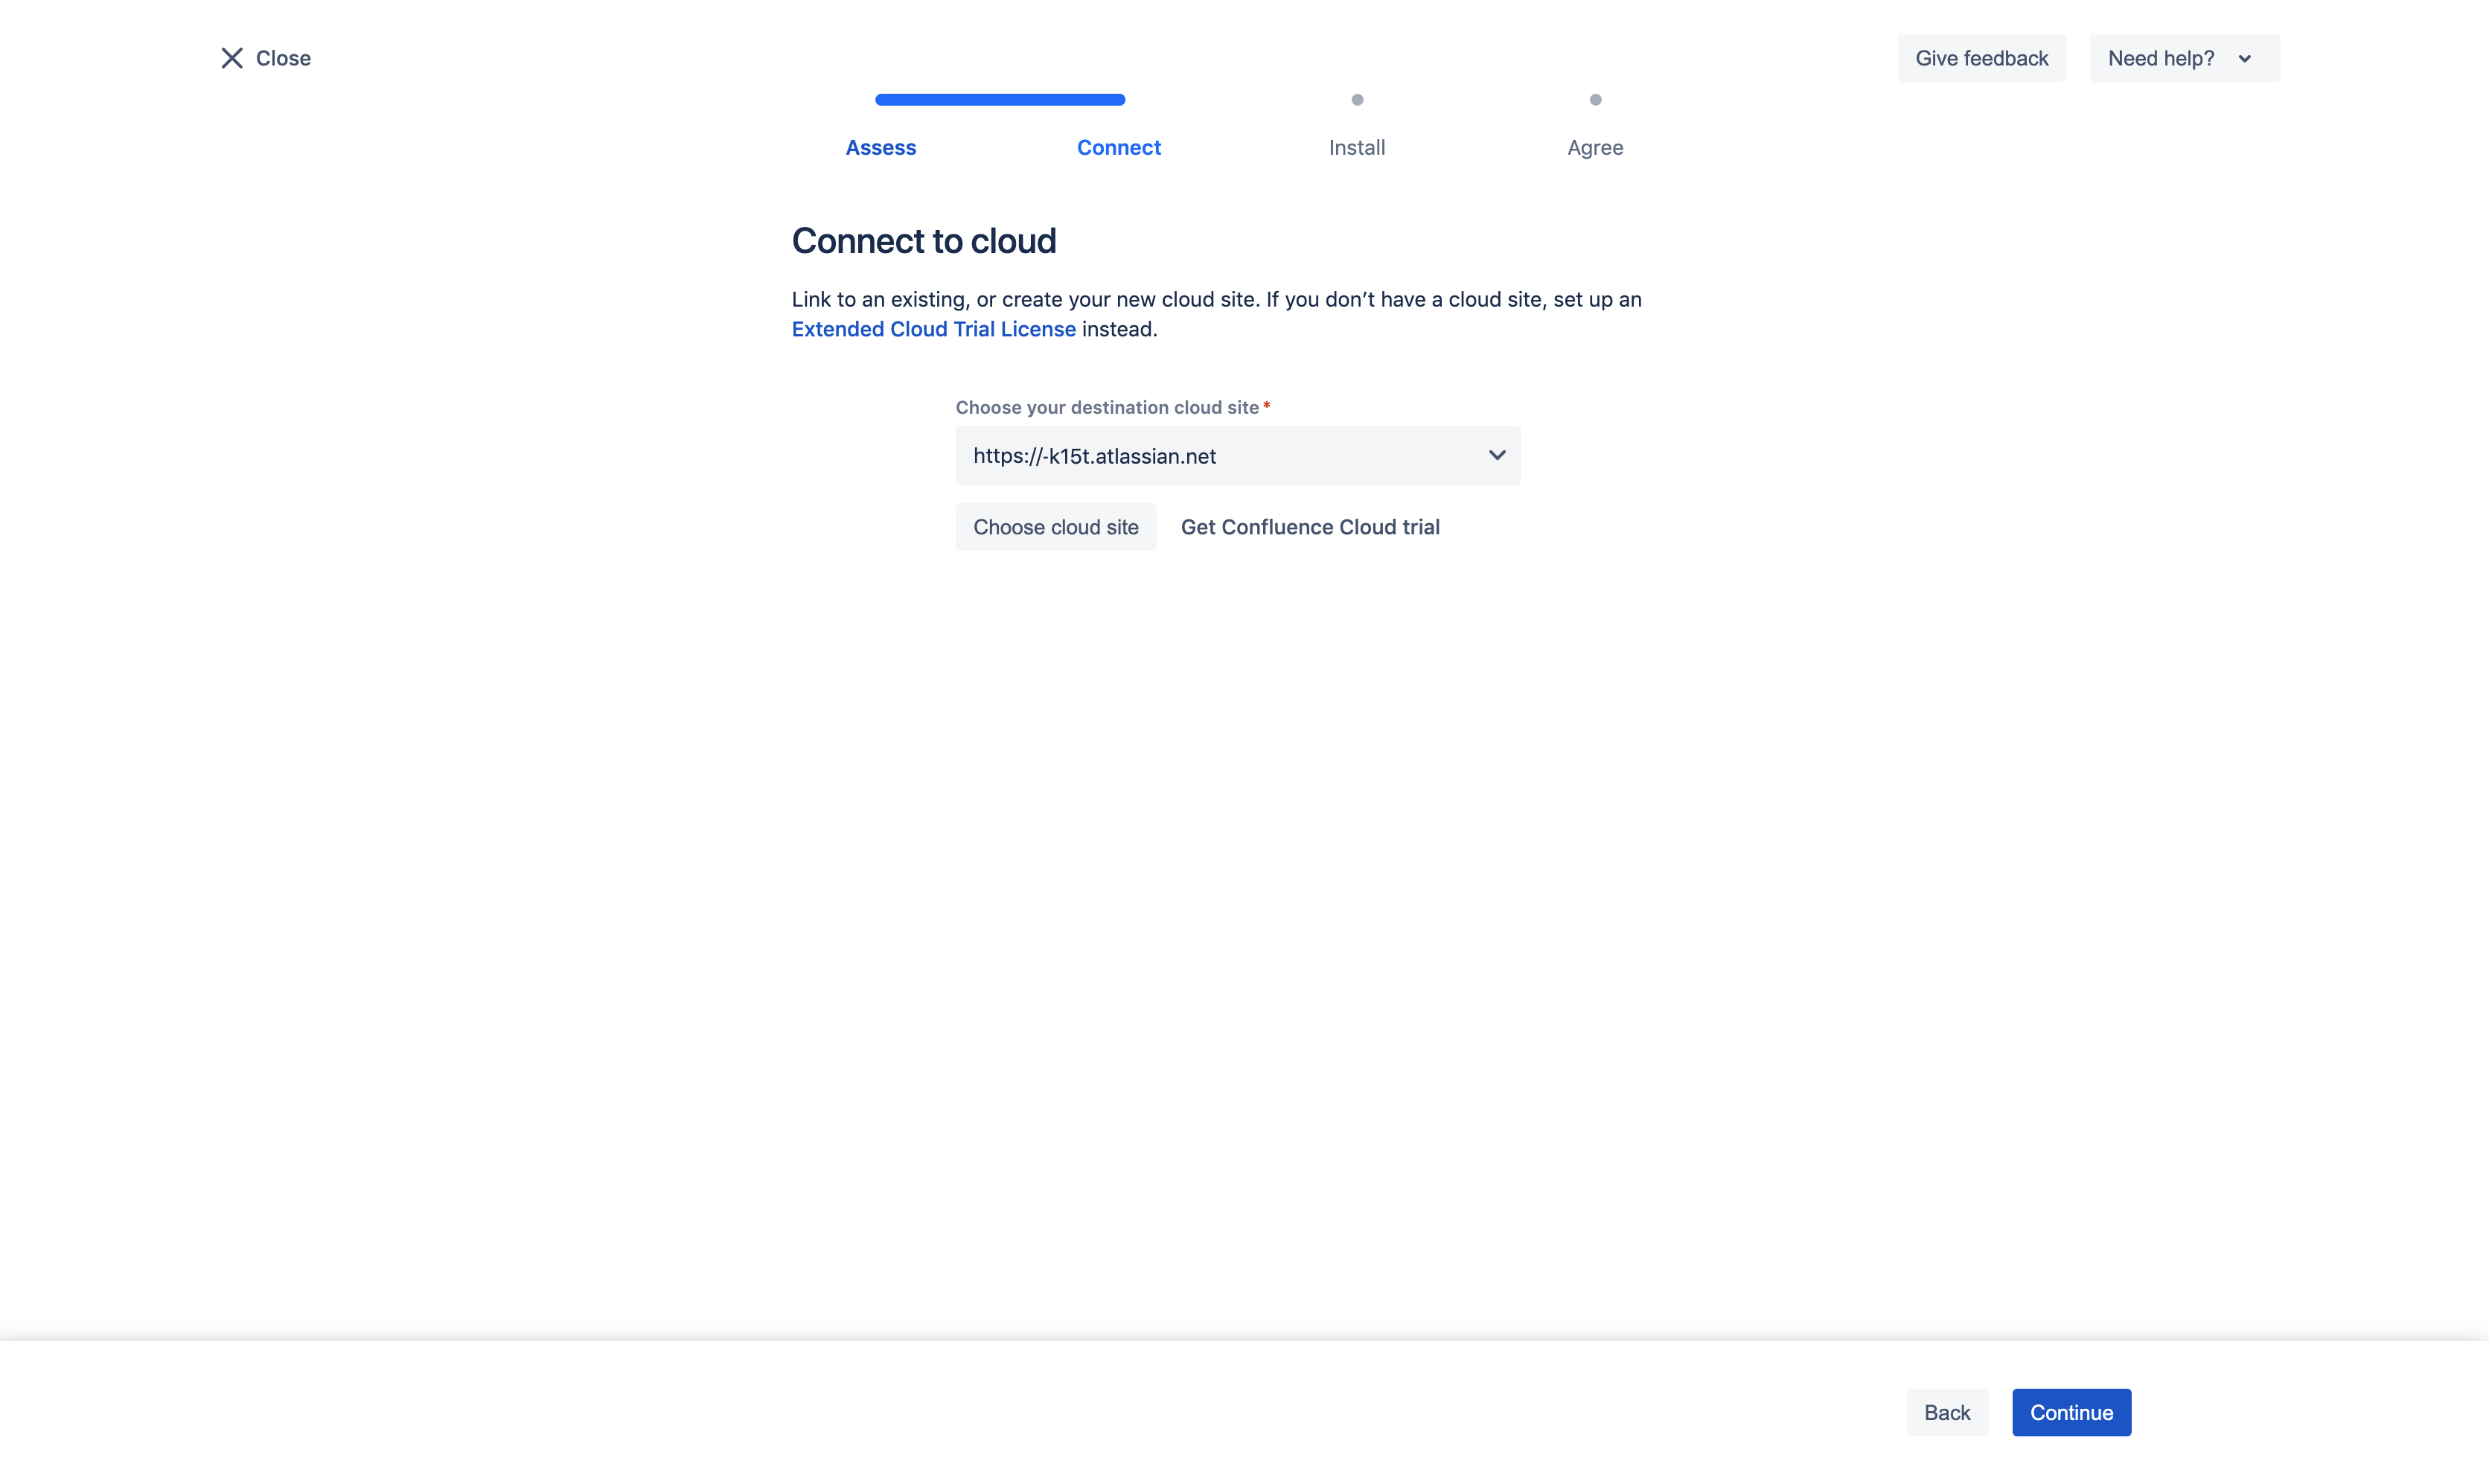
After selecting Continue you can then establish a connection with the required Confluence Cloud instance that you wish to migrate to:
-
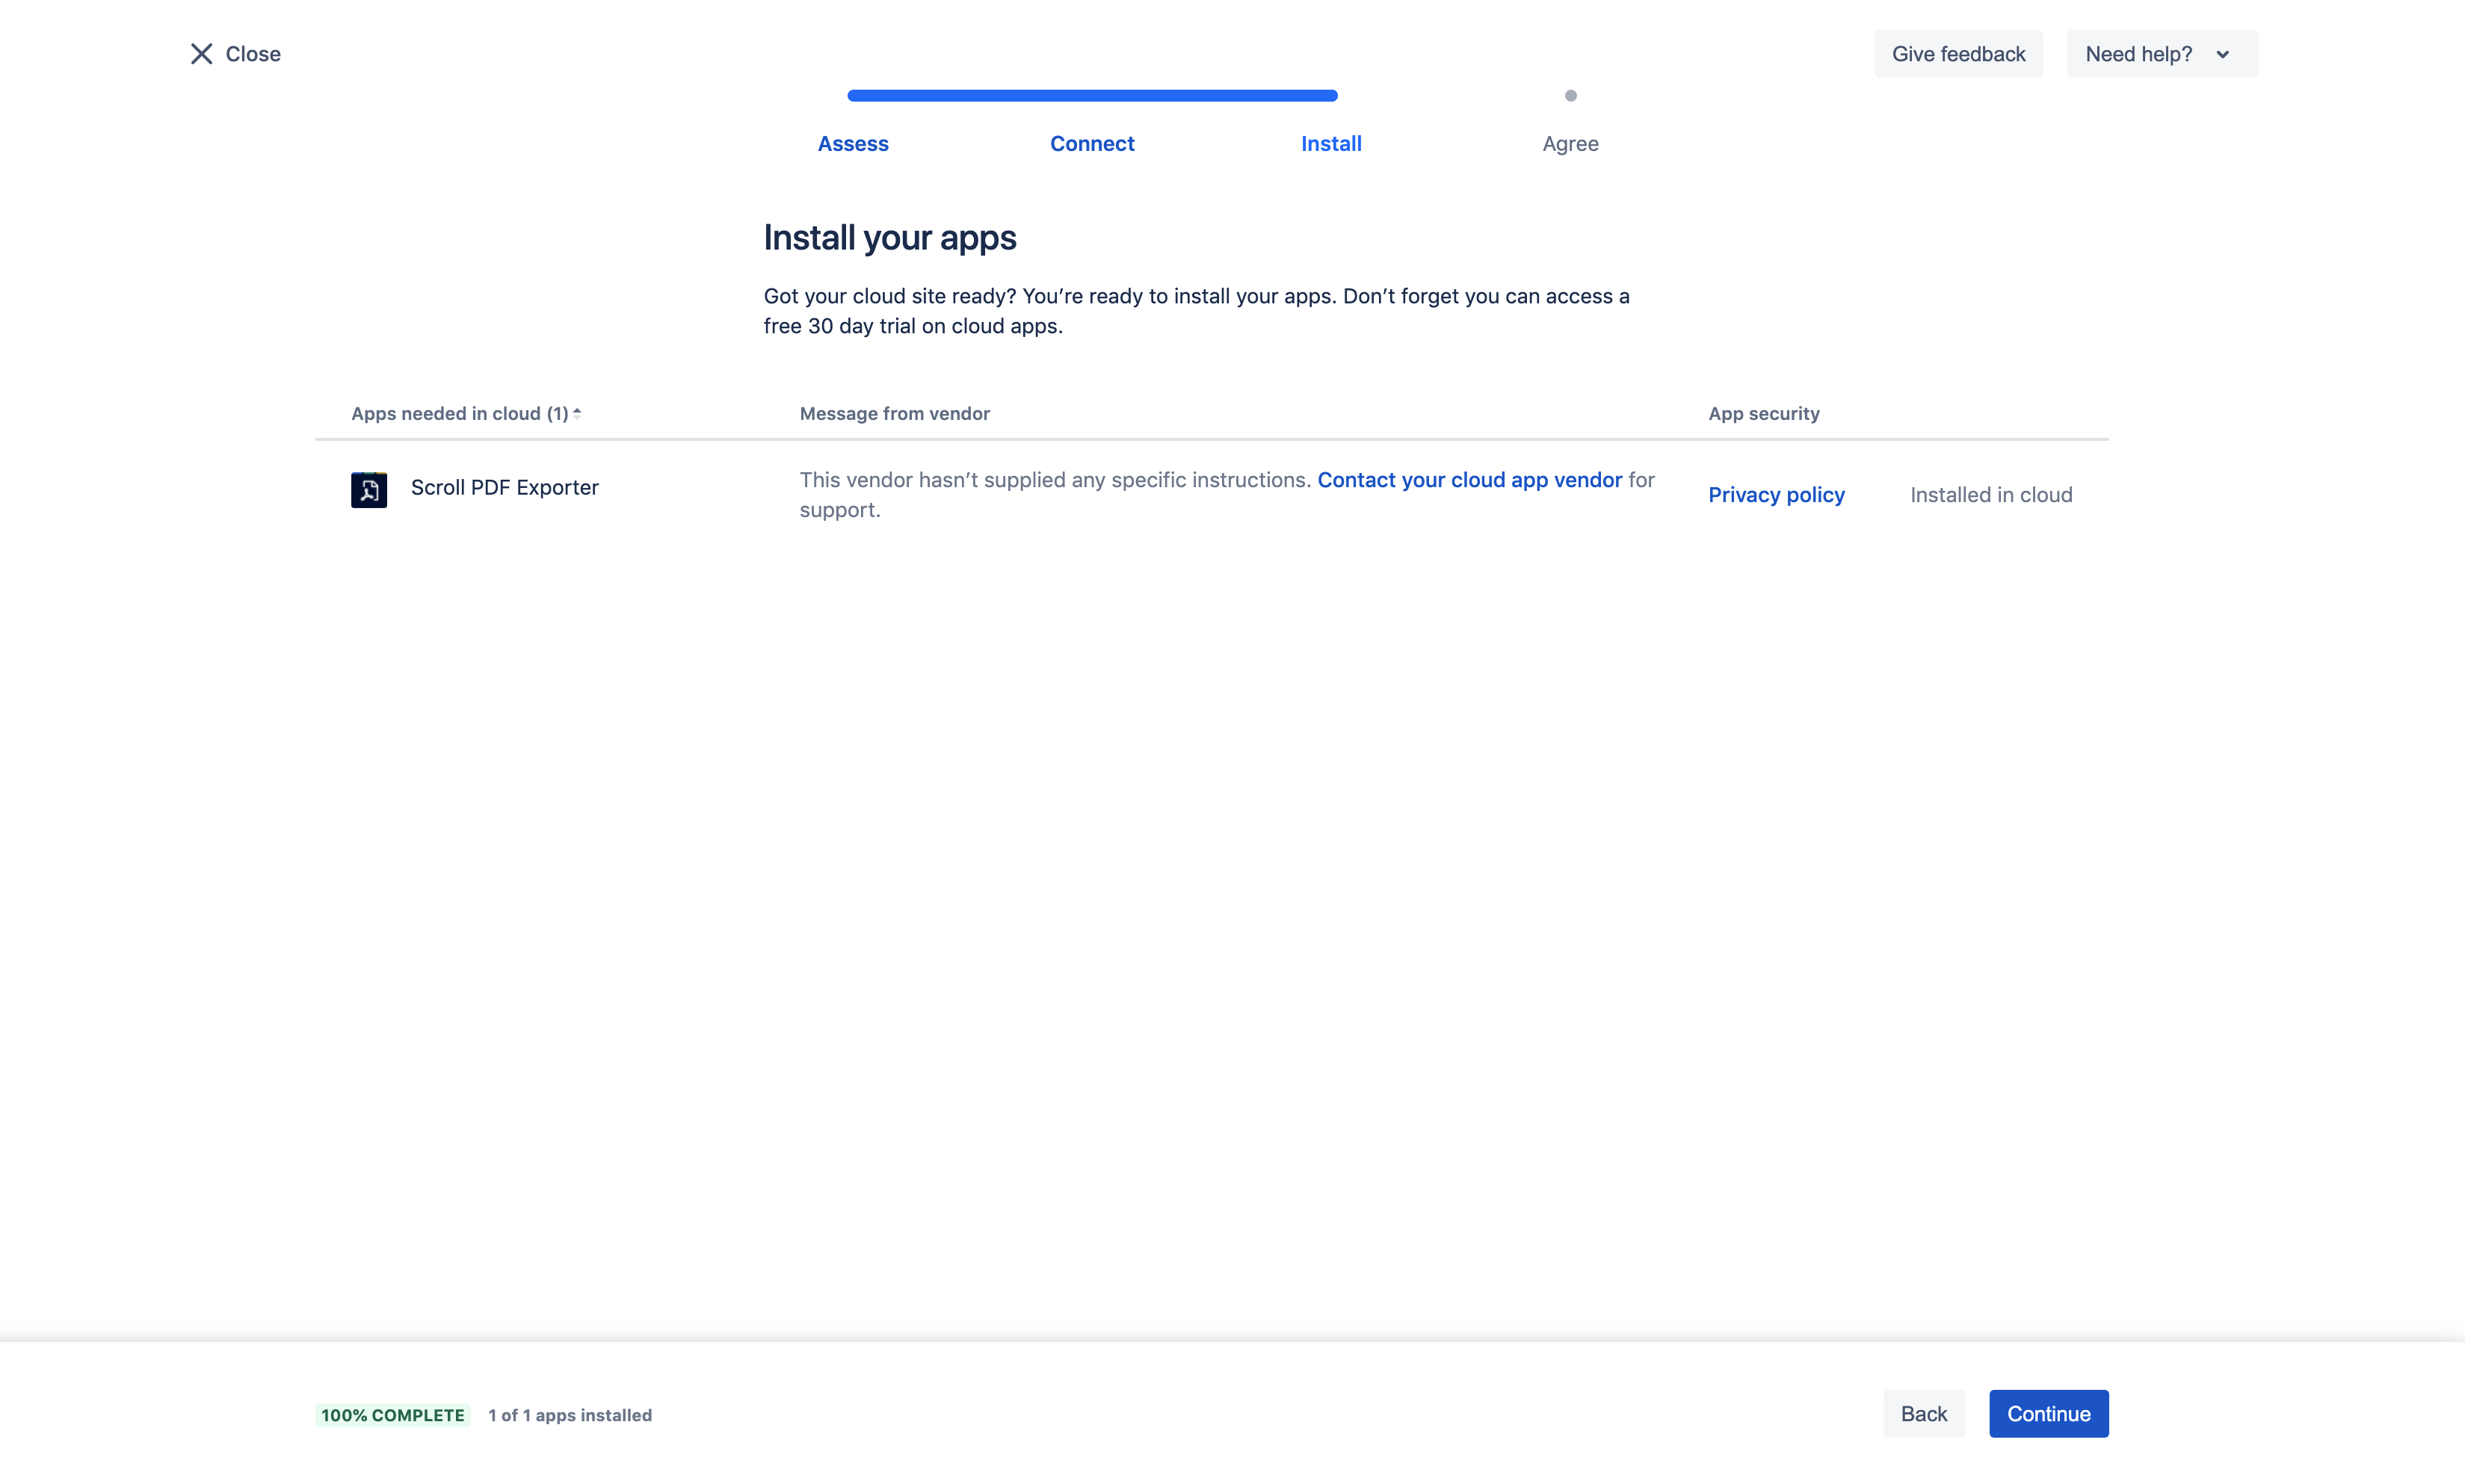
Next, the indication of whether the required app is installed on Confluence Cloud will appear. In this case, Scroll PDF Exporter, has been installed:
Stage 3: Migrate
Following the successful assessment of Scroll PDF Exporter, you can then create and run a migration - when running the migration for your chosen spaces, the space export templates for Scroll PDF Exporter will be included in the migration.
-
Within the Migrate section you can select Create New Migration:
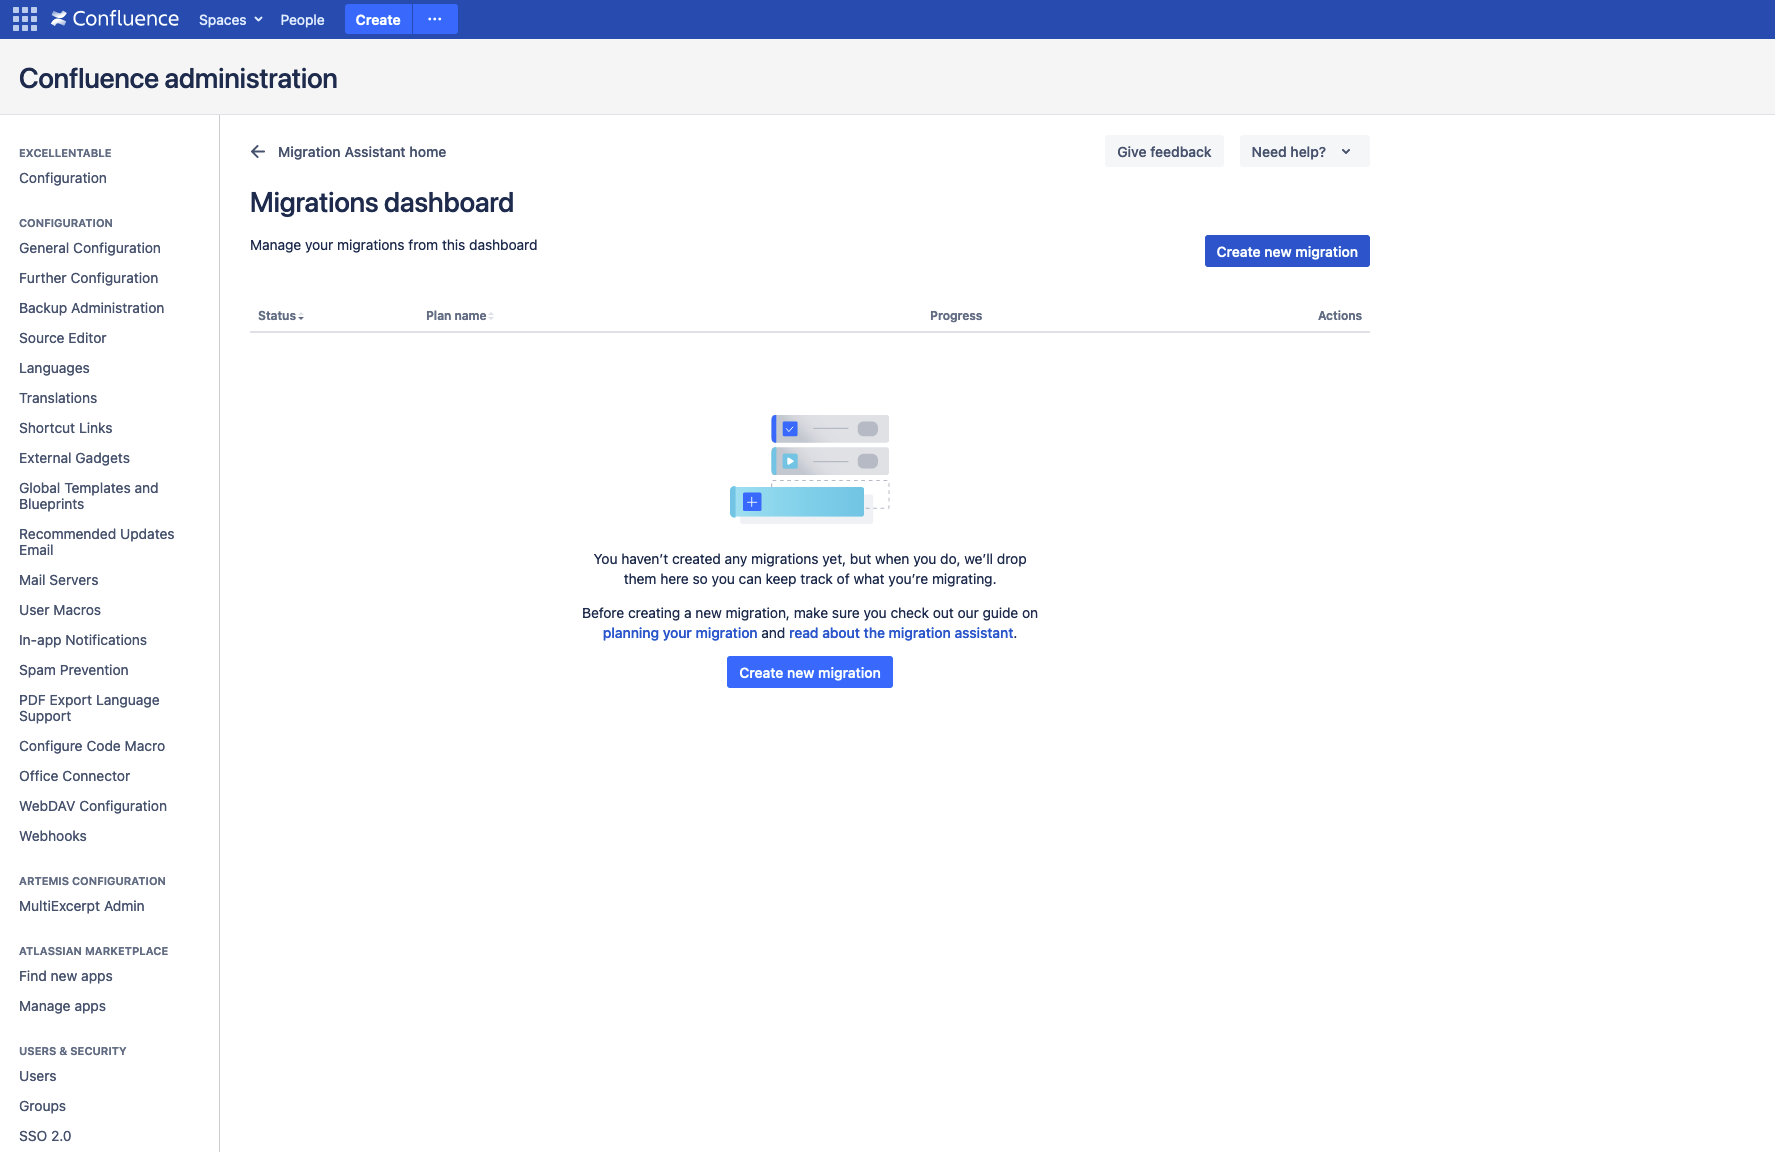
-
After this you will need to connect to the required Confluence Cloud instance and give the migration a name:
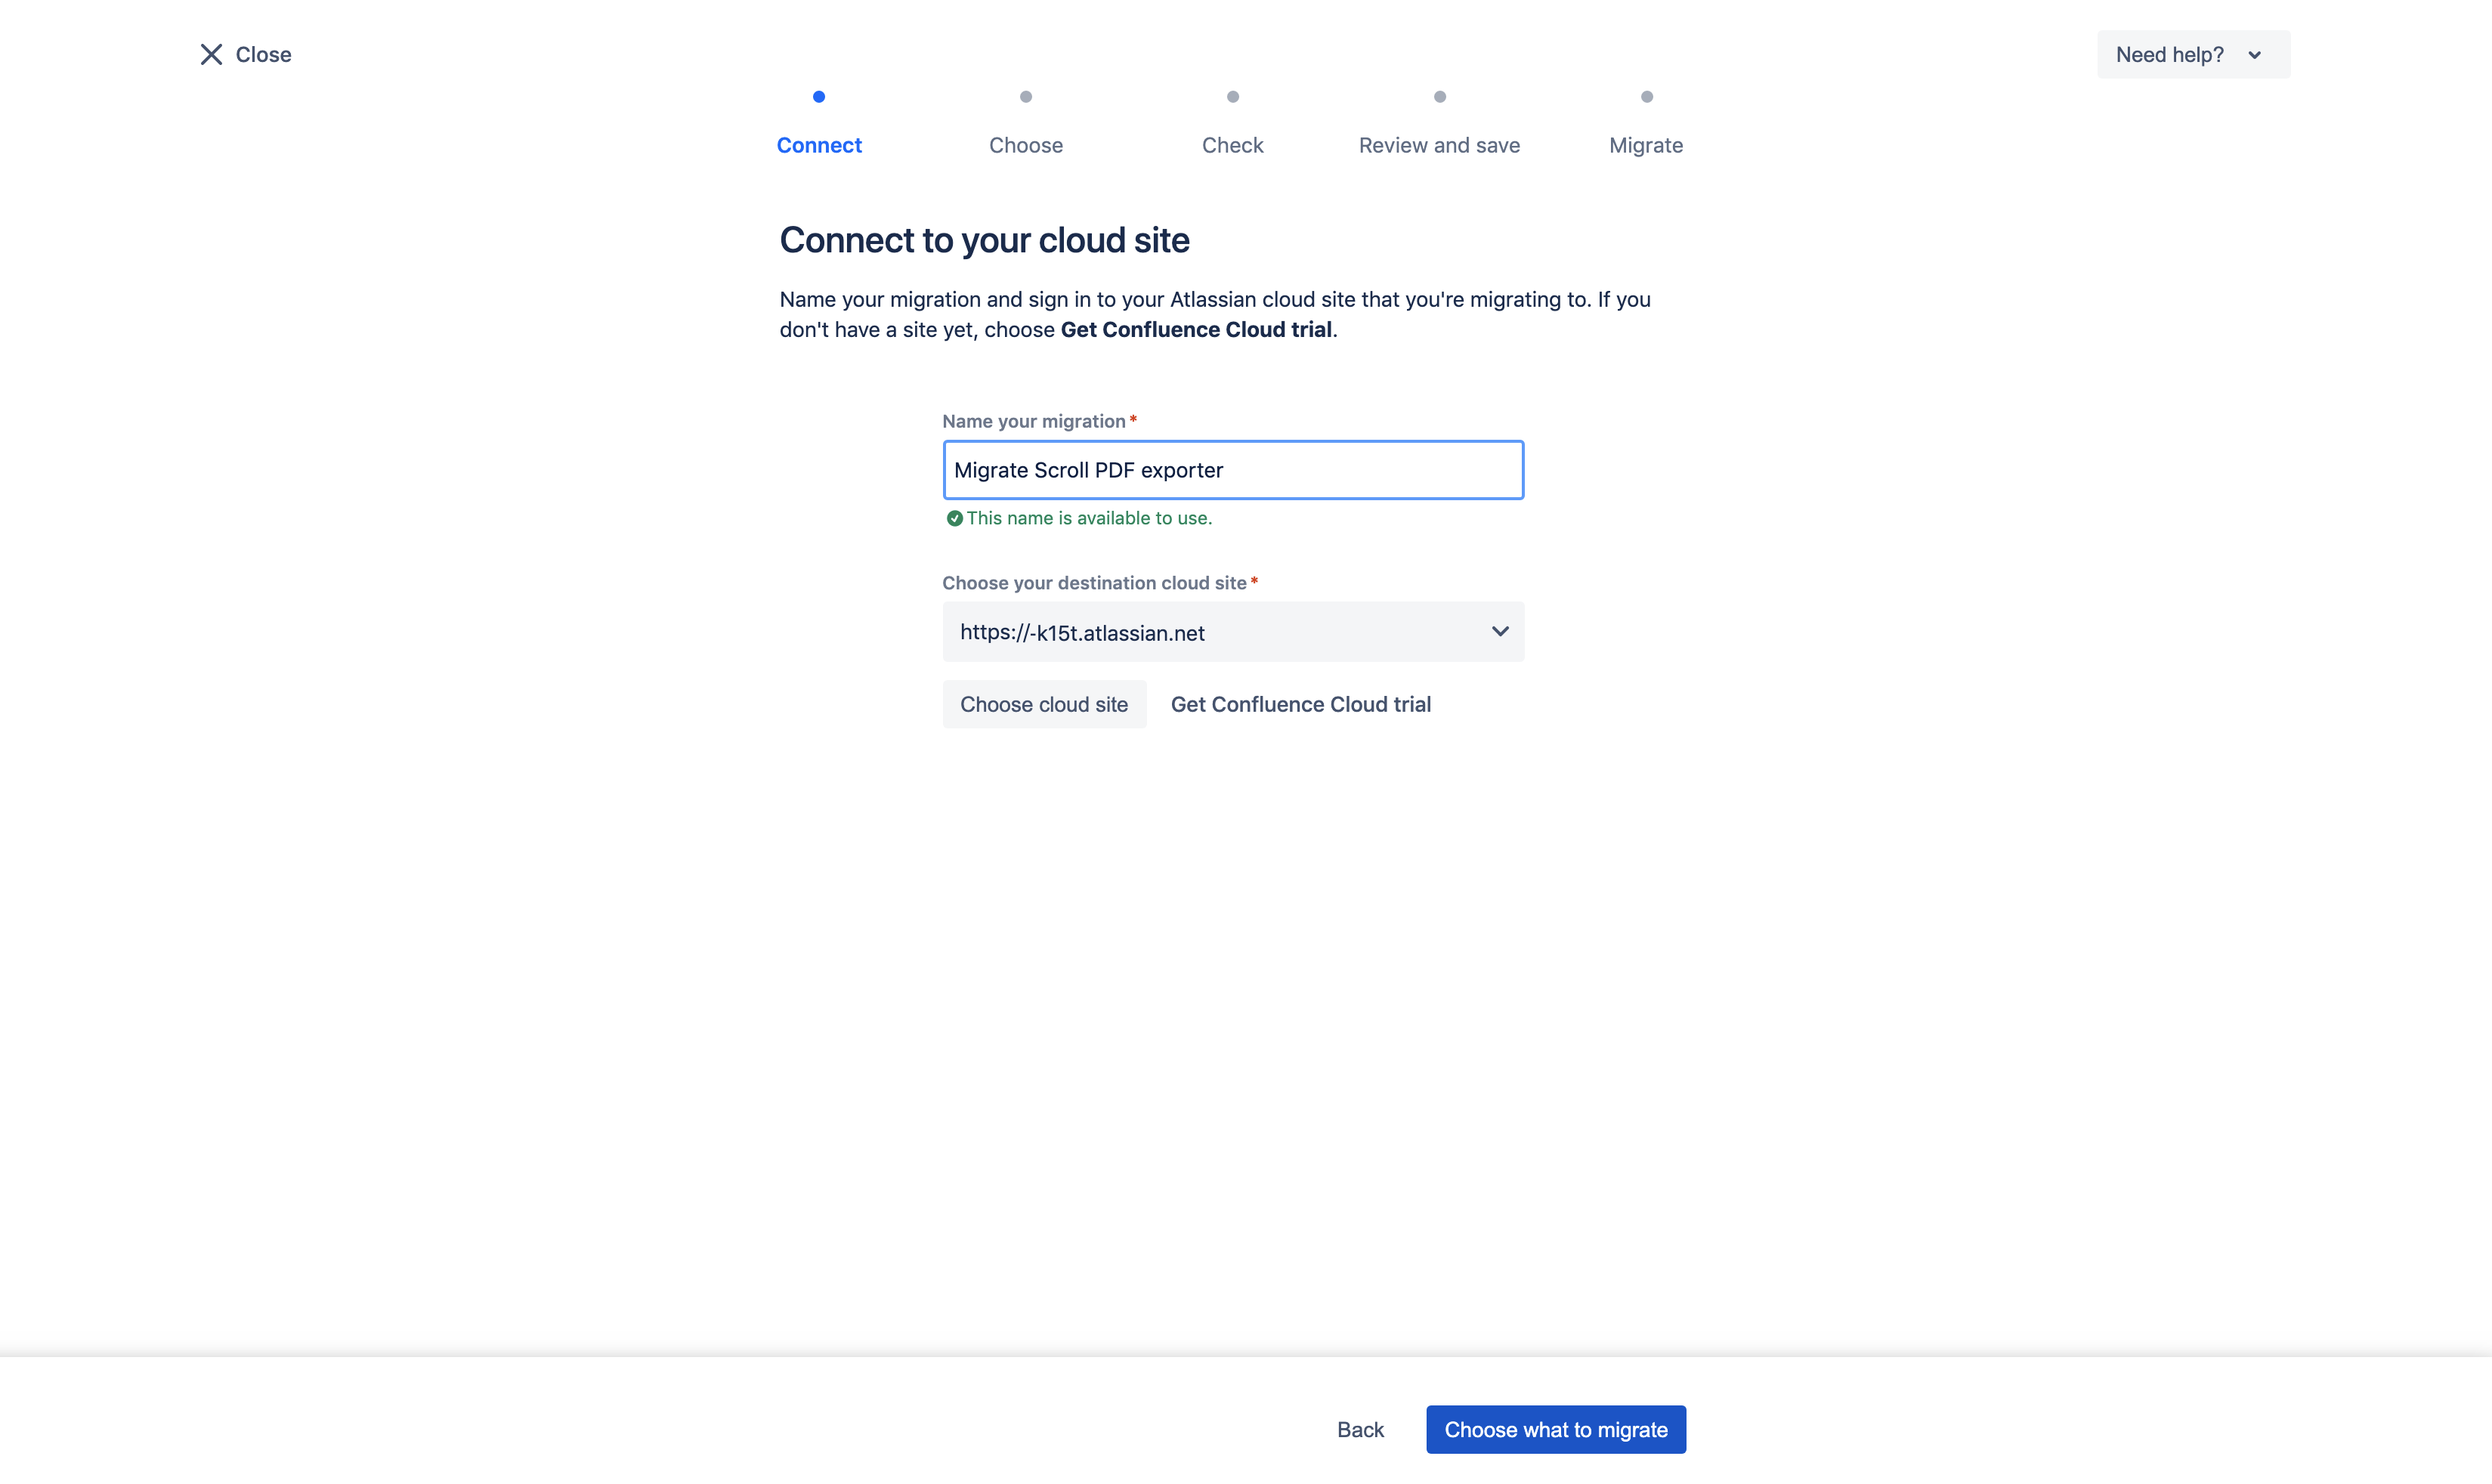
-
Proceeding through the migration steps you can then choose what you are wanting to migrate. For Scroll PDF Exporter you would need to have already marked the app as needed within the Assessment section (mentioned above) and choose spaces that contain space export templates:
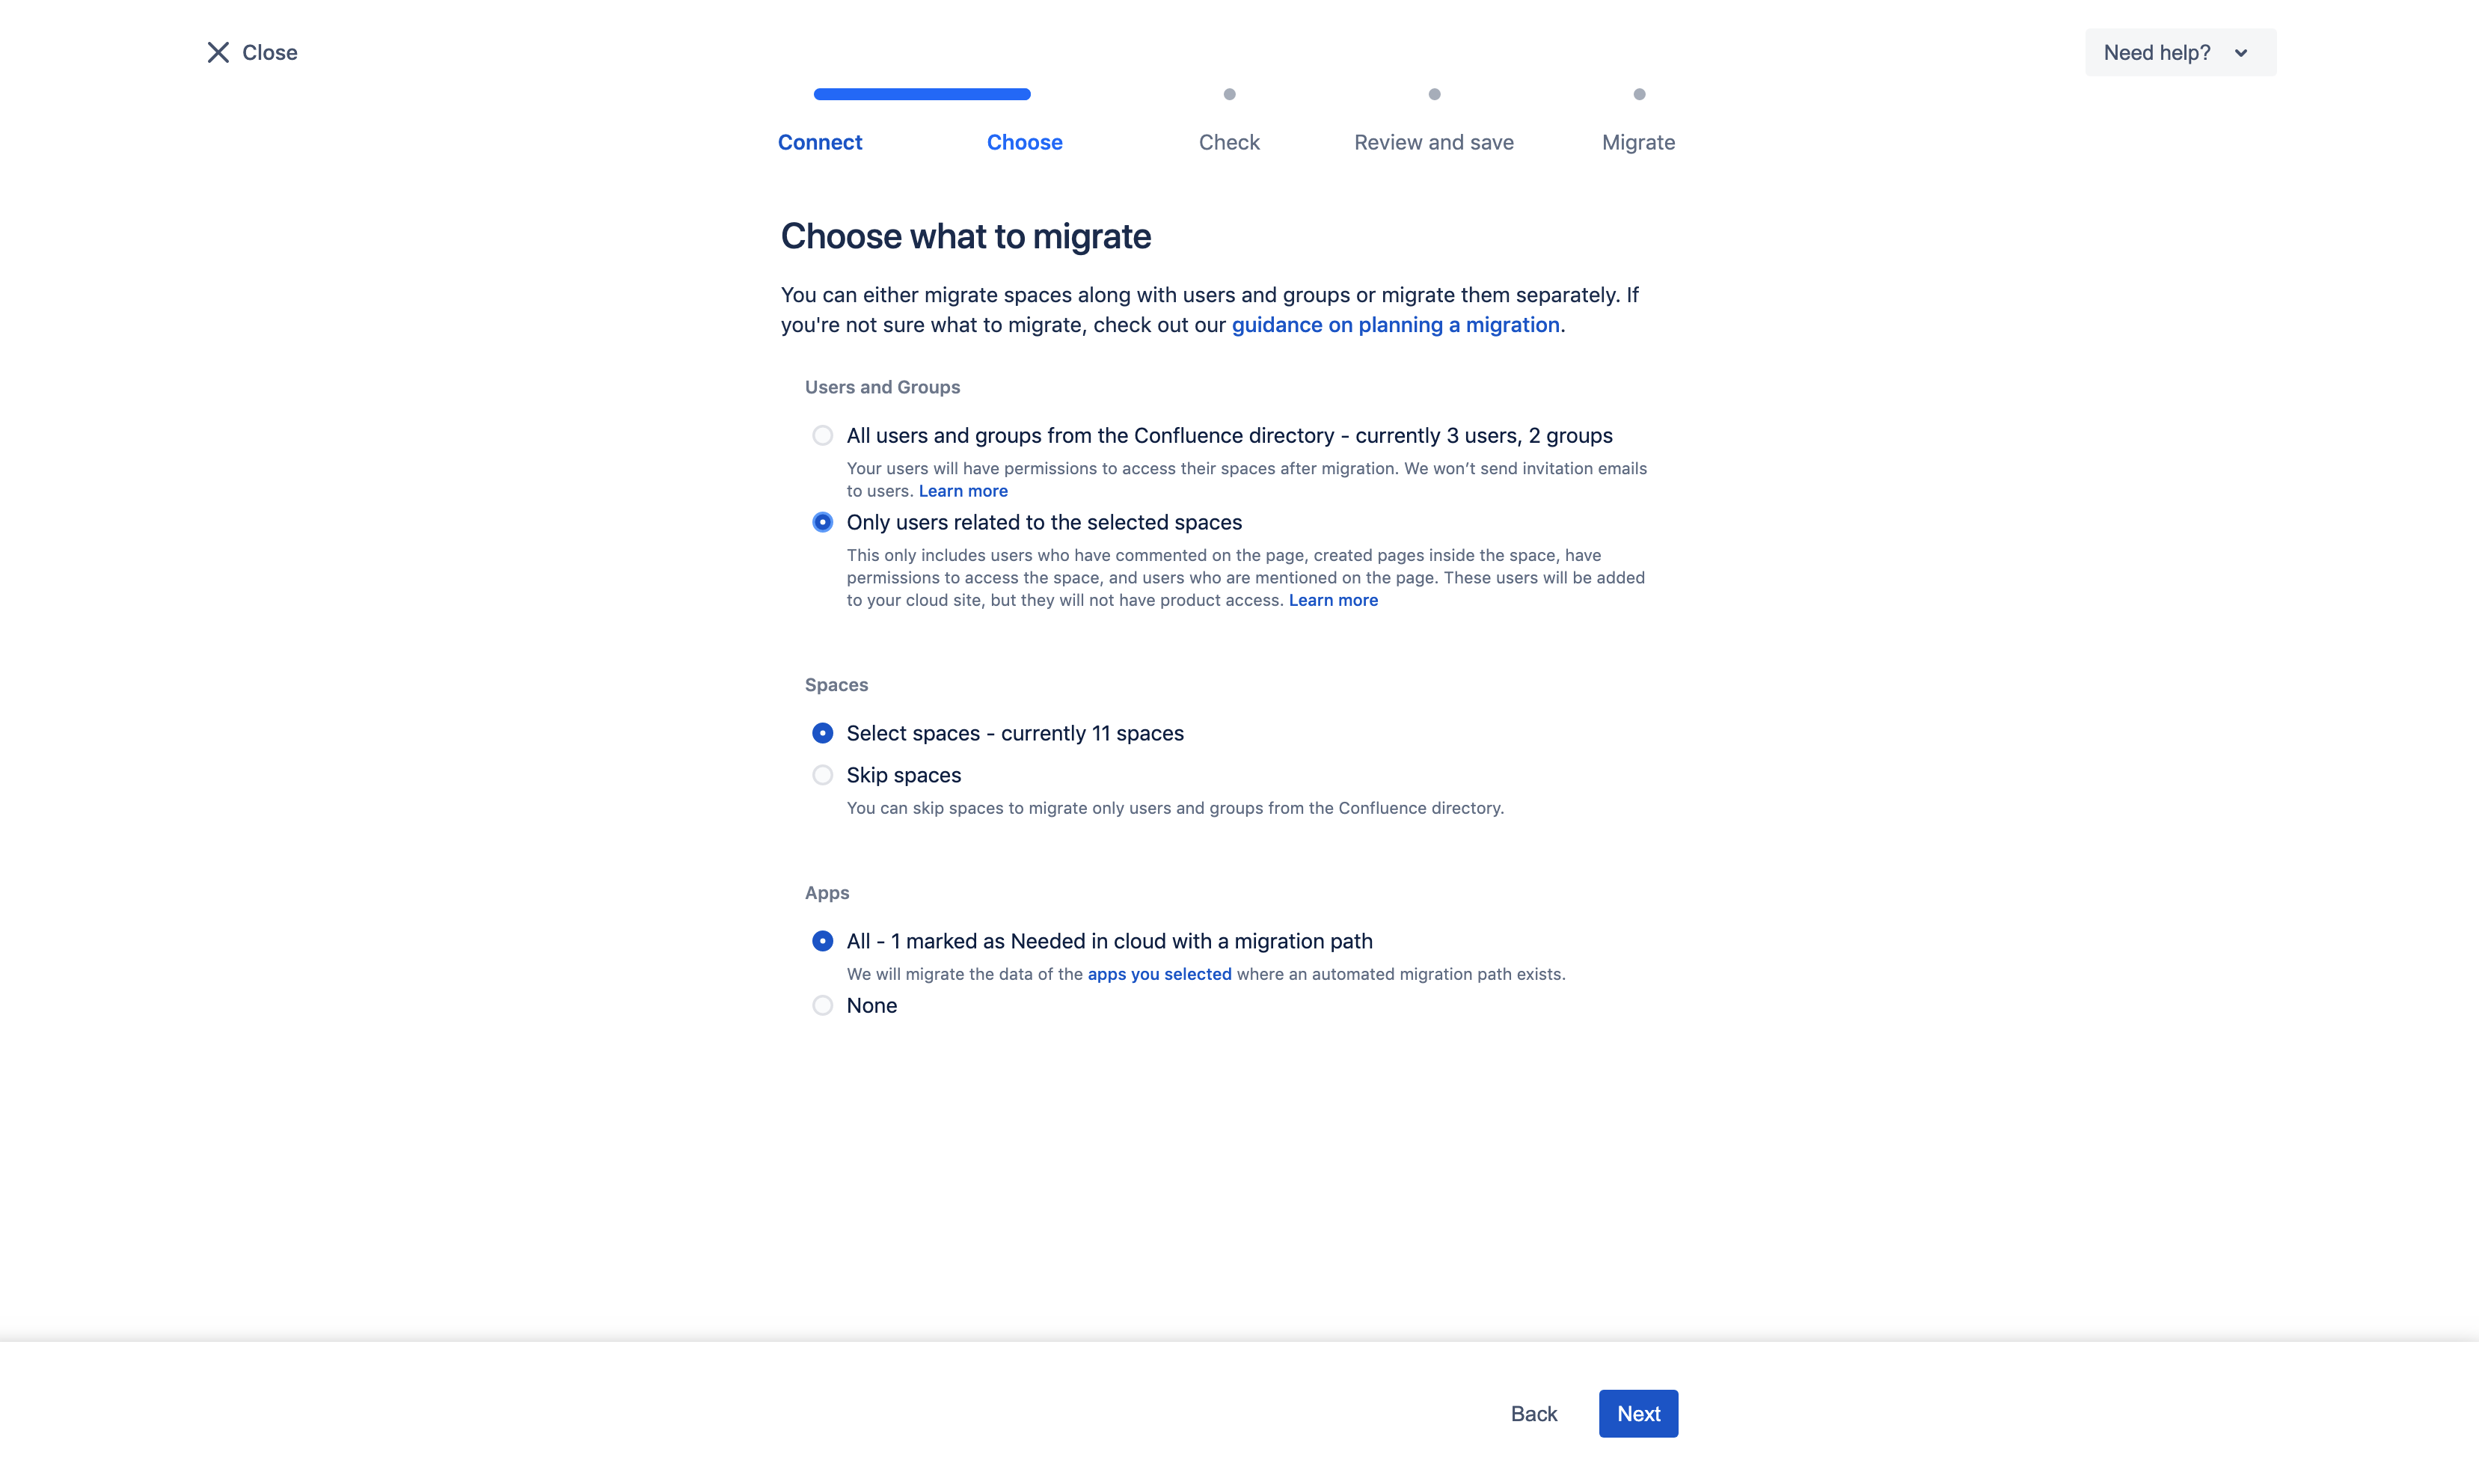
-
After proceeding through the further migration steps for choosing the spaces you wish to migrate, you will then be required to check for any errors and can then review the created migration:
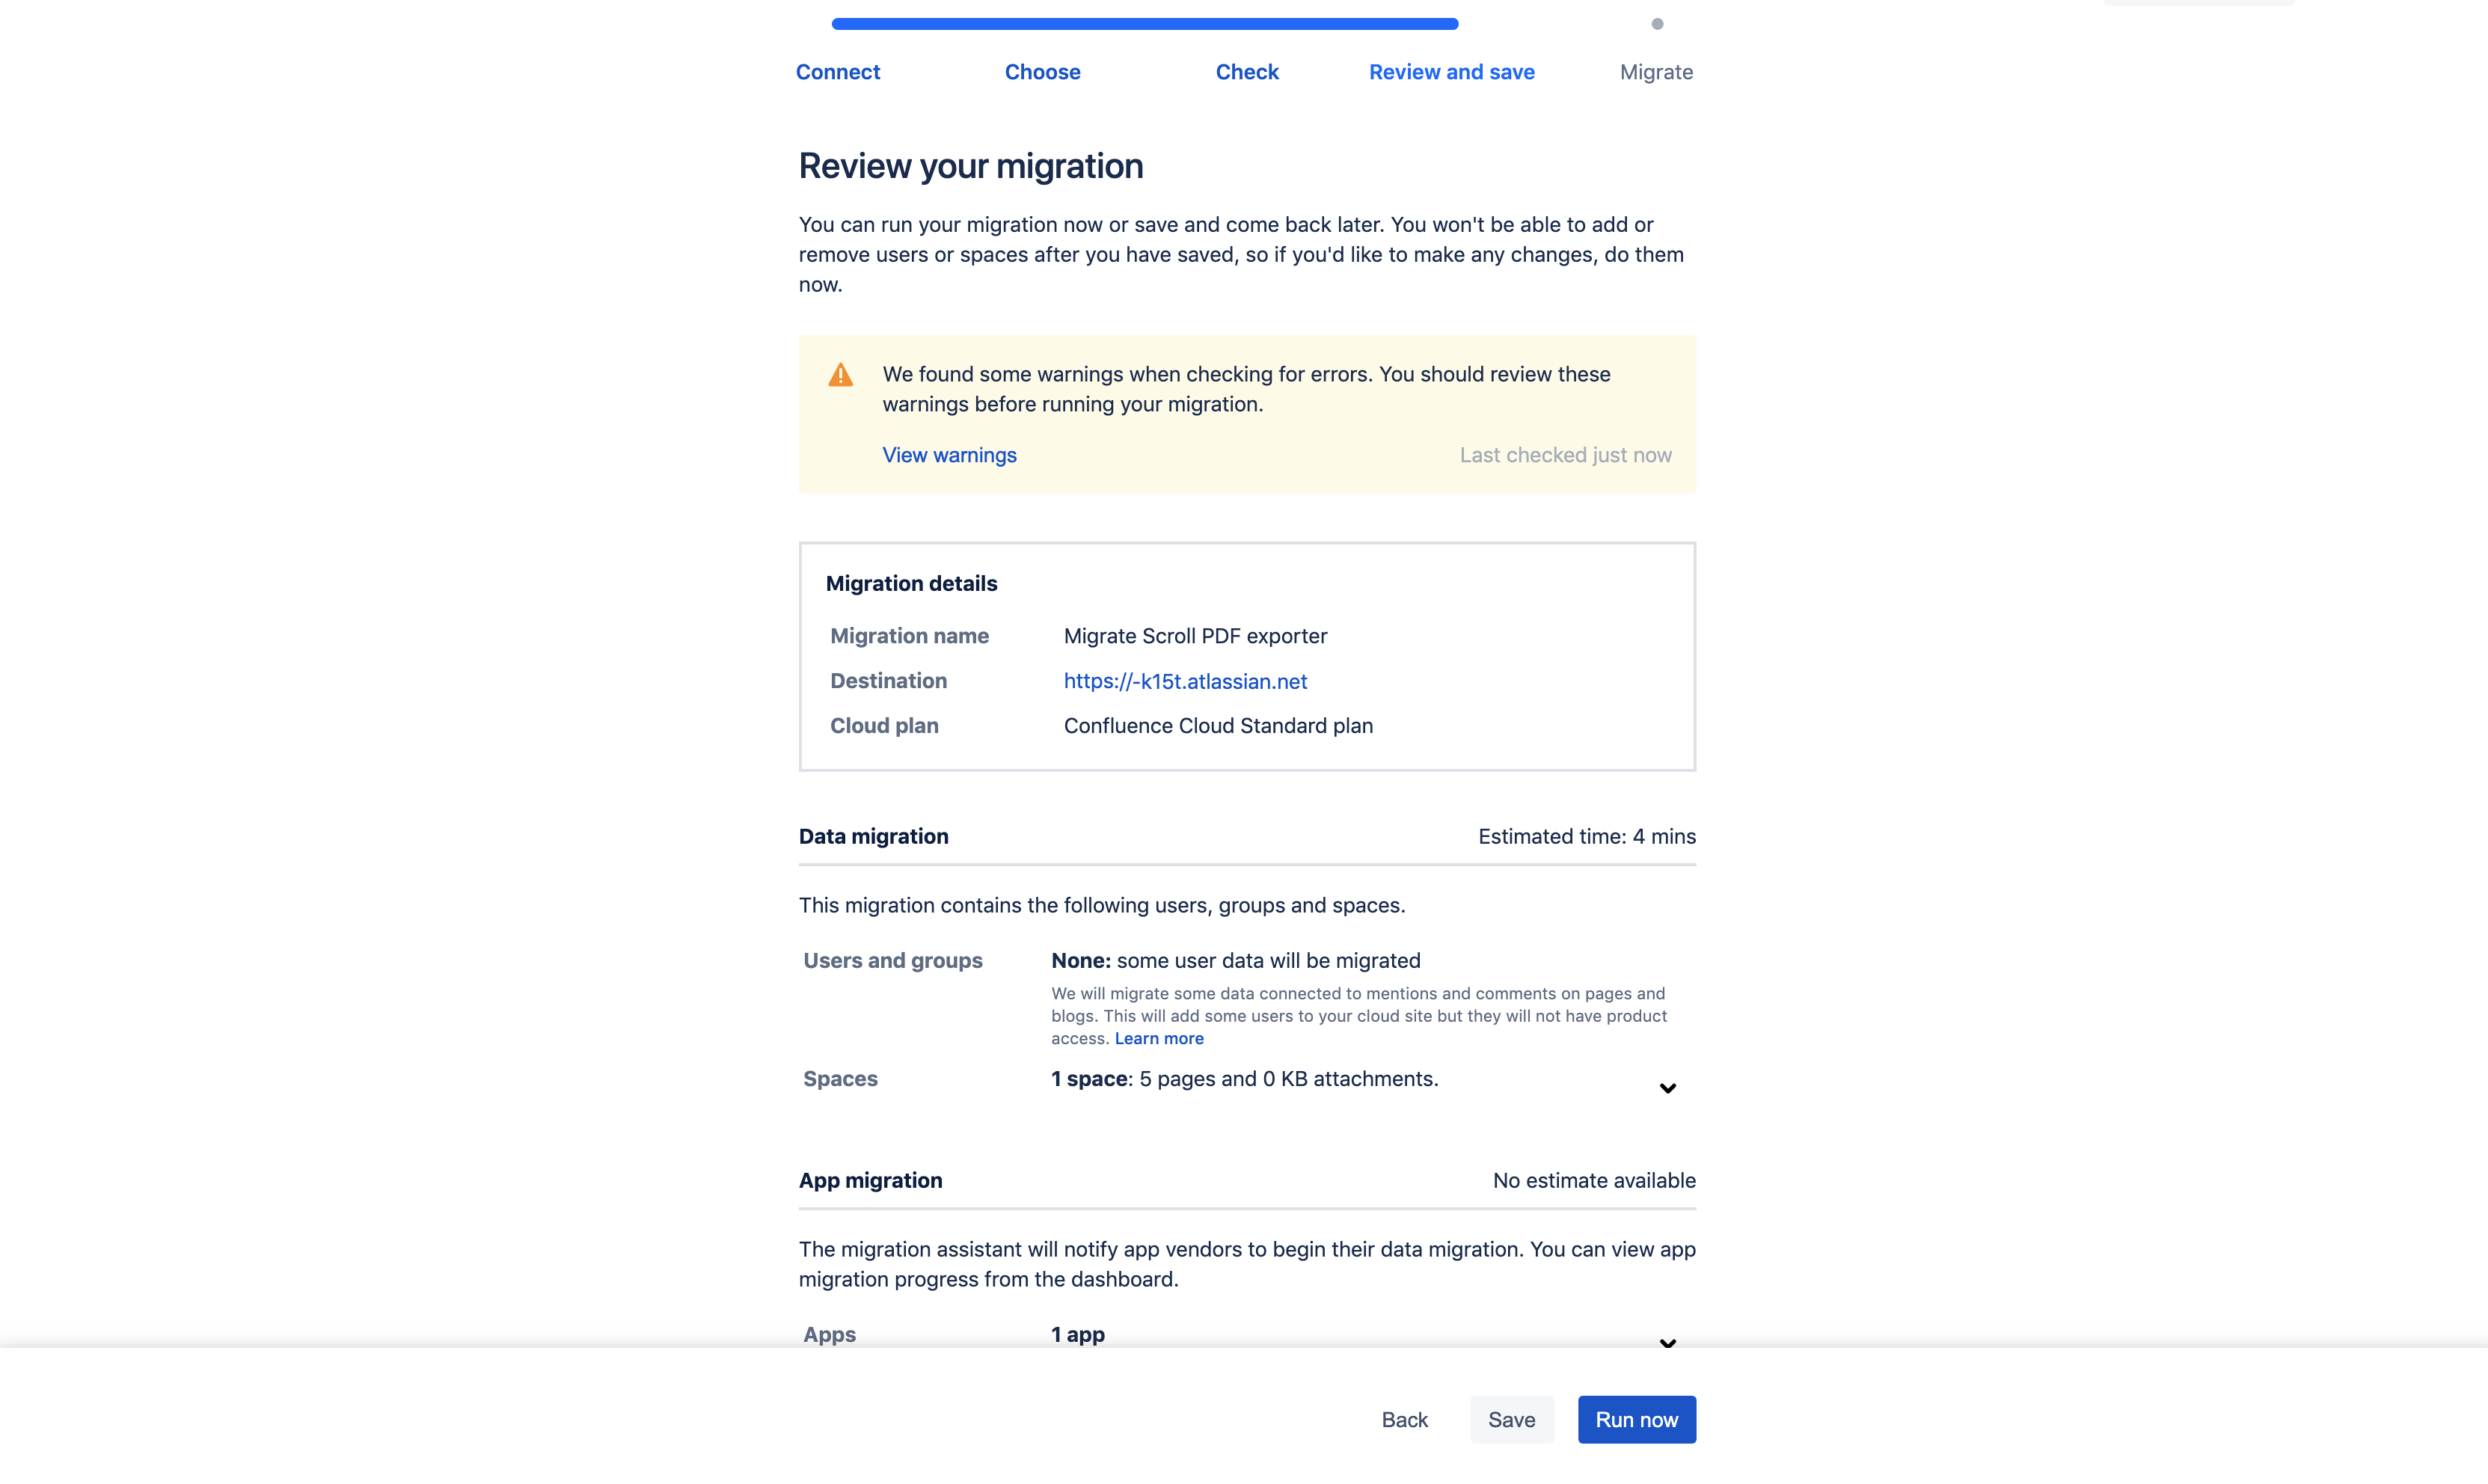
-
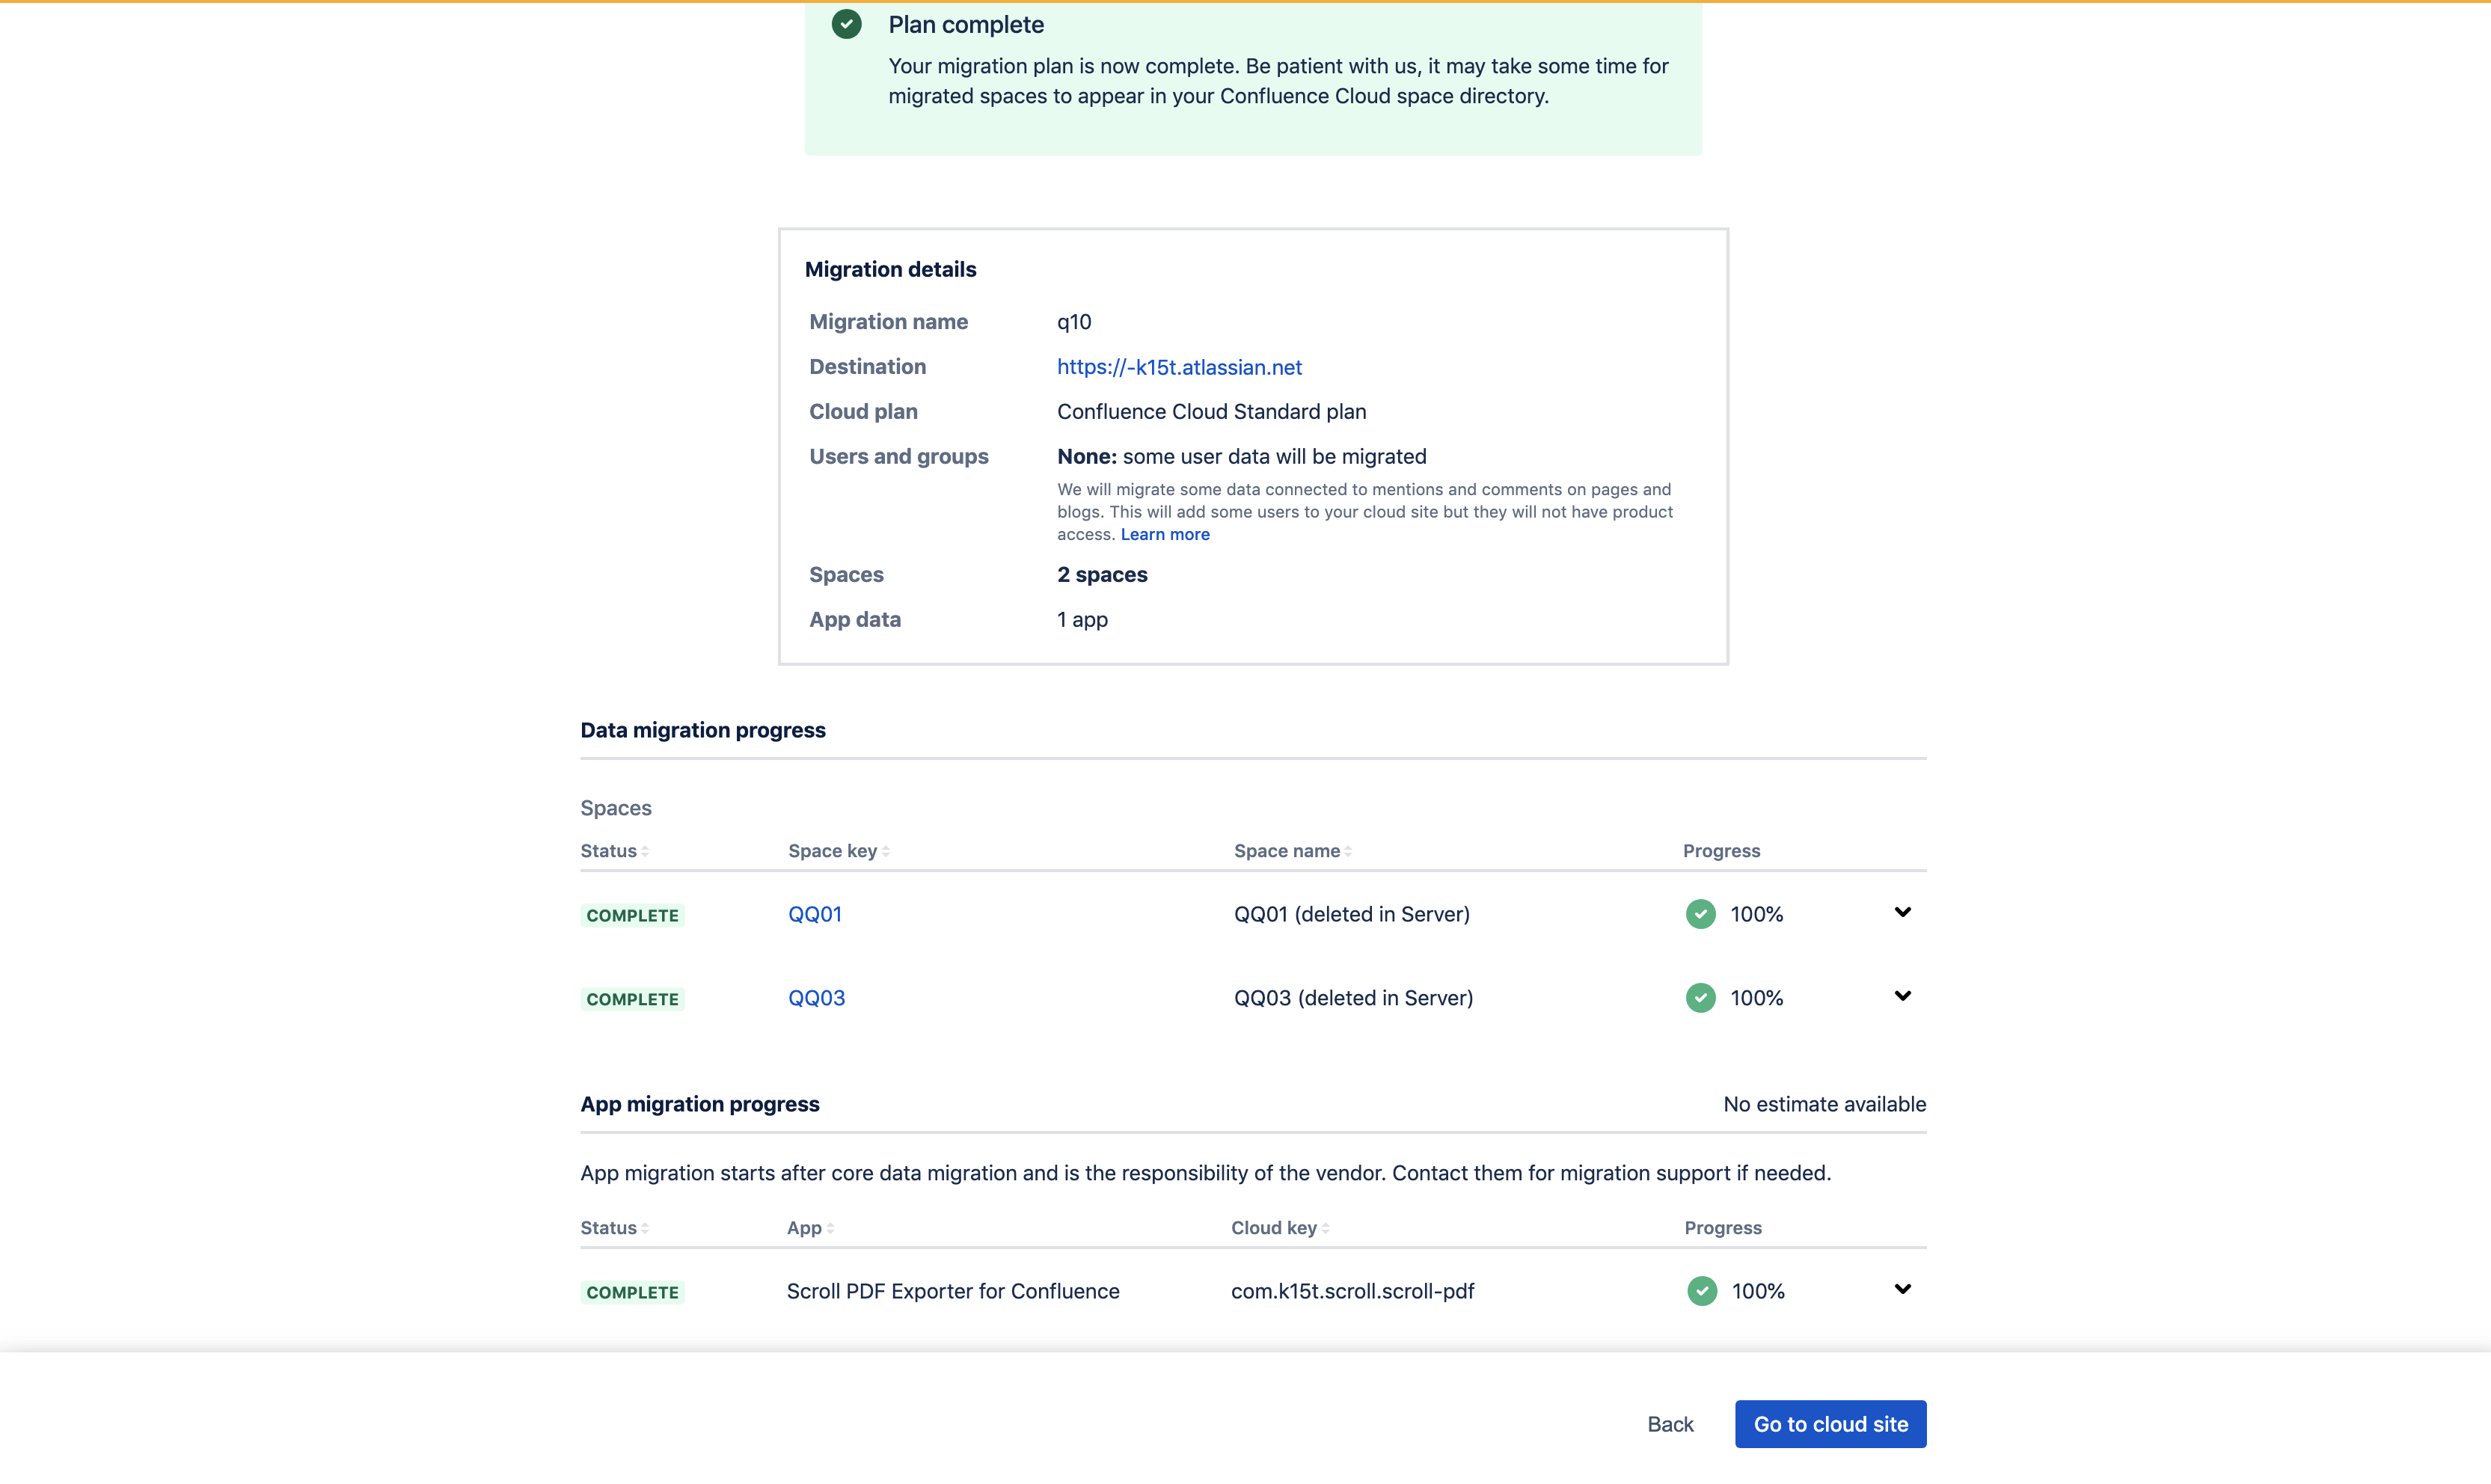
Once the migration is run and successfully completed a confirmation will display. Once this has been confirmed, the space export templates for Scroll PDF Exporter will appear in the respective migrated spaces in Confluence Cloud (it may take several minutes for the content to appear):
Troubleshooting
Migration gets stuck and hangs on 0%
Problem: We are aware that in some cases the migration for Scroll PDF Exporter can be affected and simply display 0% progress.
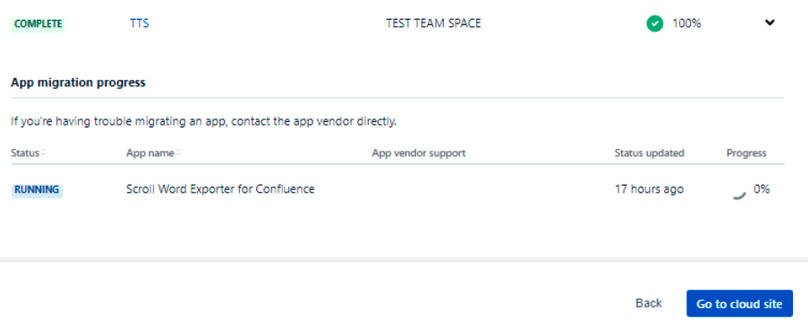
Reason: Changes to the default user groups in Confluence Cloud can cause this problem. This is because every app on Confluence Cloud gets assigned a system user. Whenever an app performs action in Confluence Cloud, it acts as this user. Additionally, Confluence Cloud by default, creates some groups which if changed and/or removed can impact the permissions of the app. Subsequently, when the Confluence Cloud instance is not using the standard user group setup, this can result in the app users not having the correct permissions in Confluence Cloud. This prevents the successful migration because the following error is visible in the cloud logs:
Current user not permitted to use Confluence & Response status code: 403 Forbidden
Resolution: To fix this issue you'd need to restore the default groups in the affected Cloud instance and then uninstall/re-install the Scroll PDF Exporter app again so that the correct permissions are applied. In most cases, this will require you to reach out to Atlassian for further assistance - this is because they would need to reapply/reactivate any paid cloud subscription (because uninstalling the app on cloud will end the subscription). Additionally, Atlassian would need to remove the affected App migration from the Migration Assistant overview.
