Structure and design templates
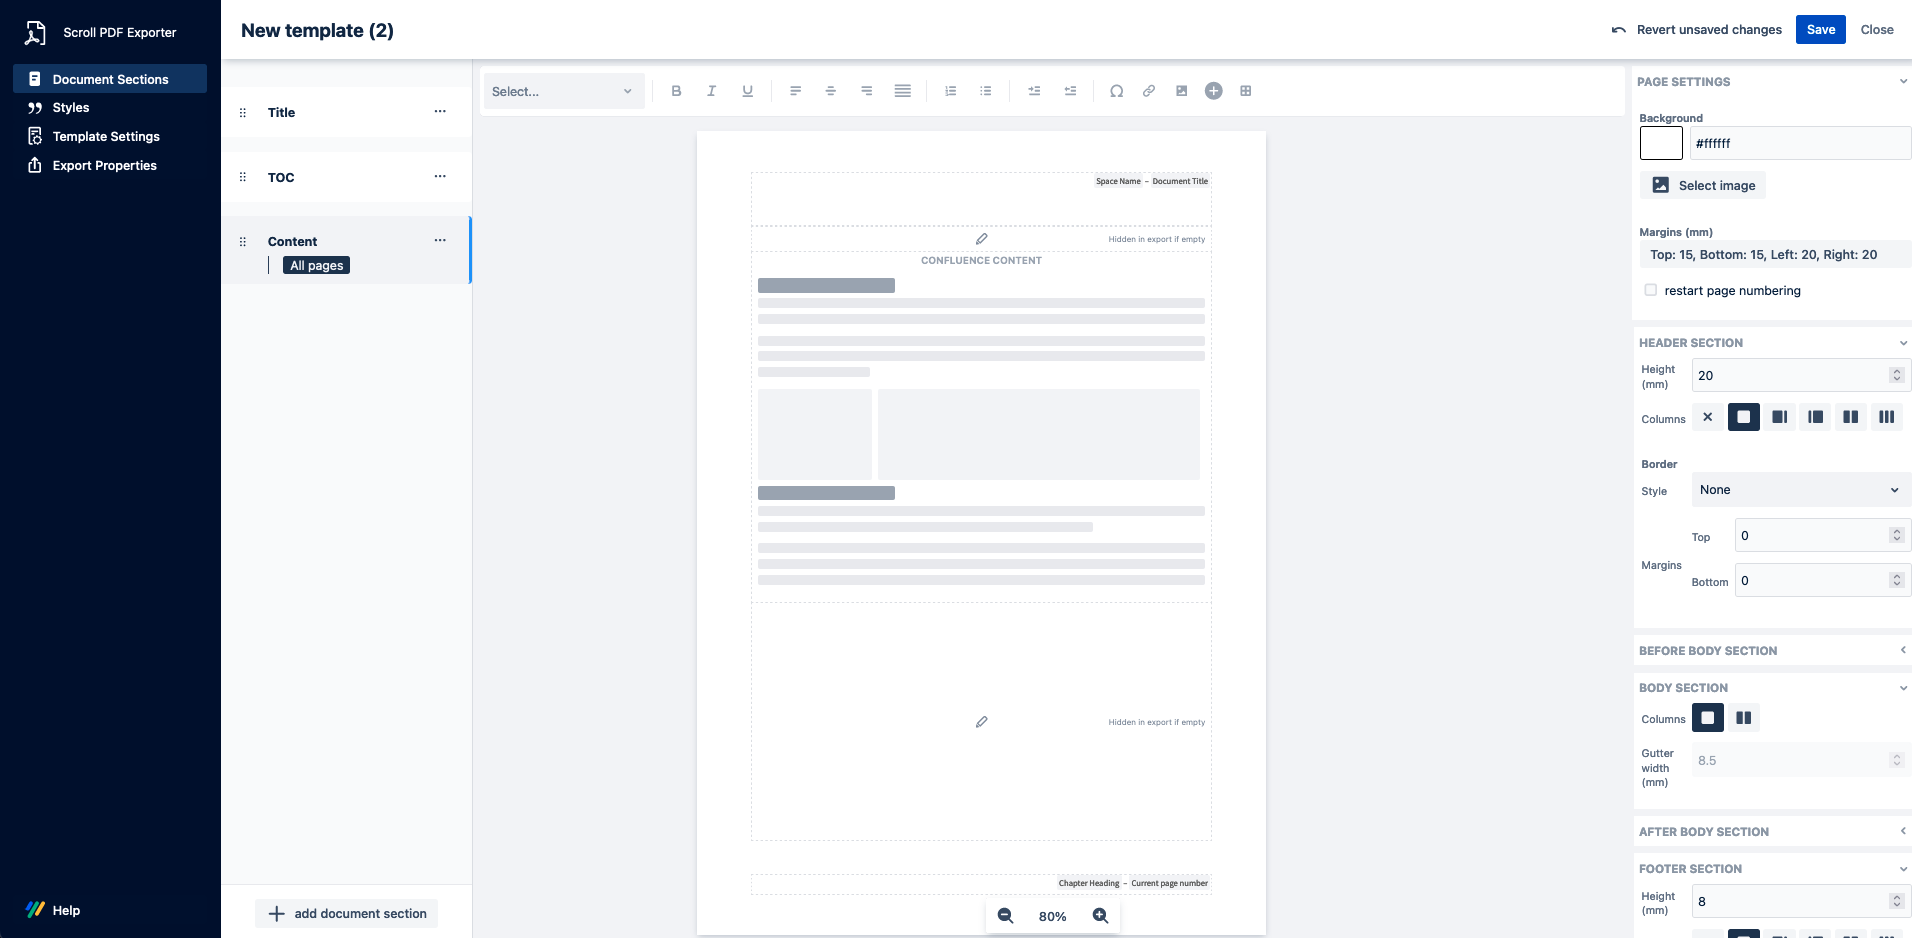
Sections are the building blocks that define the structure of your templates – each section that you create can have a unique design, and contain different content. By default, when navigating to the Document Sections in a newly created template there will be three pages added:
-
Title - this page is formatted as a Title page and contains placeholders such as the document title, space name and export date
-
TOC - this page is formatted as a Table of Contents and contains the placeholder for automatically generating a table of contents
-
Content - this page marks the start of where the Confluence content will be included from when exported. Therefore, this section is mandatory, and cannot be deleted. You can also add static content to the Body – Before Content and Body – After Content elements if you want it to be exported immediately before or after the Confluence content.

Want more control over what Confluence content is included? You can define what content is included (and also how it is formatted) using Scroll Macros.
Adding new sections
It remains possible to add additional pages to the Document Sections via the + add document section button. This might be required if you want to add more static content to your template in a different page format such as a legal notes section, an impressum or a back cover. You can change the order of the sections by clicking and dragging up and down the hierarchy. The higher a section is in the hierarchy, the earlier it will appear in your exports.
When you create a new section, you will notice that it does not include the exported Confluence content goes here element. This is because Confluence content only gets exported into the Content section – other sections can only contain static content and placeholders.
Edit the page layout
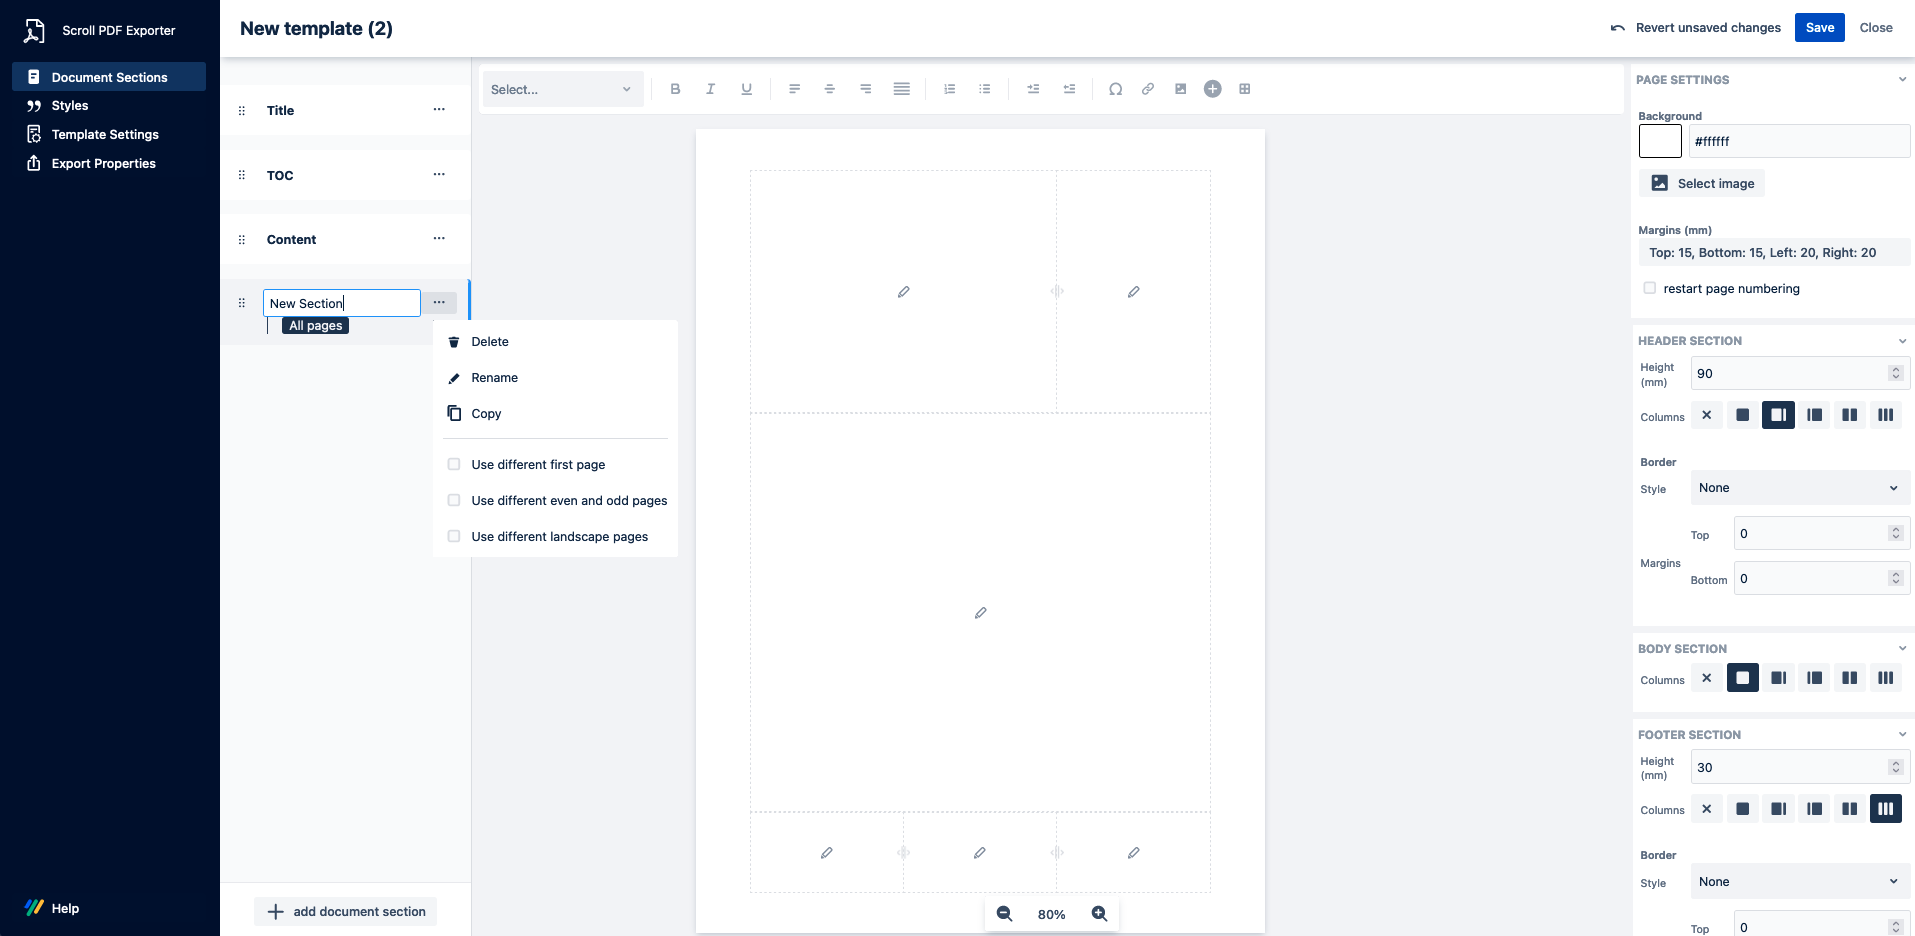
Page layouts consist of three main elements – header, content, and footer. These comprise one or several content boxes where you can add static content (text and images) in addition to placeholders. Using the tab on the left hand side, you can change the section name and via the section menu ••• you can:
-
Delete a section
-
Rename a section
-
Copy a section
-
Use a different first page
-
Use different even and odd pages
-
Use different landscape pages

Using the header, body and footer section menus to the right of the page editor, you can edit the elements' size and layout, and add a border. Additionally, by clicking and dragging the on screen sliders, you can manually adjust the size of the content boxes, depending on your requirements – an indicator will display the current size (mm) and percentage of the content boxes as you change the size.
.png?cb=6d561980198d47db1626f94ef7cb33ac)
You can add static content (text and images) to any content box in your template, by simply clicking in the editable content field.
-
To add an image, click the insert image icon
-
To add a symbol, click the symbol icon
-
To add a link, click the link icon
-
To add a table, click the table icon
-
If you want to add text with a custom typeface, you first have to create a custom text style in the Styles tab, and then apply that style to the text.
Besides static content, you can also add placeholders. Placeholders reference metadata, and insert this metadata into content boxes. To add placeholder, click the + icon in the toolbar and choose your placeholder from the available list. Alternatively, you also add placeholders via the / or { keyboard shortcuts.
To discover more about how to structure and format your template's Document Sections, please see the following documentation pages:
